
Clients
This page provides detailed information on clients.
Face Login supports using multiple service providers as clients. You can use the same face (or User ID and password) to make the same sign-on possible.
List of Clients
The list of established clients will be displayed upon entering a service instance. Clients are displayed by their client name, ascending by default. The type of client is also displayed as a logo.
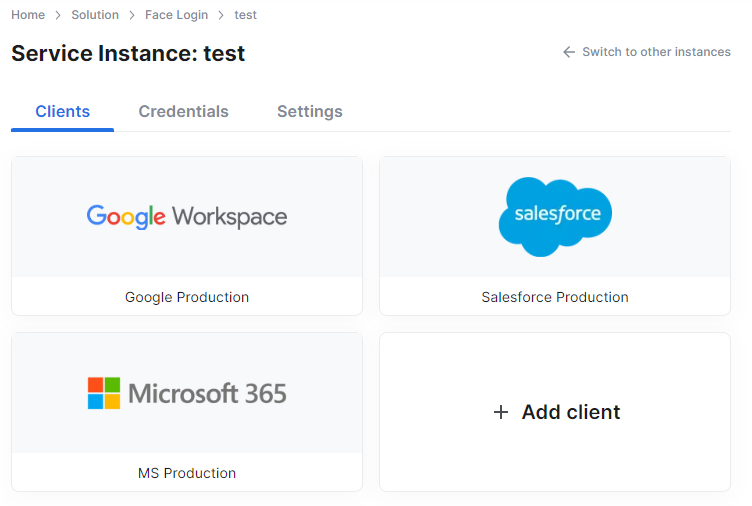
Client list
Add a client
Add a client by clicking the Add client tab.
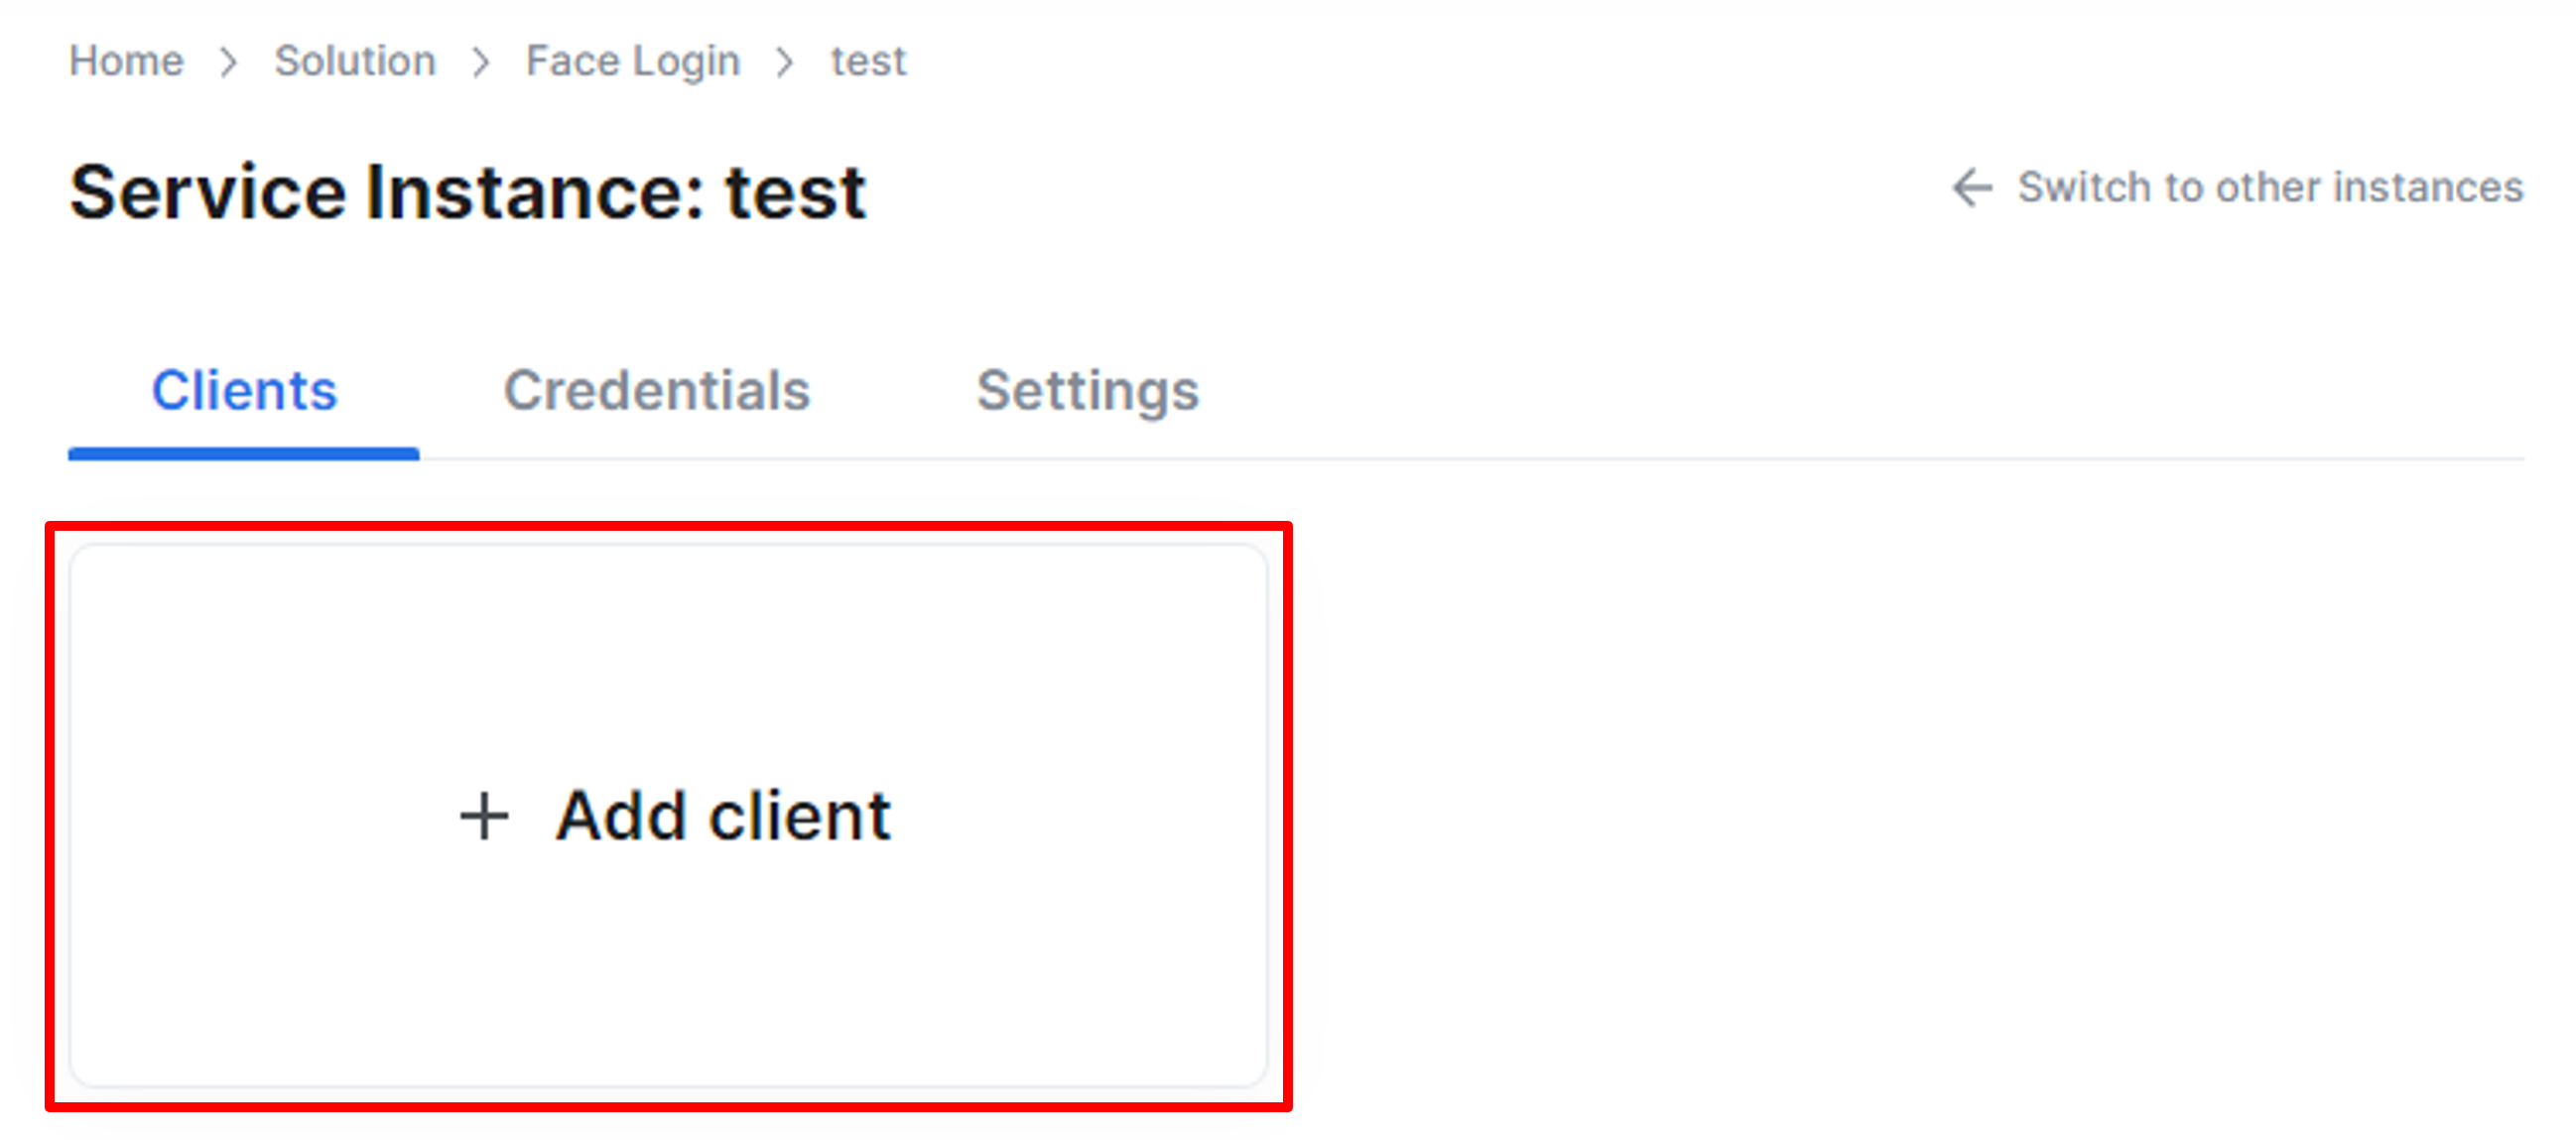
Add a client
On the client creation page, you need to select the protocol first. For most web-based SAML clients, select SAML. Select Windows only if you are using the Windows version addon. Then, enter some basic information for the client. After filling up the required information, click Addto complete adding. To cancel adding, click Cancel.
Due to technical reasons, there is only one Windows client can be added in an instance.
About the validation of clientsSince the client setting requires asynchronous configuration on both sides of IDP and SP, the validation of clients cannot be displayed on Face Login.
Successfully creating a client only means that the part of configuration on the IDP side is done.
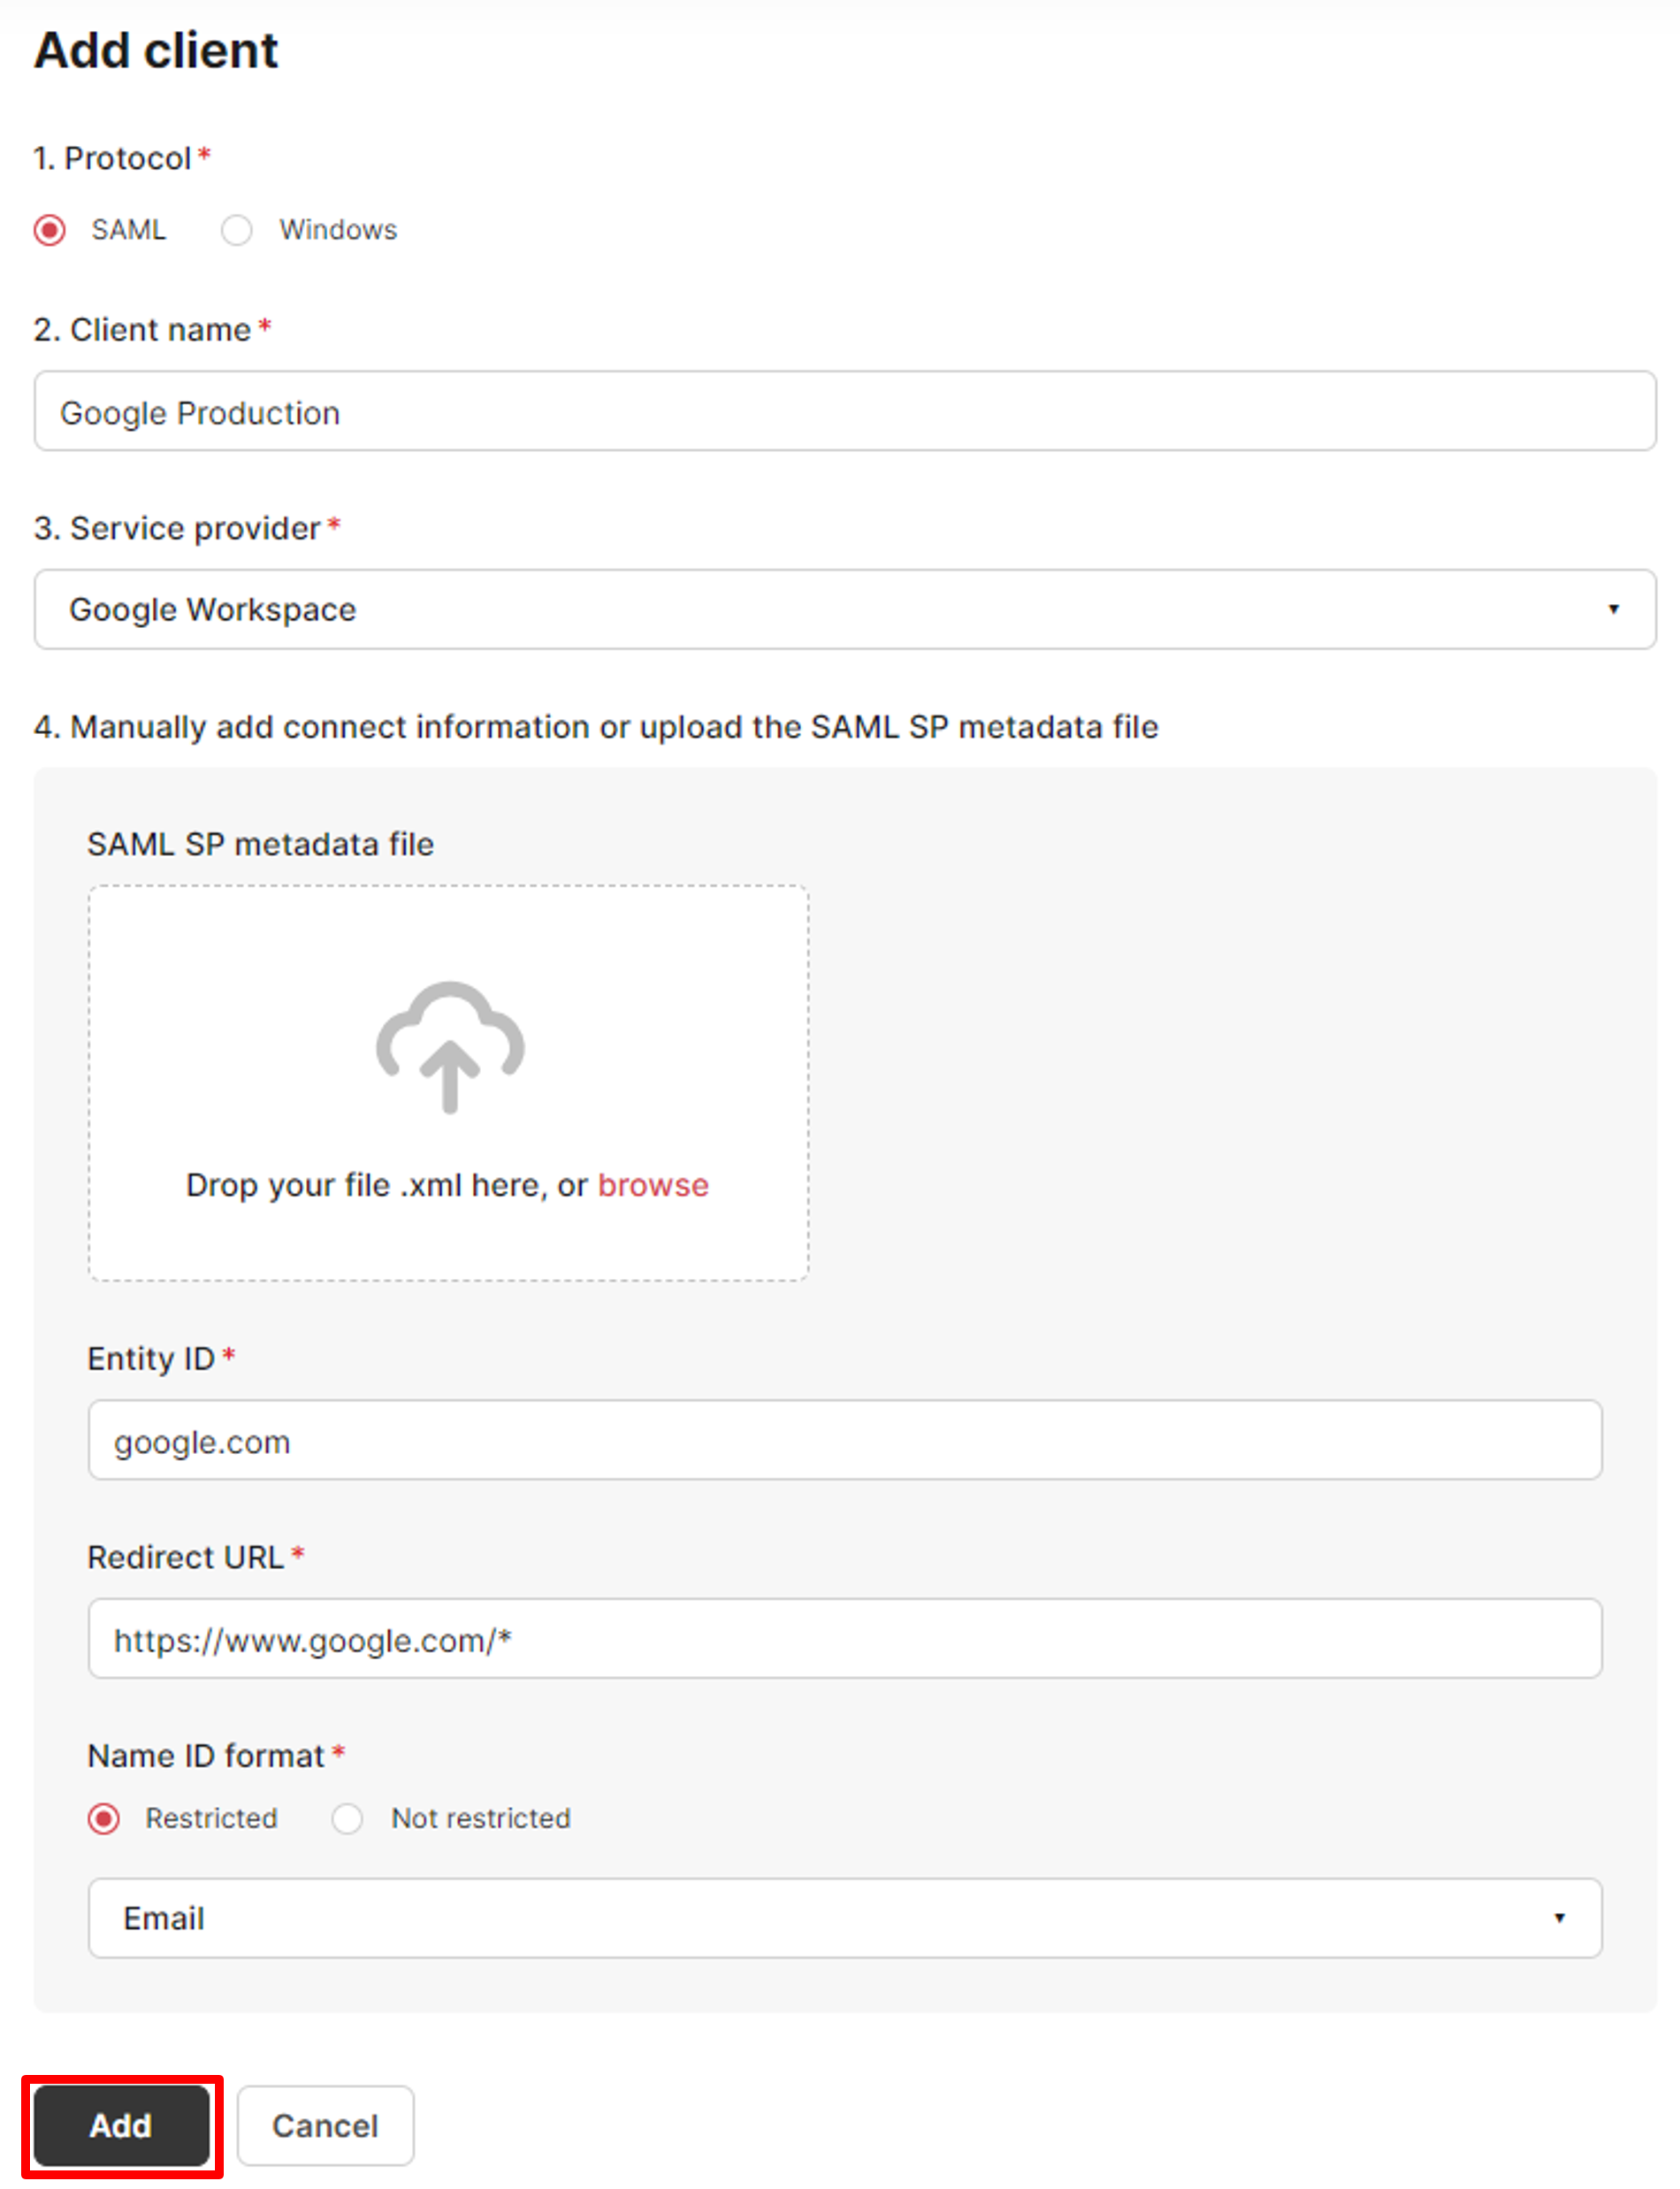
Client adding page
For step 3, there are two types of entry methods available. You can manually fill in the fields or upload an XML metadata file by clicking the SAML SP metadata file button. To check whether this file is available, please refer to the pages of each service provider.
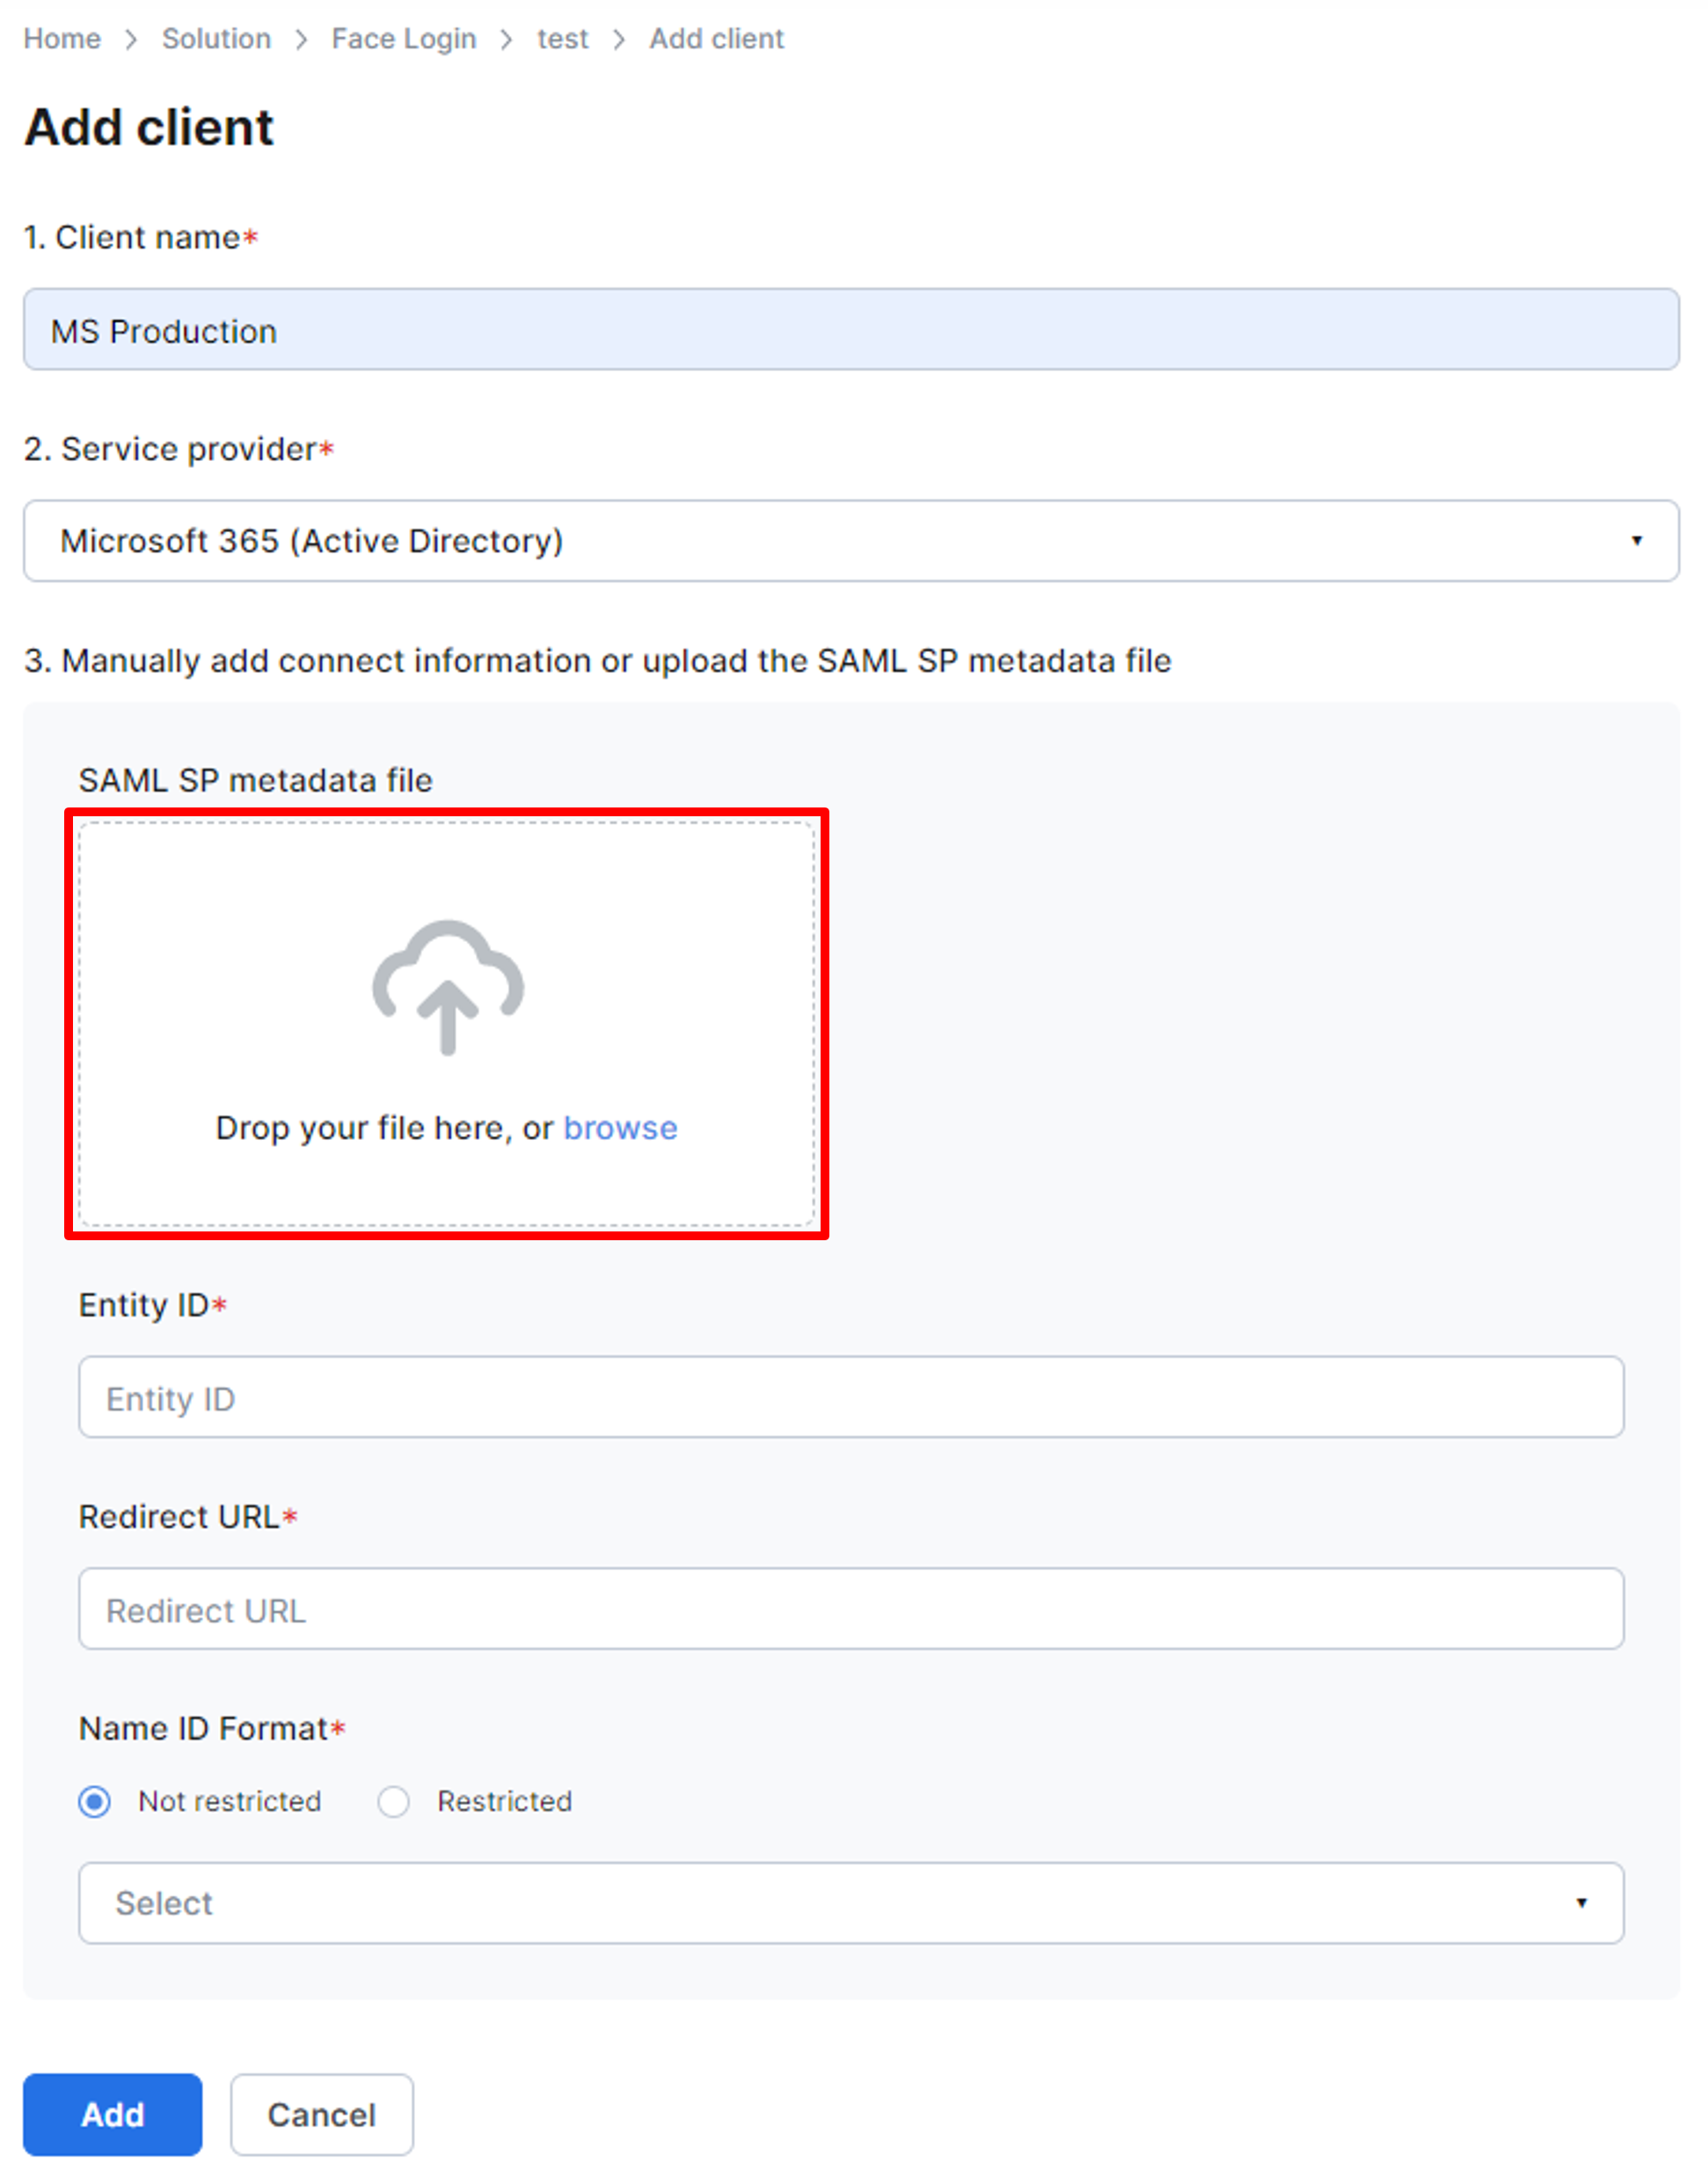
Upload a metadata file
After the metadata file is uploaded, the Entity ID and the Redirect URL field will be locked. To re-enable the entry of these fields, click the cross button next to the uploaded file, and the text boxes will be enabled again.
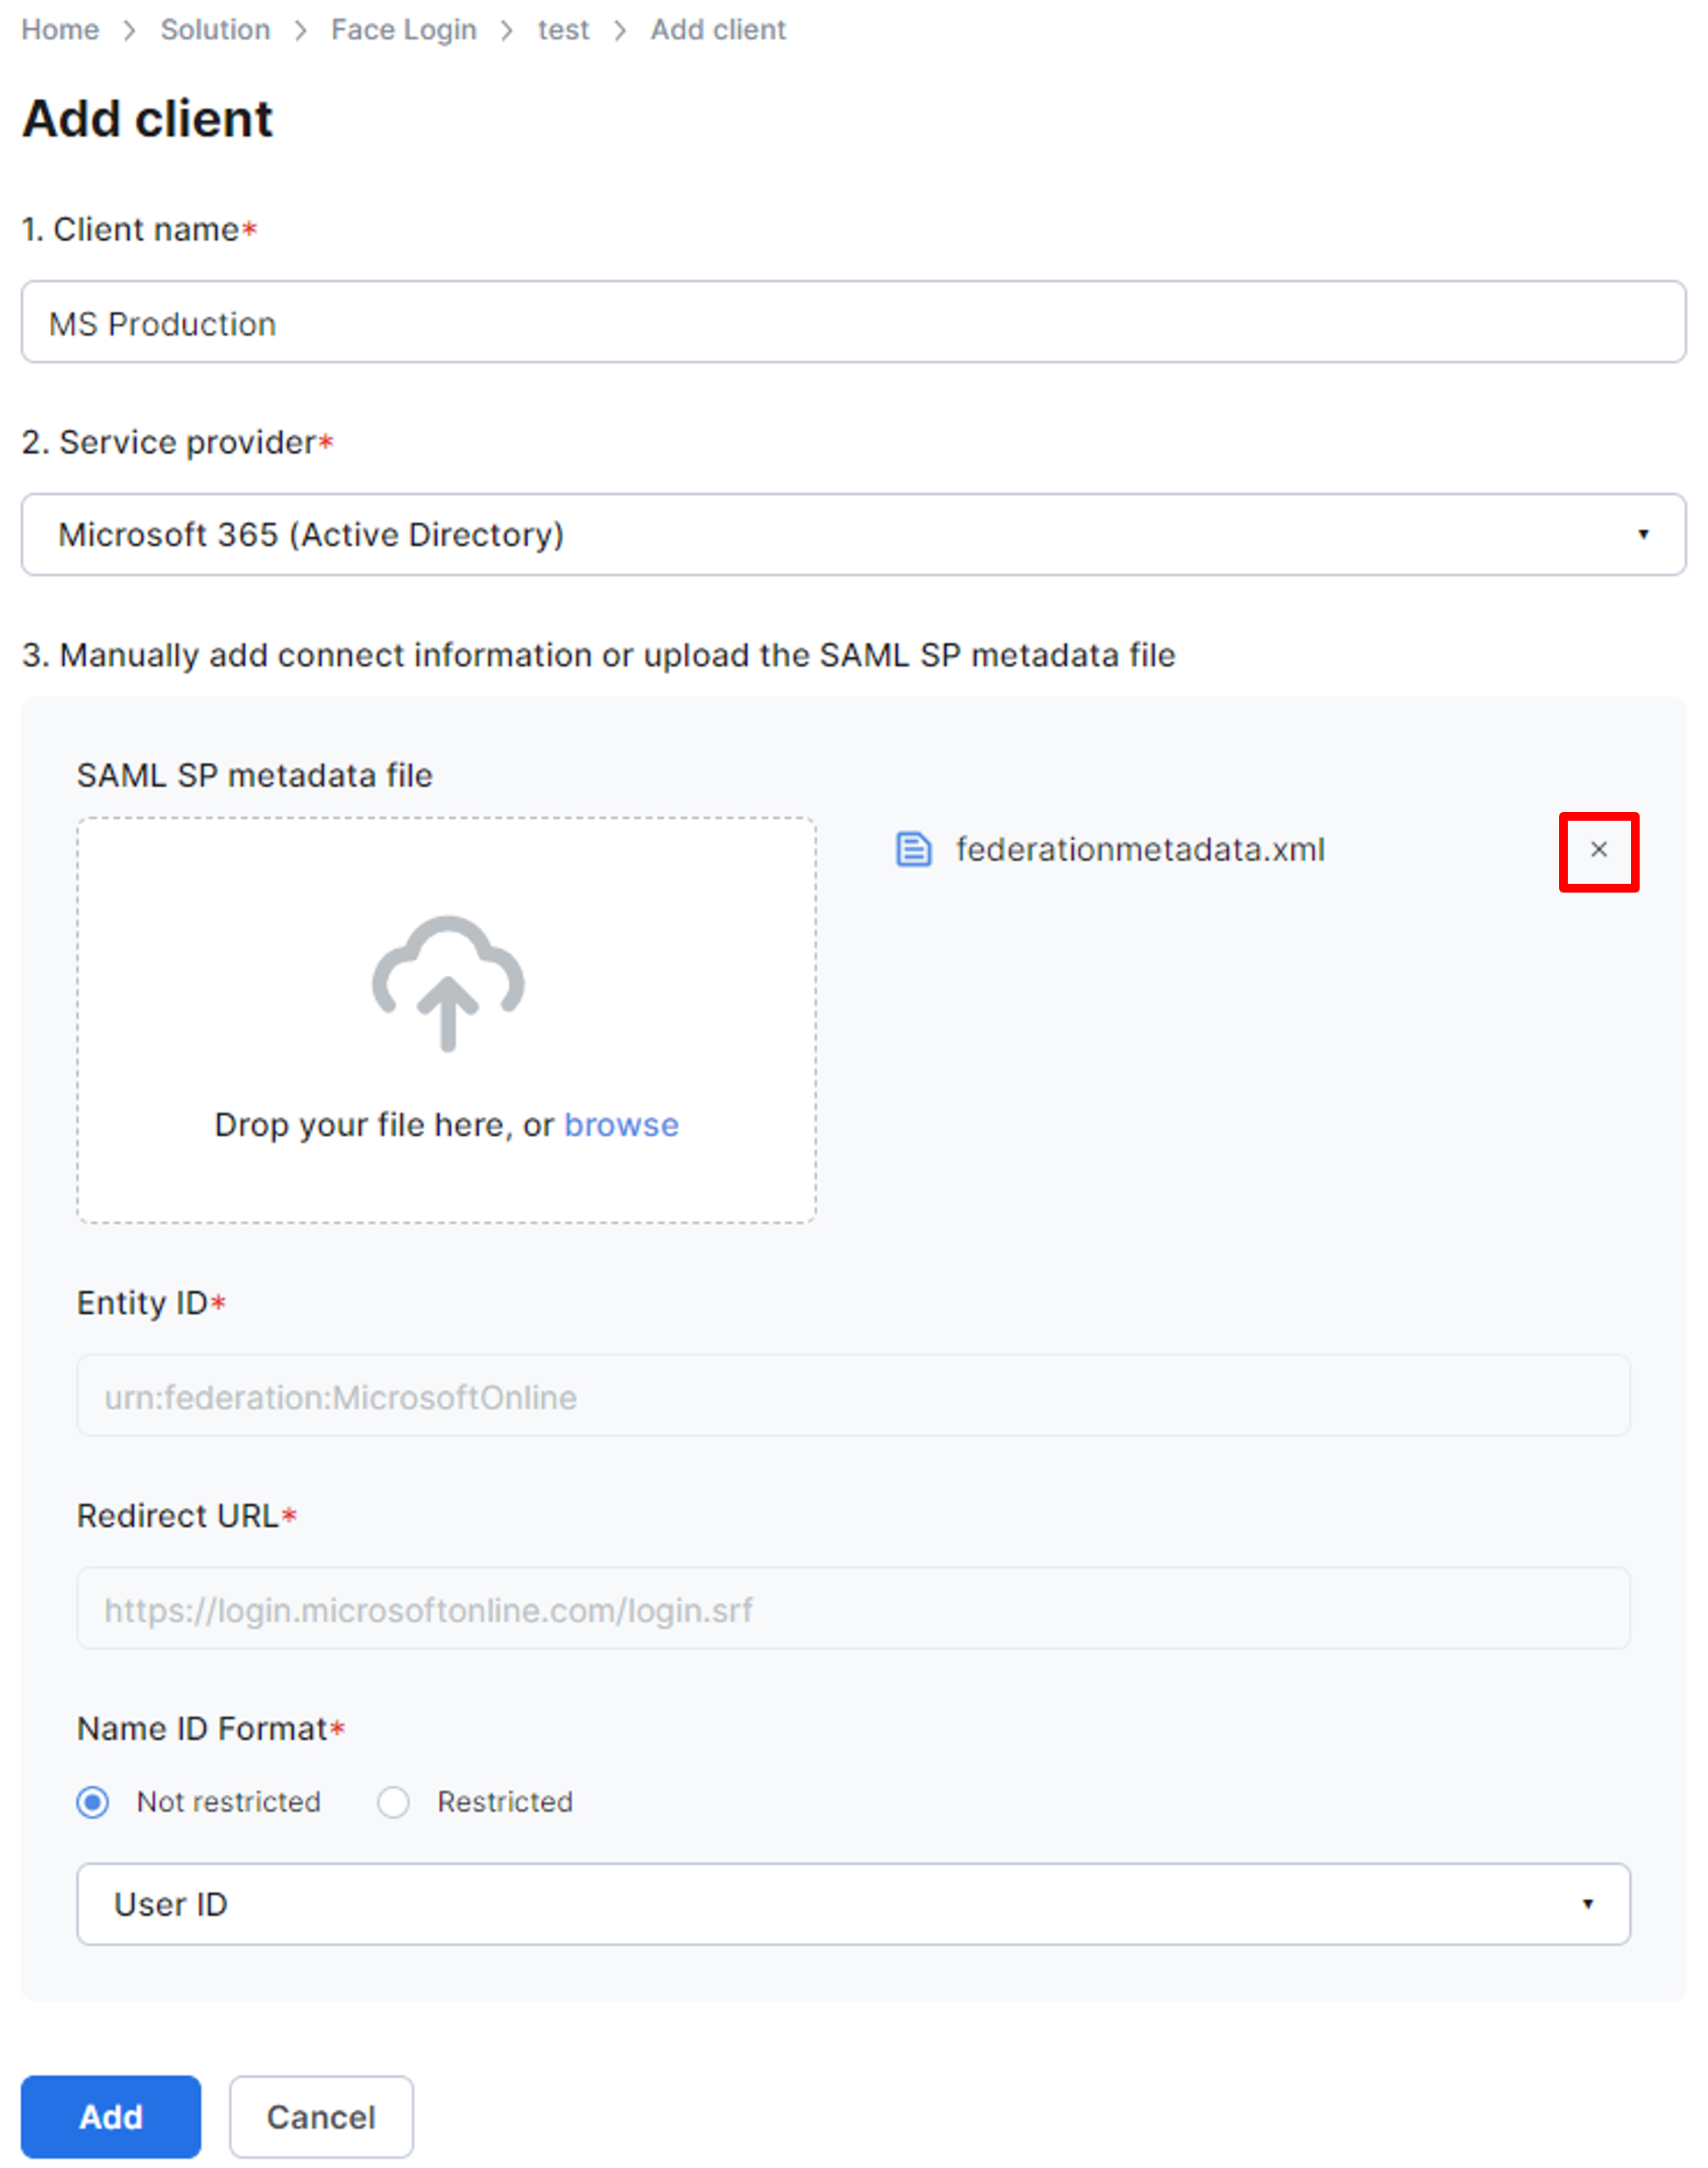
Remove an uploaded metadata file
Client information
Below is a table of fields of a SAML client.
Item | Required | Unique | Nullable | Max Length | Regular Expression | Description |
|---|---|---|---|---|---|---|
Client Name | Yes | No | No | 255 | The name of the client | |
Service provider | Yes | No | No | Options:
| The type of service provider | |
Entity ID | Yes | Yes | No | 255 | The SAML Entity ID used to identify the Service Provider | |
Redirect URL | Yes | No | No | 255 | See the block below * | The URL of the service provider from where the auth server needs to redirect |
Name ID Format (option) | Yes | No | No | Options:
| Whether to ignore the format in the request and use this Name ID Format instead | |
Name ID Format (value) | Yes | No | No | Options:
| The detailed forced Name ID format |
* The regular expression of the Redirect URI.
/^((https?|ftp):)?\/\/(((([a-z]|\d|-|\.|_|~|[\u00A0-\uD7FF\uF900-\uFDCF\uFDF0-\uFFEF])|(%[\da-f]{2})|[!\$&'\(\)\*\+,;=]|:)*@)?(((\d|[1-9]\d|1\d\d|2[0-4]\d|25[0-5])\.(\d|[1-9]\d|1\d\d|2[0-4]\d|25[0-5])\.(\d|[1-9]\d|1\d\d|2[0-4]\d|25[0-5])\.(\d|[1-9]\d|1\d\d|2[0-4]\d|25[0-5]))|((([a-z]|\d|[\u00A0-\uD7FF\uF900-\uFDCF\uFDF0-\uFFEF])|(([a-z]|\d|[\u00A0-\uD7FF\uF900-\uFDCF\uFDF0-\uFFEF])([a-z]|\d|-|\.|_|~|[\u00A0-\uD7FF\uF900-\uFDCF\uFDF0-\uFFEF])*([a-z]|\d|[\u00A0-\uD7FF\uF900-\uFDCF\uFDF0-\uFFEF])))\.)+(([a-z]|[\u00A0-\uD7FF\uF900-\uFDCF\uFDF0-\uFFEF])|(([a-z]|[\u00A0-\uD7FF\uF900-\uFDCF\uFDF0-\uFFEF])([a-z]|\d|-|\.|_|~|[\u00A0-\uD7FF\uF900-\uFDCF\uFDF0-\uFFEF])*([a-z]|[\u00A0-\uD7FF\uF900-\uFDCF\uFDF0-\uFFEF])))\.?)(:\d*)?)(\/((([a-z]|\d|-|\.|_|~|[\u00A0-\uD7FF\uF900-\uFDCF\uFDF0-\uFFEF])|(%[\da-f]{2})|[!\$&'\(\)\*\+,;=]|:|@)+(\/(([a-z]|\d|-|\.|_|~|[\u00A0-\uD7FF\uF900-\uFDCF\uFDF0-\uFFEF])|(%[\da-f]{2})|[!\$&'\(\)\*\+,;=]|:|@)*)*)?)?(\?((([a-z]|\d|-|\.|_|~|[\u00A0-\uD7FF\uF900-\uFDCF\uFDF0-\uFFEF])|(%[\da-f]{2})|[!\$&'\(\)\*\+,;=]|:|@)|[\uE000-\uF8FF]|\/|\?)*)?(\#((([a-z]|\d|-|\.|_|~|[\u00A0-\uD7FF\uF900-\uFDCF\uFDF0-\uFFEF])|(%[\da-f]{2})|[!\$&'\(\)\*\+,;=]|:|@)|\/|\?)*)?$/For Windows, there are two other options.
Local account sign-in: By enabling this option, the login screen will display a button to exit the APP. Otherwise, this button will be concealed.Proxy Server: By enabling this option, the connection of the Face Login on Windows will go through the Proxy server based on its setting. Enter the address and port number in theServer address:Portfield and separate them by:. If your proxy server also requires credentials, enter them in theUsernameand thePasswordfield.
Check the details of a client
After the client is created, click the corresponding tab on the client list screen, and the client detail page will be displayed.
Client detail
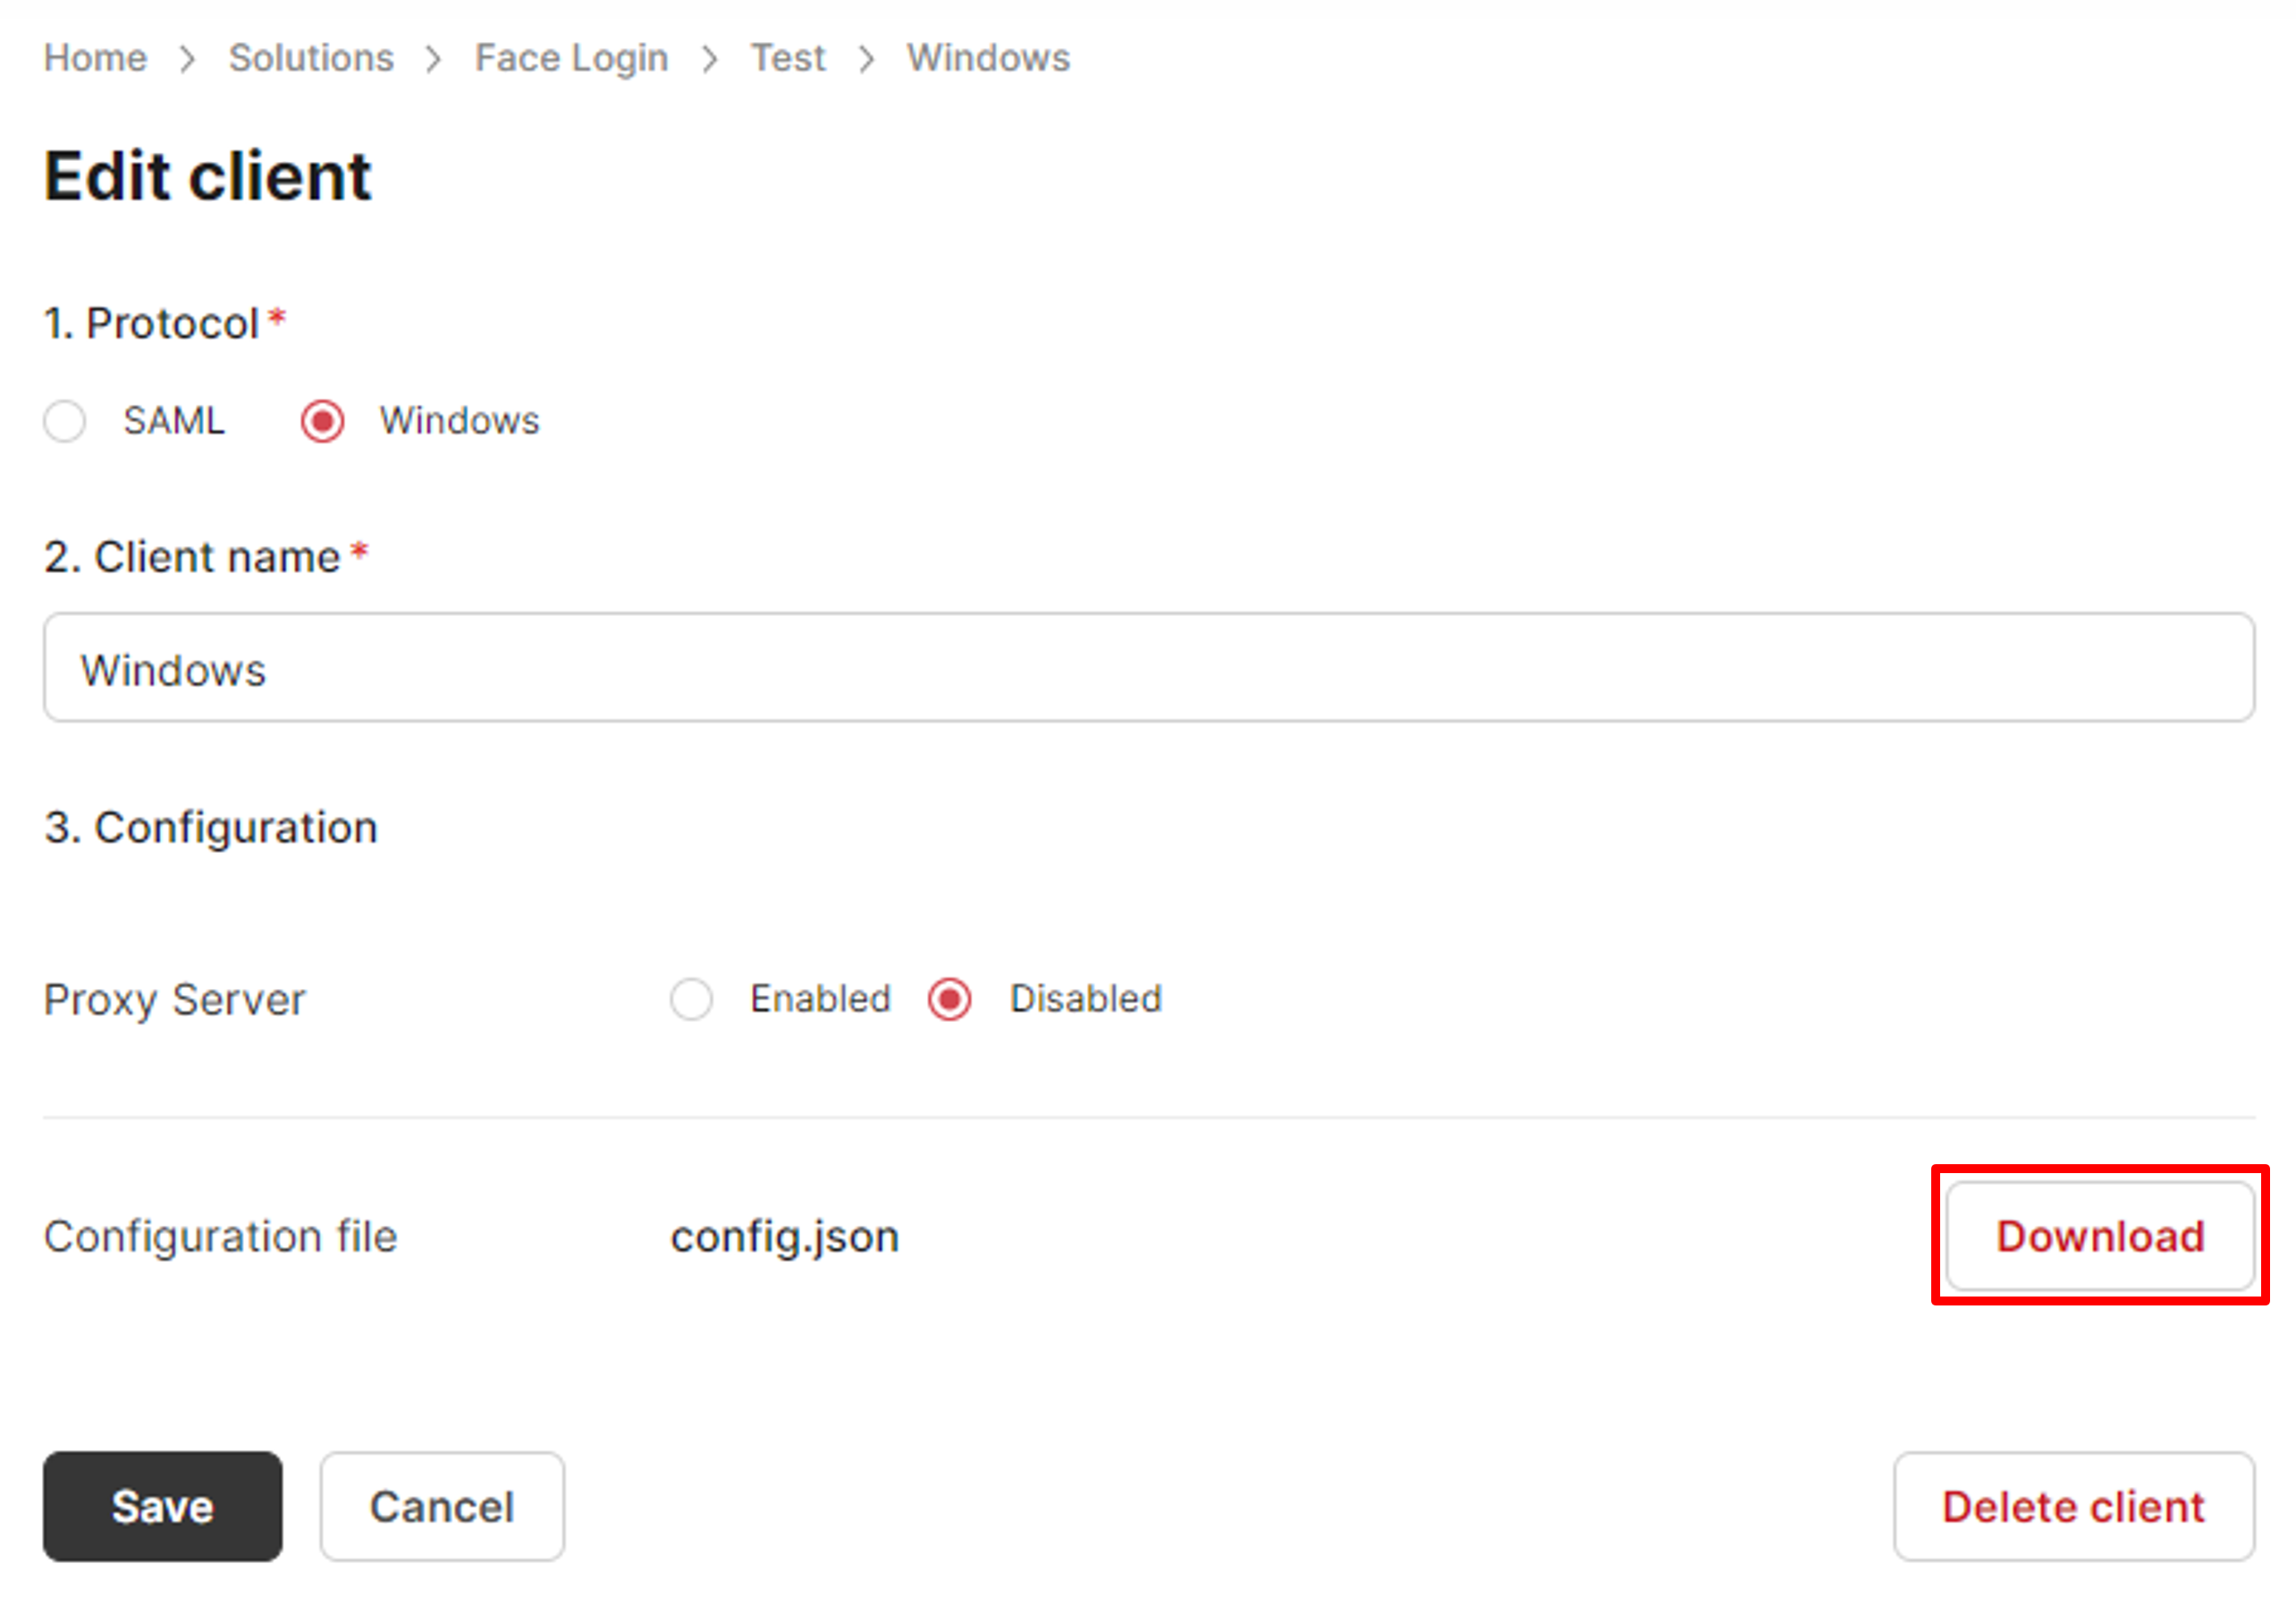
For a Windows client, a configuration file required during installation is available for download. Click the Download button to download it.
Download the configuration file
Update a client
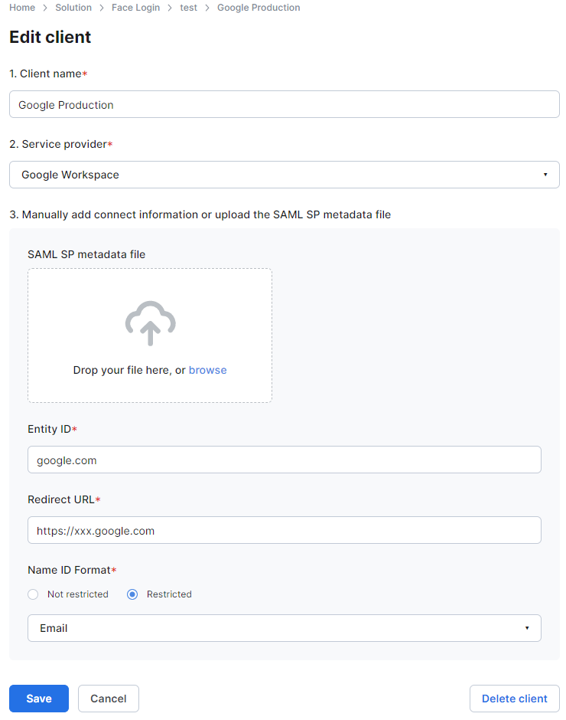
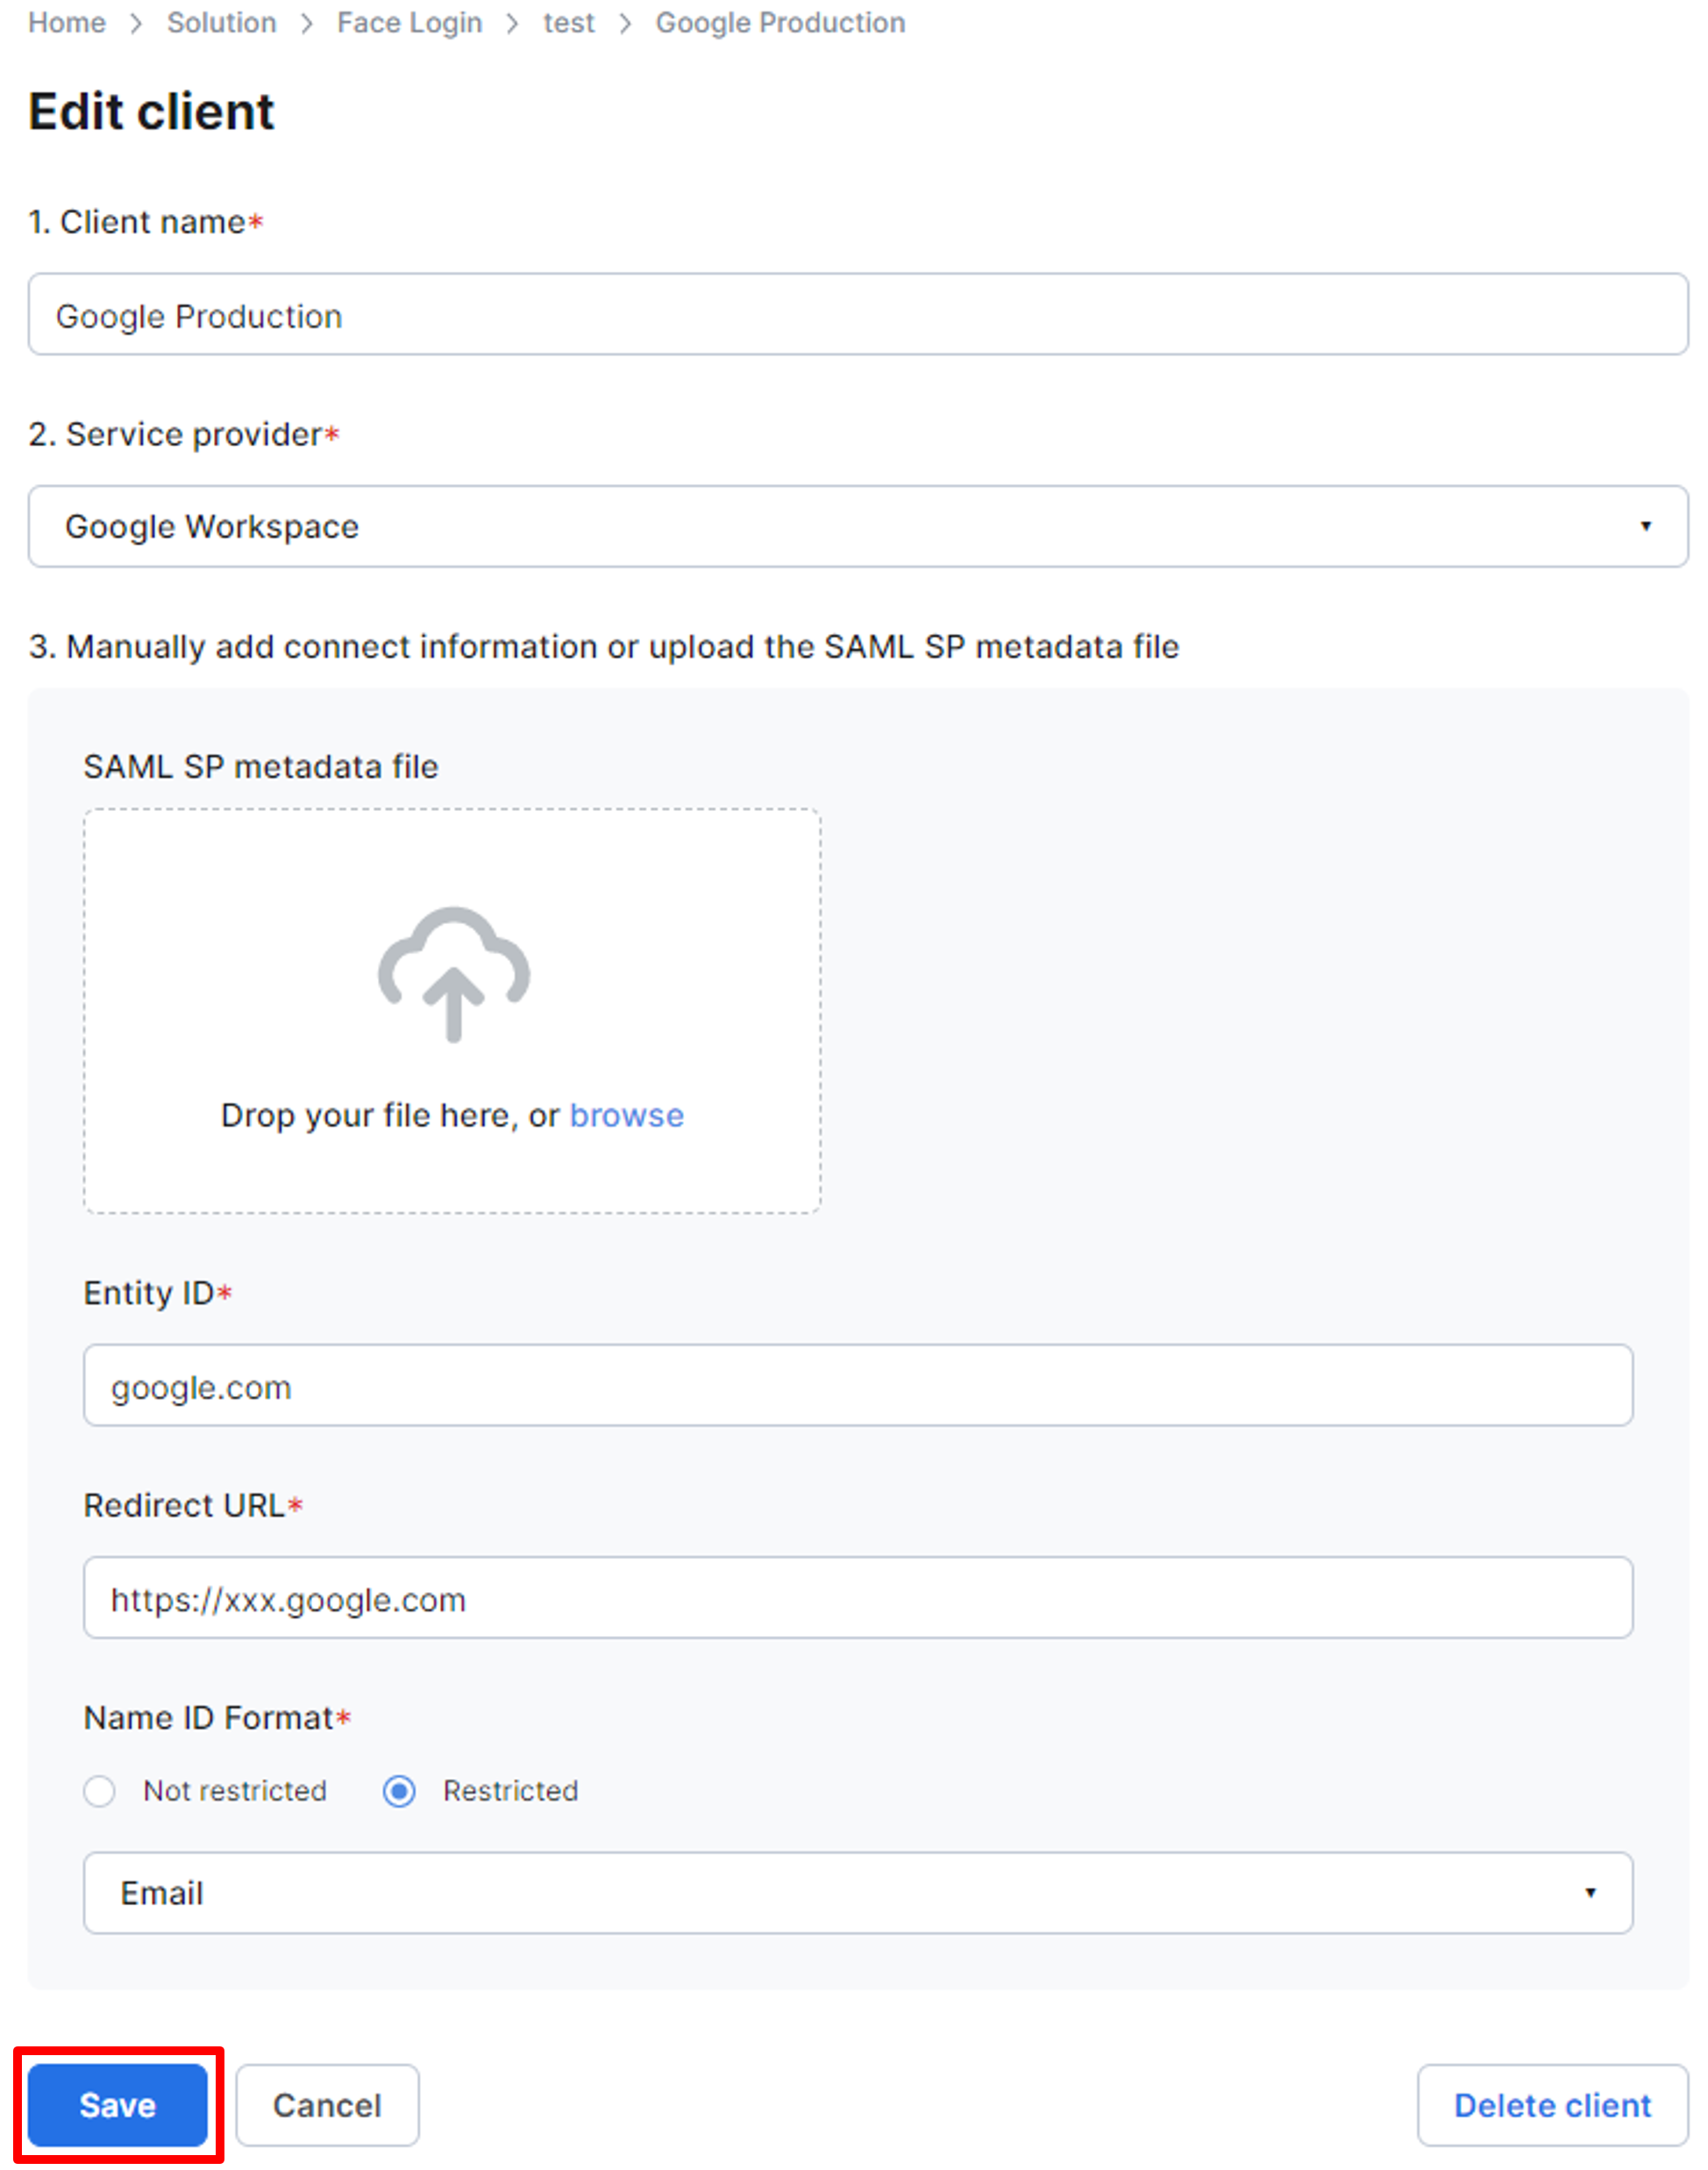
On the client detail page, you can change the fields you want to update. You can also re-upload an SP metadata file.
Update a client
To complete the update, click Save.
Delete a client
On the client detail page, click Delete client at the bottom right to delete the client.
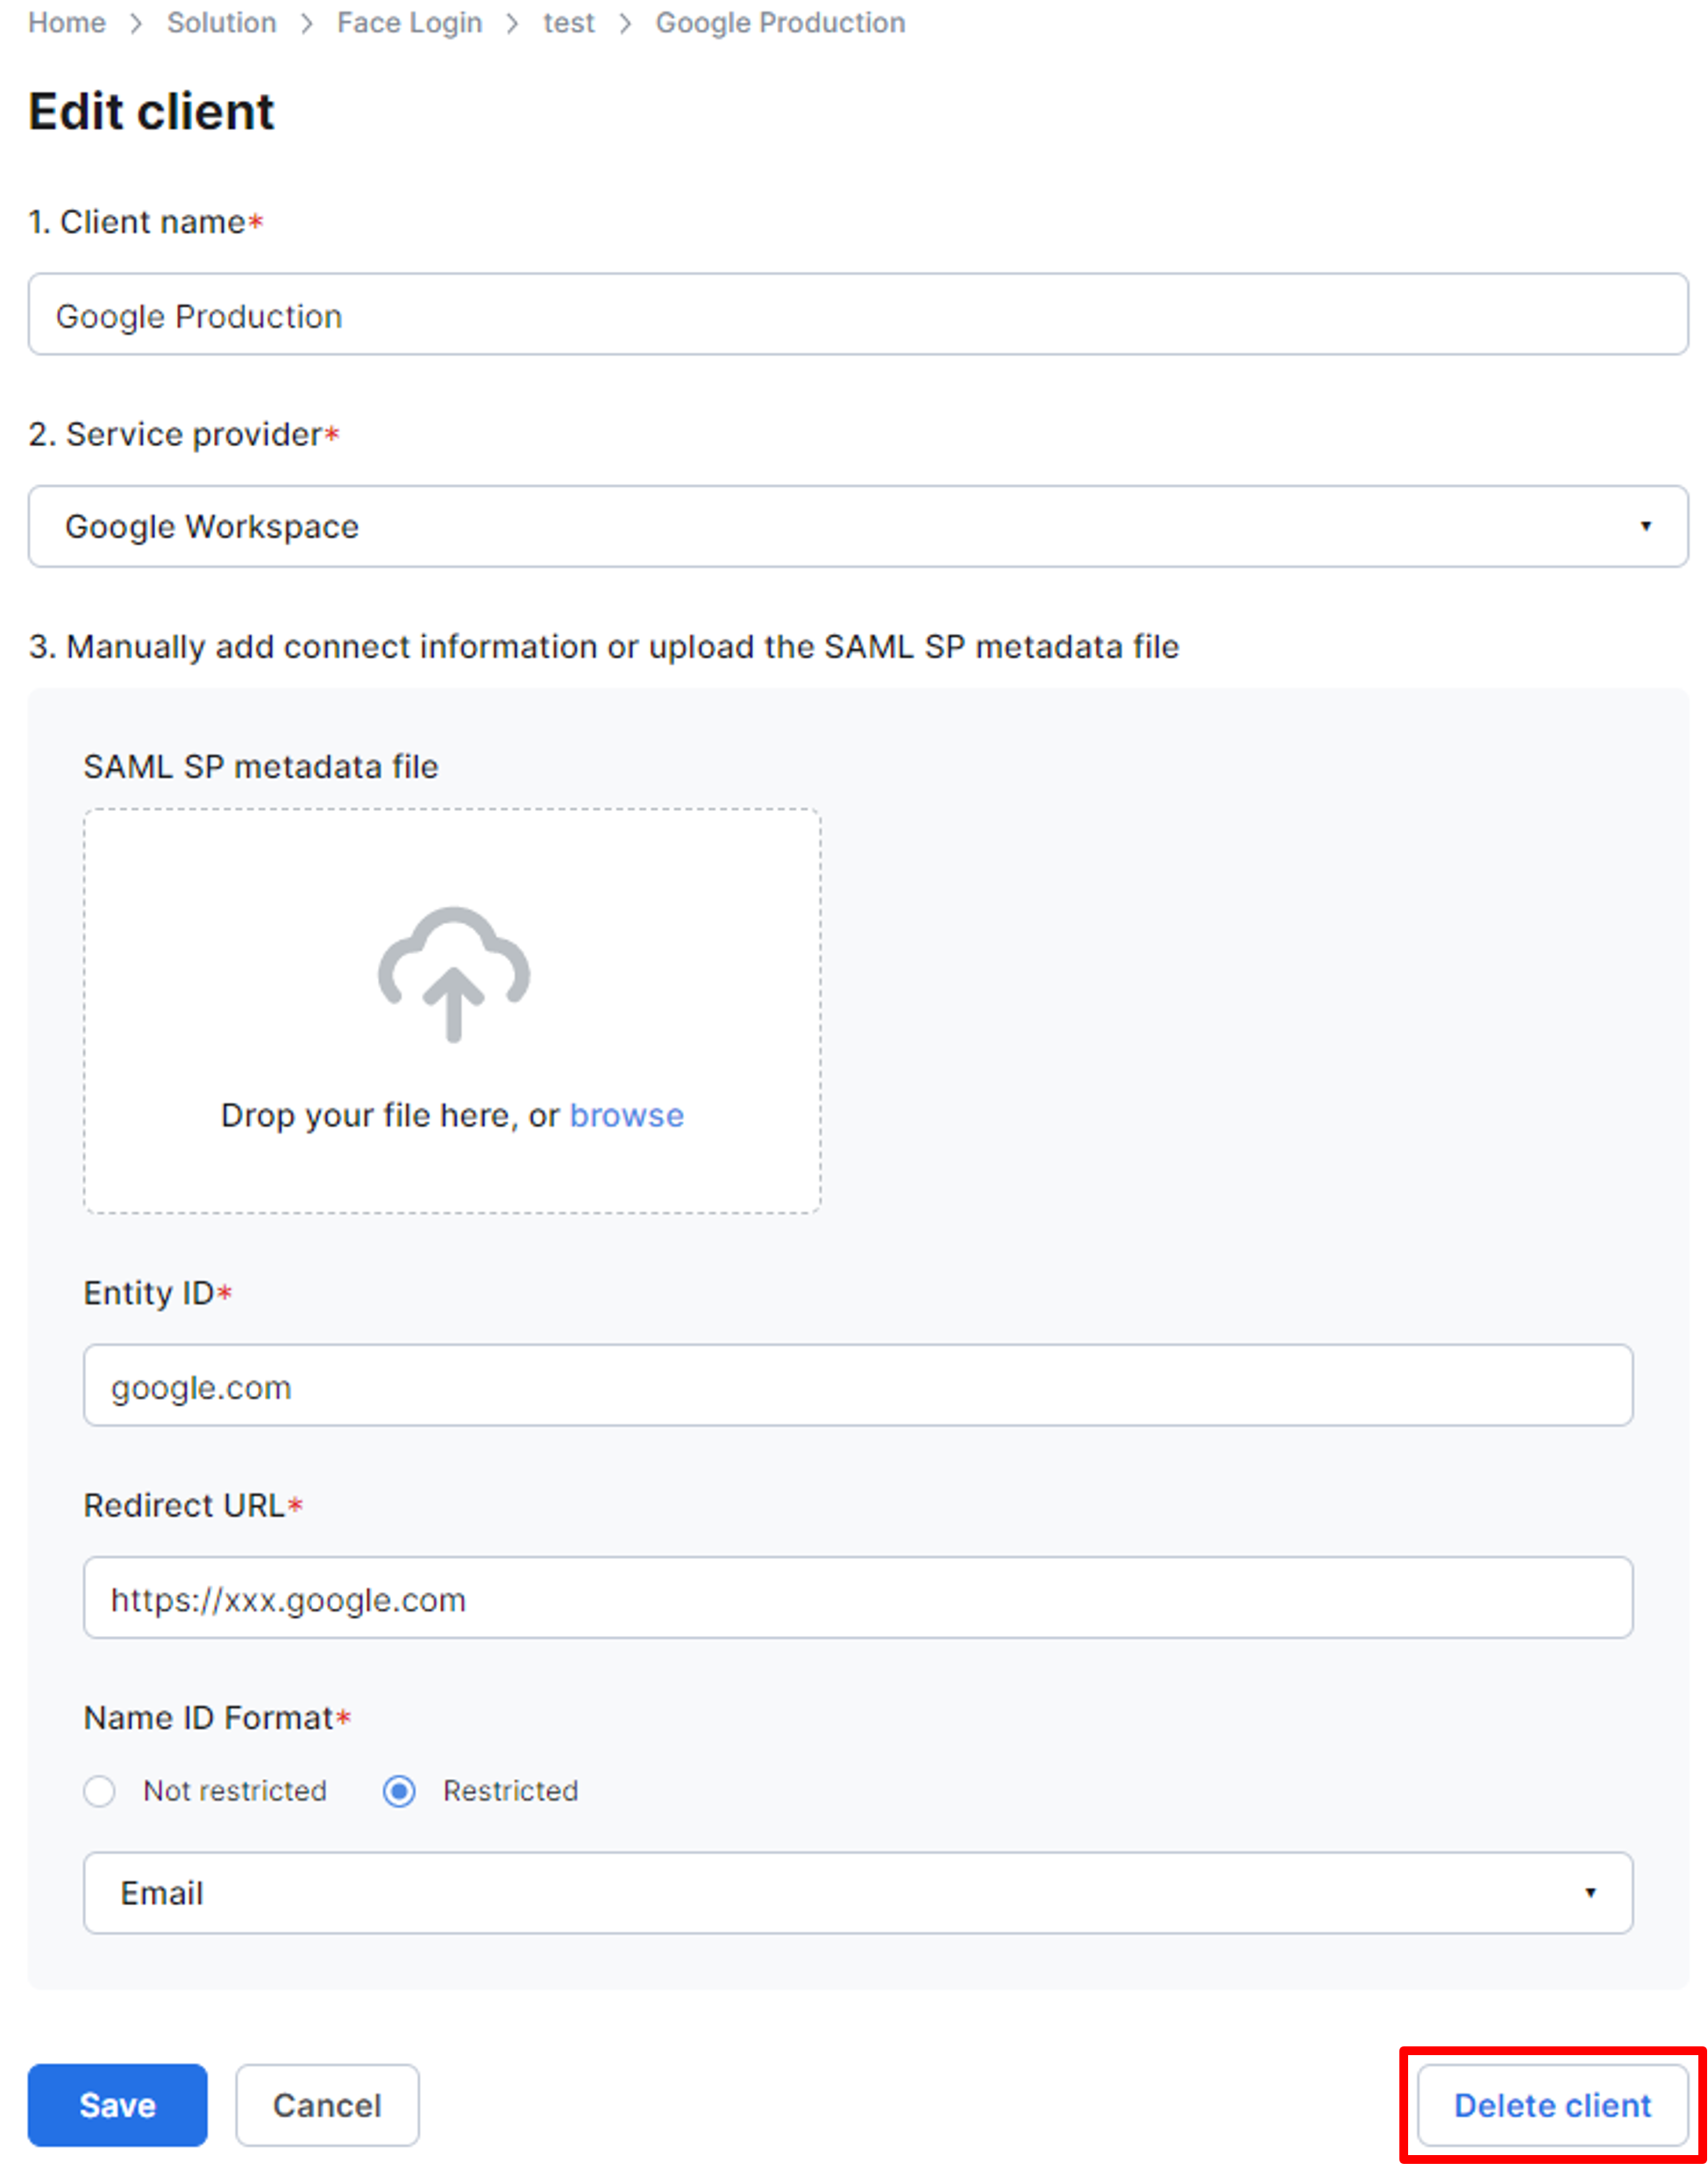
Delete a client
Updated 11 months ago