
GMO Trust Login
This page provides detailed steps to integrate Face Login with GMO Trust Login.
Step 1. Set up a client on JCV Cloud Face Login
Refer to the clients section to set up a client.
Use trustlogin-saml-sp as the Entity ID and https://portal.trustlogin.com/saml/acs as the Redirect URL.
Select Restricted - Email for Name ID Format.
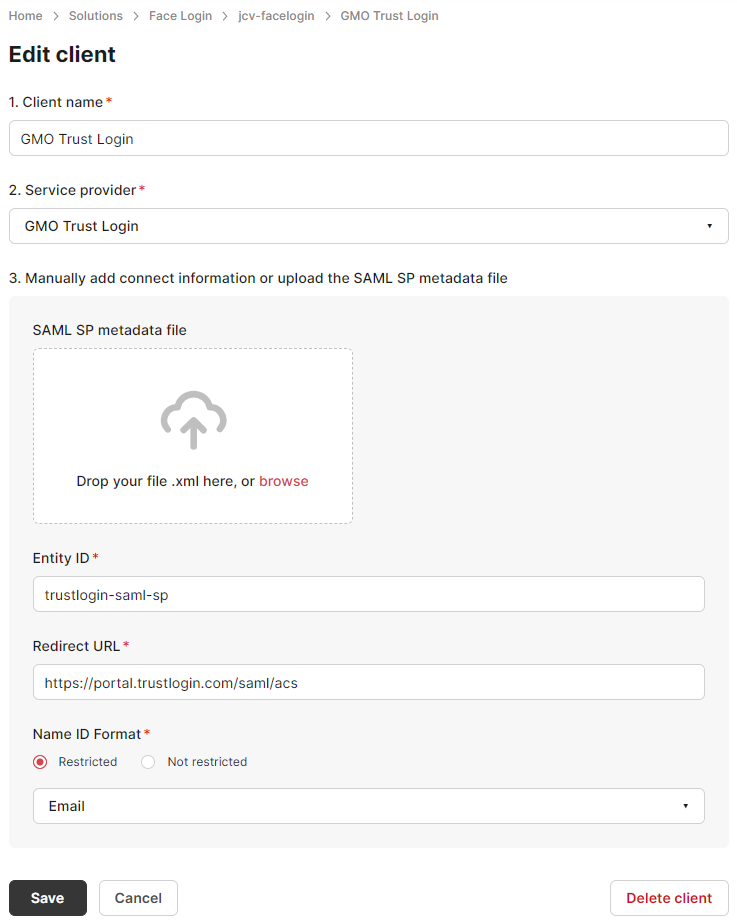
GMO client example
Step 2. Download the IDP metadata file
Go to the settings page of JCV Cloud Face Login, and download the XML file. Refer to IDP information section.
Step 3. Add external IDP on GMO Trust Login
3.1 Open External IDP setting page
Login to the GMO Trust Login admin portal, click Settings - Optional functionality - Settings (next to External IDP) to open the external IDP setting.
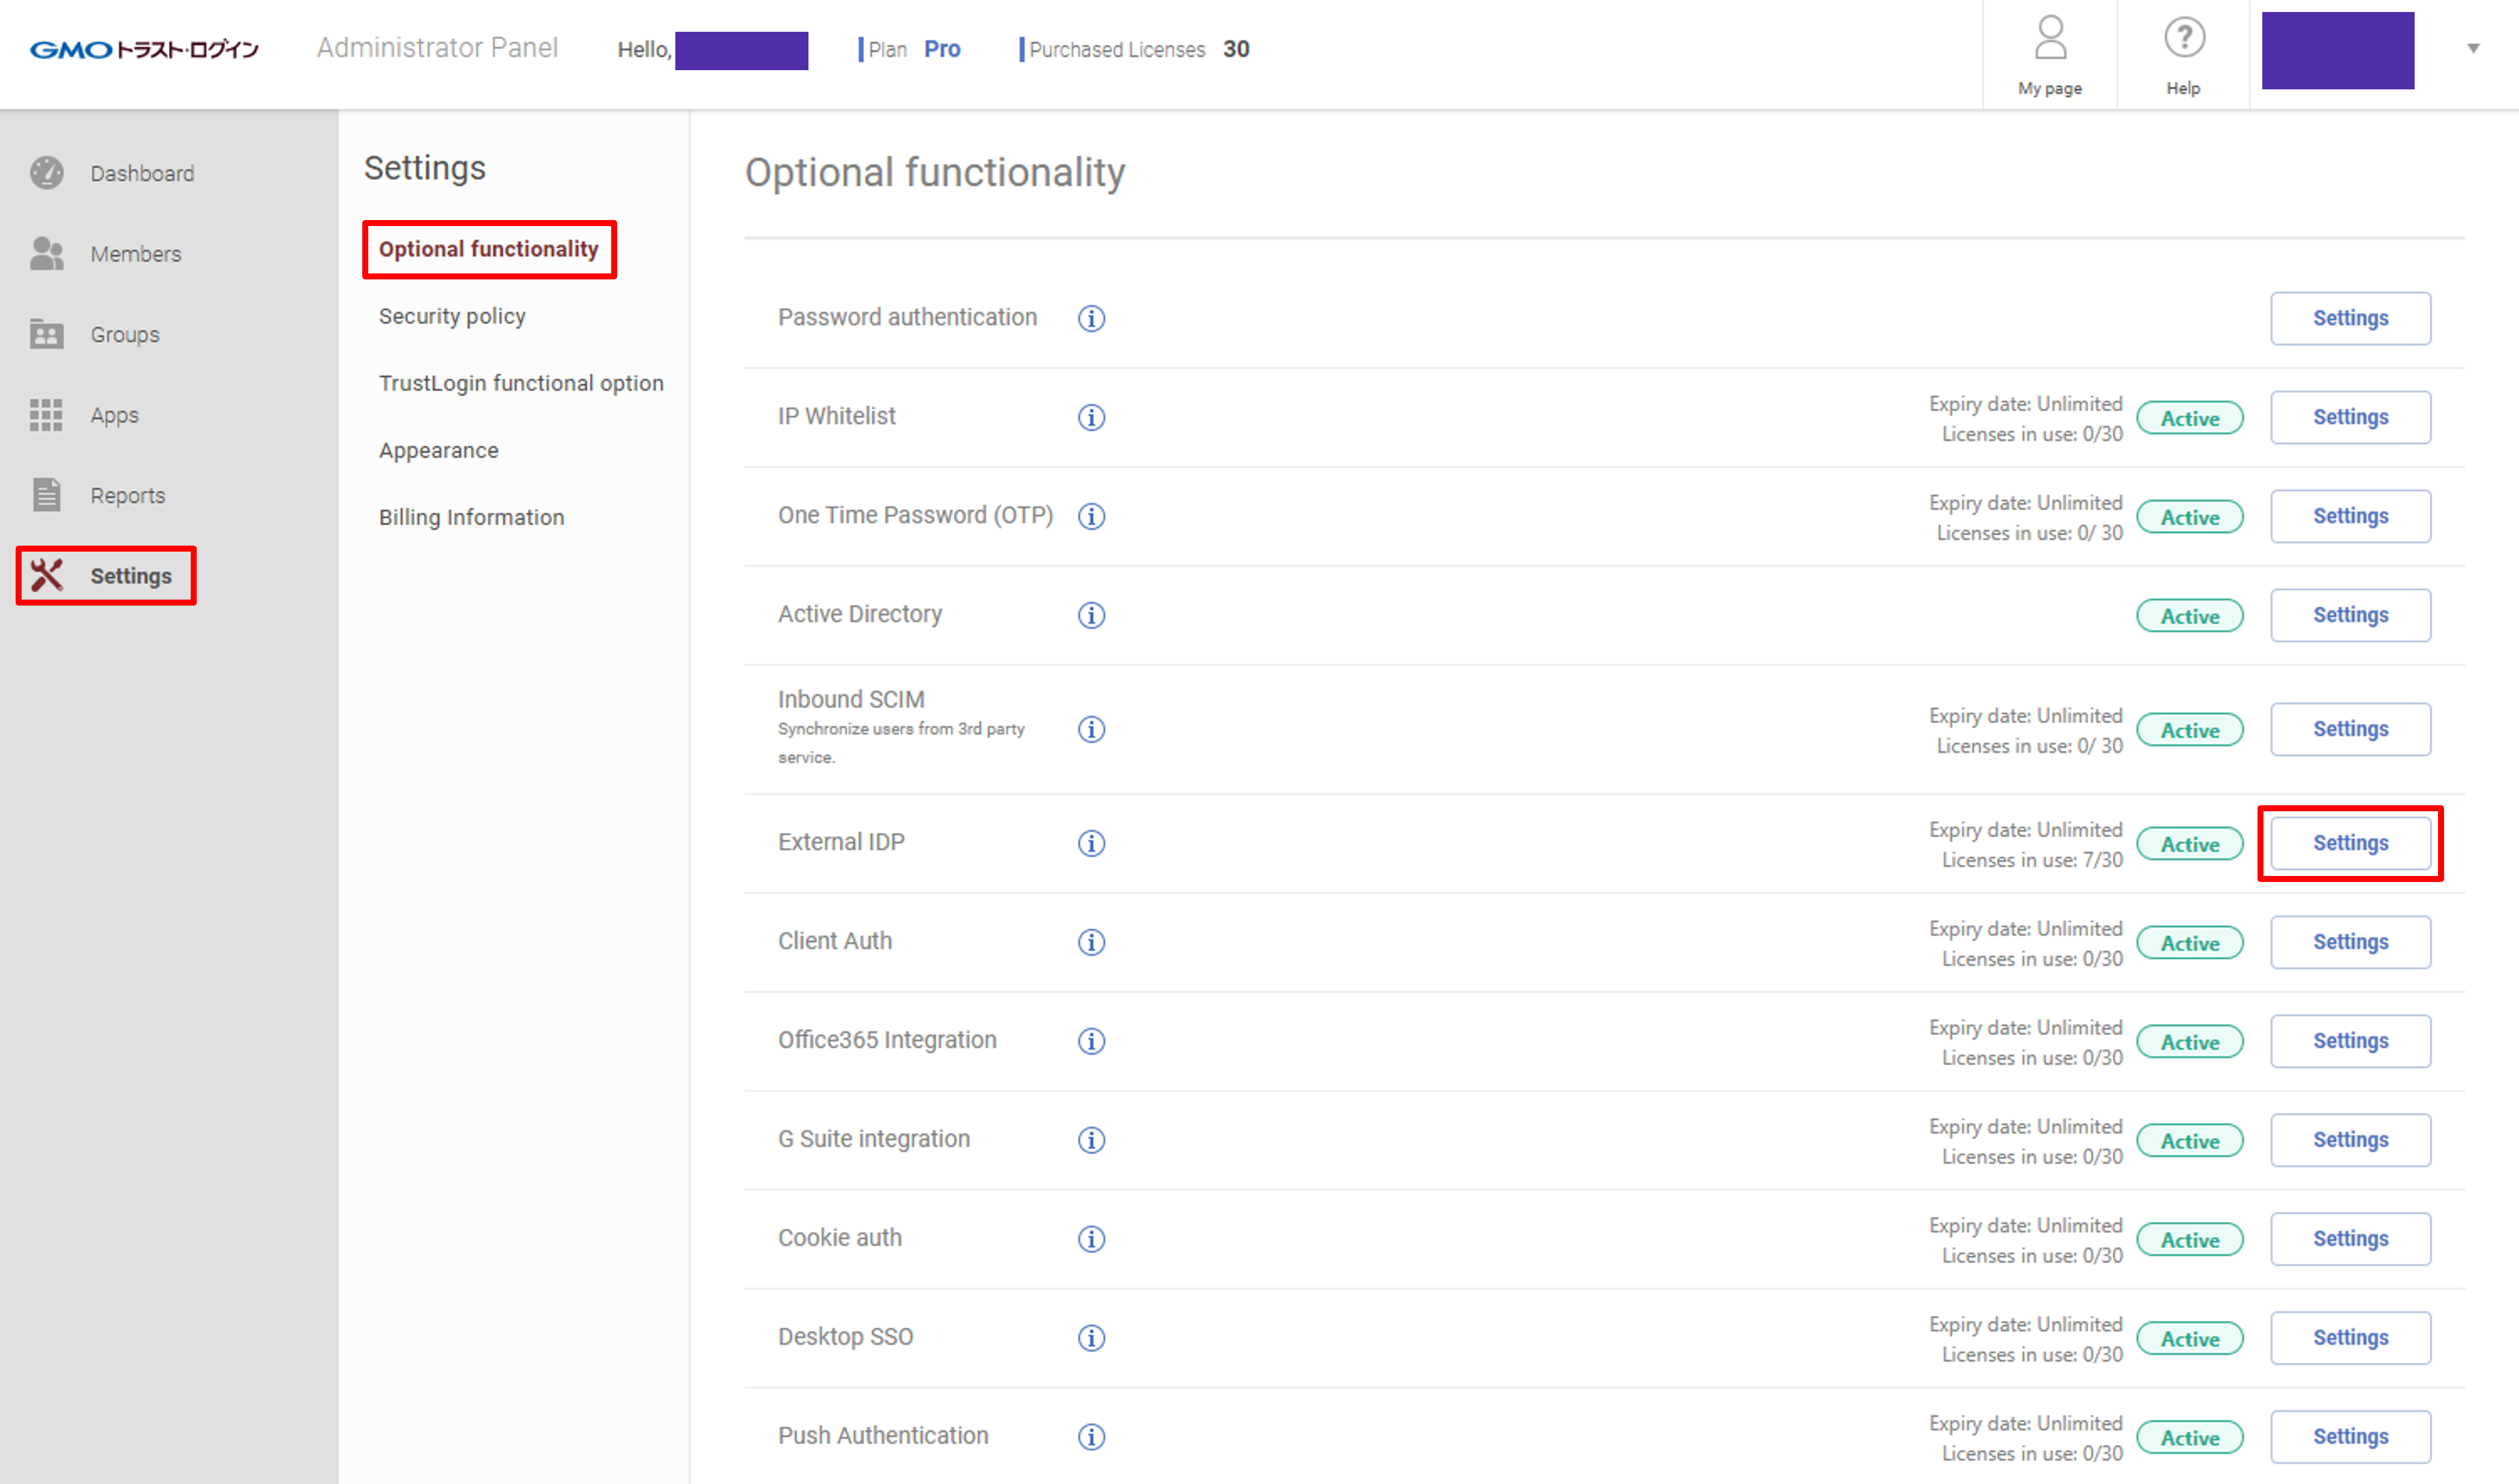
Go to External IDP setting
3.2 Add a new External IDP
On the external IDP setting page, click Add an external IDP.
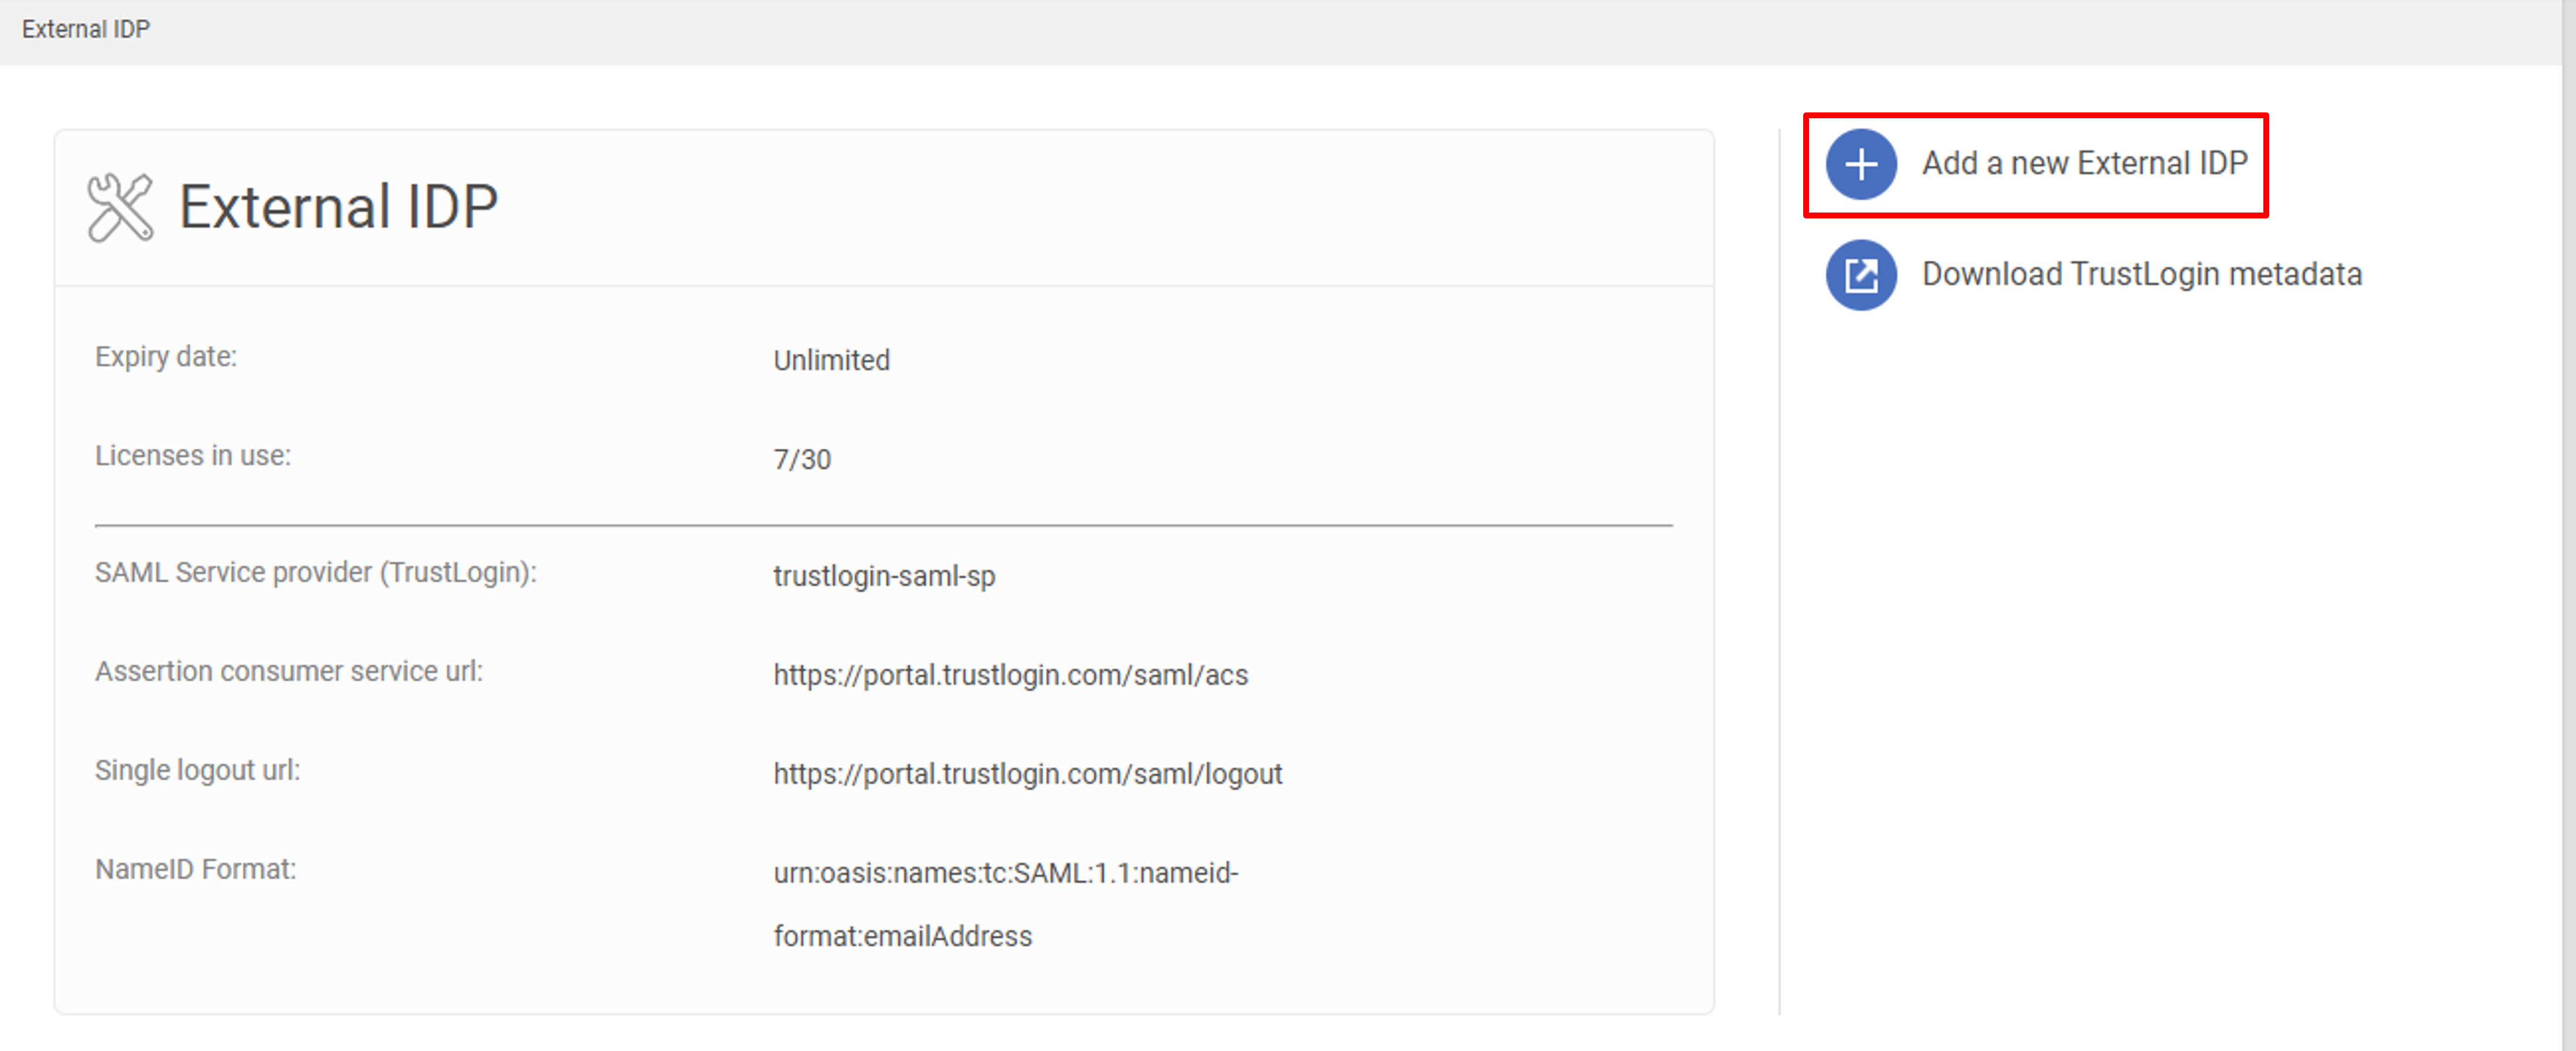
Add an External IDP
Open the IDP metadata file downloaded in Step 2. Here is an example.
<md:EntityDescriptor xmlns="urn:oasis:names:tc:SAML:2.0:metadata" xmlns:md="urn:oasis:names:tc:SAML:2.0:metadata" xmlns:saml="urn:oasis:names:tc:SAML:2.0:assertion" xmlns:ds="http://www.w3.org/2000/09/xmldsig#" entityID="https://facelogin.japancv.co.jp/realms/idp-abcd1234">
	<md:IDPSSODescriptor WantAuthnRequestsSigned="true" protocolSupportEnumeration="urn:oasis:names:tc:SAML:2.0:protocol">
		<md:KeyDescriptor use="signing">
			<ds:KeyInfo>
				<ds:KeyName>L7ei2fxMq7Vk1frt_0EAqT72g9cUHrzsRm1l9AFhVNk</ds:KeyName>
				<ds:X509Data>
					<ds:X509Certificate>MIICpzCCAY8CBgGE6nnjjjANBgkqhkiG...qnInjWrg=
           </ds:X509Certificate>
				</ds:X509Data>
			</ds:KeyInfo>
		</md:KeyDescriptor>
		<md:ArtifactResolutionService Binding="urn:oasis:names:tc:SAML:2.0:bindings:SOAP" Location="https://facelogin.japancv.co.jp/realms/idp-abcd1234/protocol/saml/resolve" index="0"/>
		<md:SingleLogoutService Binding="urn:oasis:names:tc:SAML:2.0:bindings:HTTP-POST" Location="https://facelogin.japancv.co.jp/realms/idp-abcd1234/protocol/saml"/>
		<md:SingleLogoutService Binding="urn:oasis:names:tc:SAML:2.0:bindings:HTTP-Redirect" Location="https://facelogin.japancv.co.jp/realms/idp-abcd1234/protocol/saml"/>
		<md:SingleLogoutService Binding="urn:oasis:names:tc:SAML:2.0:bindings:HTTP-Artifact" Location="https://facelogin.japancv.co.jp/realms/idp-abcd1234/protocol/saml"/>
		<md:NameIDFormat>urn:oasis:names:tc:SAML:2.0:nameid-format:persistent</md:NameIDFormat>
		<md:NameIDFormat>urn:oasis:names:tc:SAML:2.0:nameid-format:transient</md:NameIDFormat>
		<md:NameIDFormat>urn:oasis:names:tc:SAML:1.1:nameid-format:unspecified</md:NameIDFormat>
		<md:NameIDFormat>urn:oasis:names:tc:SAML:1.1:nameid-format:emailAddress</md:NameIDFormat>
		<md:SingleSignOnService Binding="urn:oasis:names:tc:SAML:2.0:bindings:HTTP-POST" Location="https://facelogin.japancv.co.jp/realms/idp-abcd1234/protocol/saml"/>
		<md:SingleSignOnService Binding="urn:oasis:names:tc:SAML:2.0:bindings:HTTP-Redirect" Location="https://facelogin.japancv.co.jp/realms/idp-abcd1234/protocol/saml"/>
		<md:SingleSignOnService Binding="urn:oasis:names:tc:SAML:2.0:bindings:SOAP" Location="https://facelogin.japancv.co.jp/realms/idp-abcd1234/protocol/saml"/>
		<md:SingleSignOnService Binding="urn:oasis:names:tc:SAML:2.0:bindings:HTTP-Artifact" Location="https://facelogin.japancv.co.jp/realms/idp-abcd1234/protocol/saml"/>
	</md:IDPSSODescriptor>
</md:EntityDescriptor>
Search for the field names.
- SAML:2.0:bindings:HTTP-POST, e.g.
https://facelogin.japancv.co.jp/realms/idp-abcd1234/protocol/samlas the SSO URL. - entityID, e.g.
https://facelogin.japancv.co.jp/realms/idp-abcd1234as the Entity ID. - X509Certificate, e.g.
MIICpzCCAY8CBgGE6nnjjjANBgkqhkiG...qnInjWrg=as the IDP Certificate.
Input the above values into the External IDP page on the GMO Trust Login. Set the name for this IDP, and click Register to finish the External IDP registration.
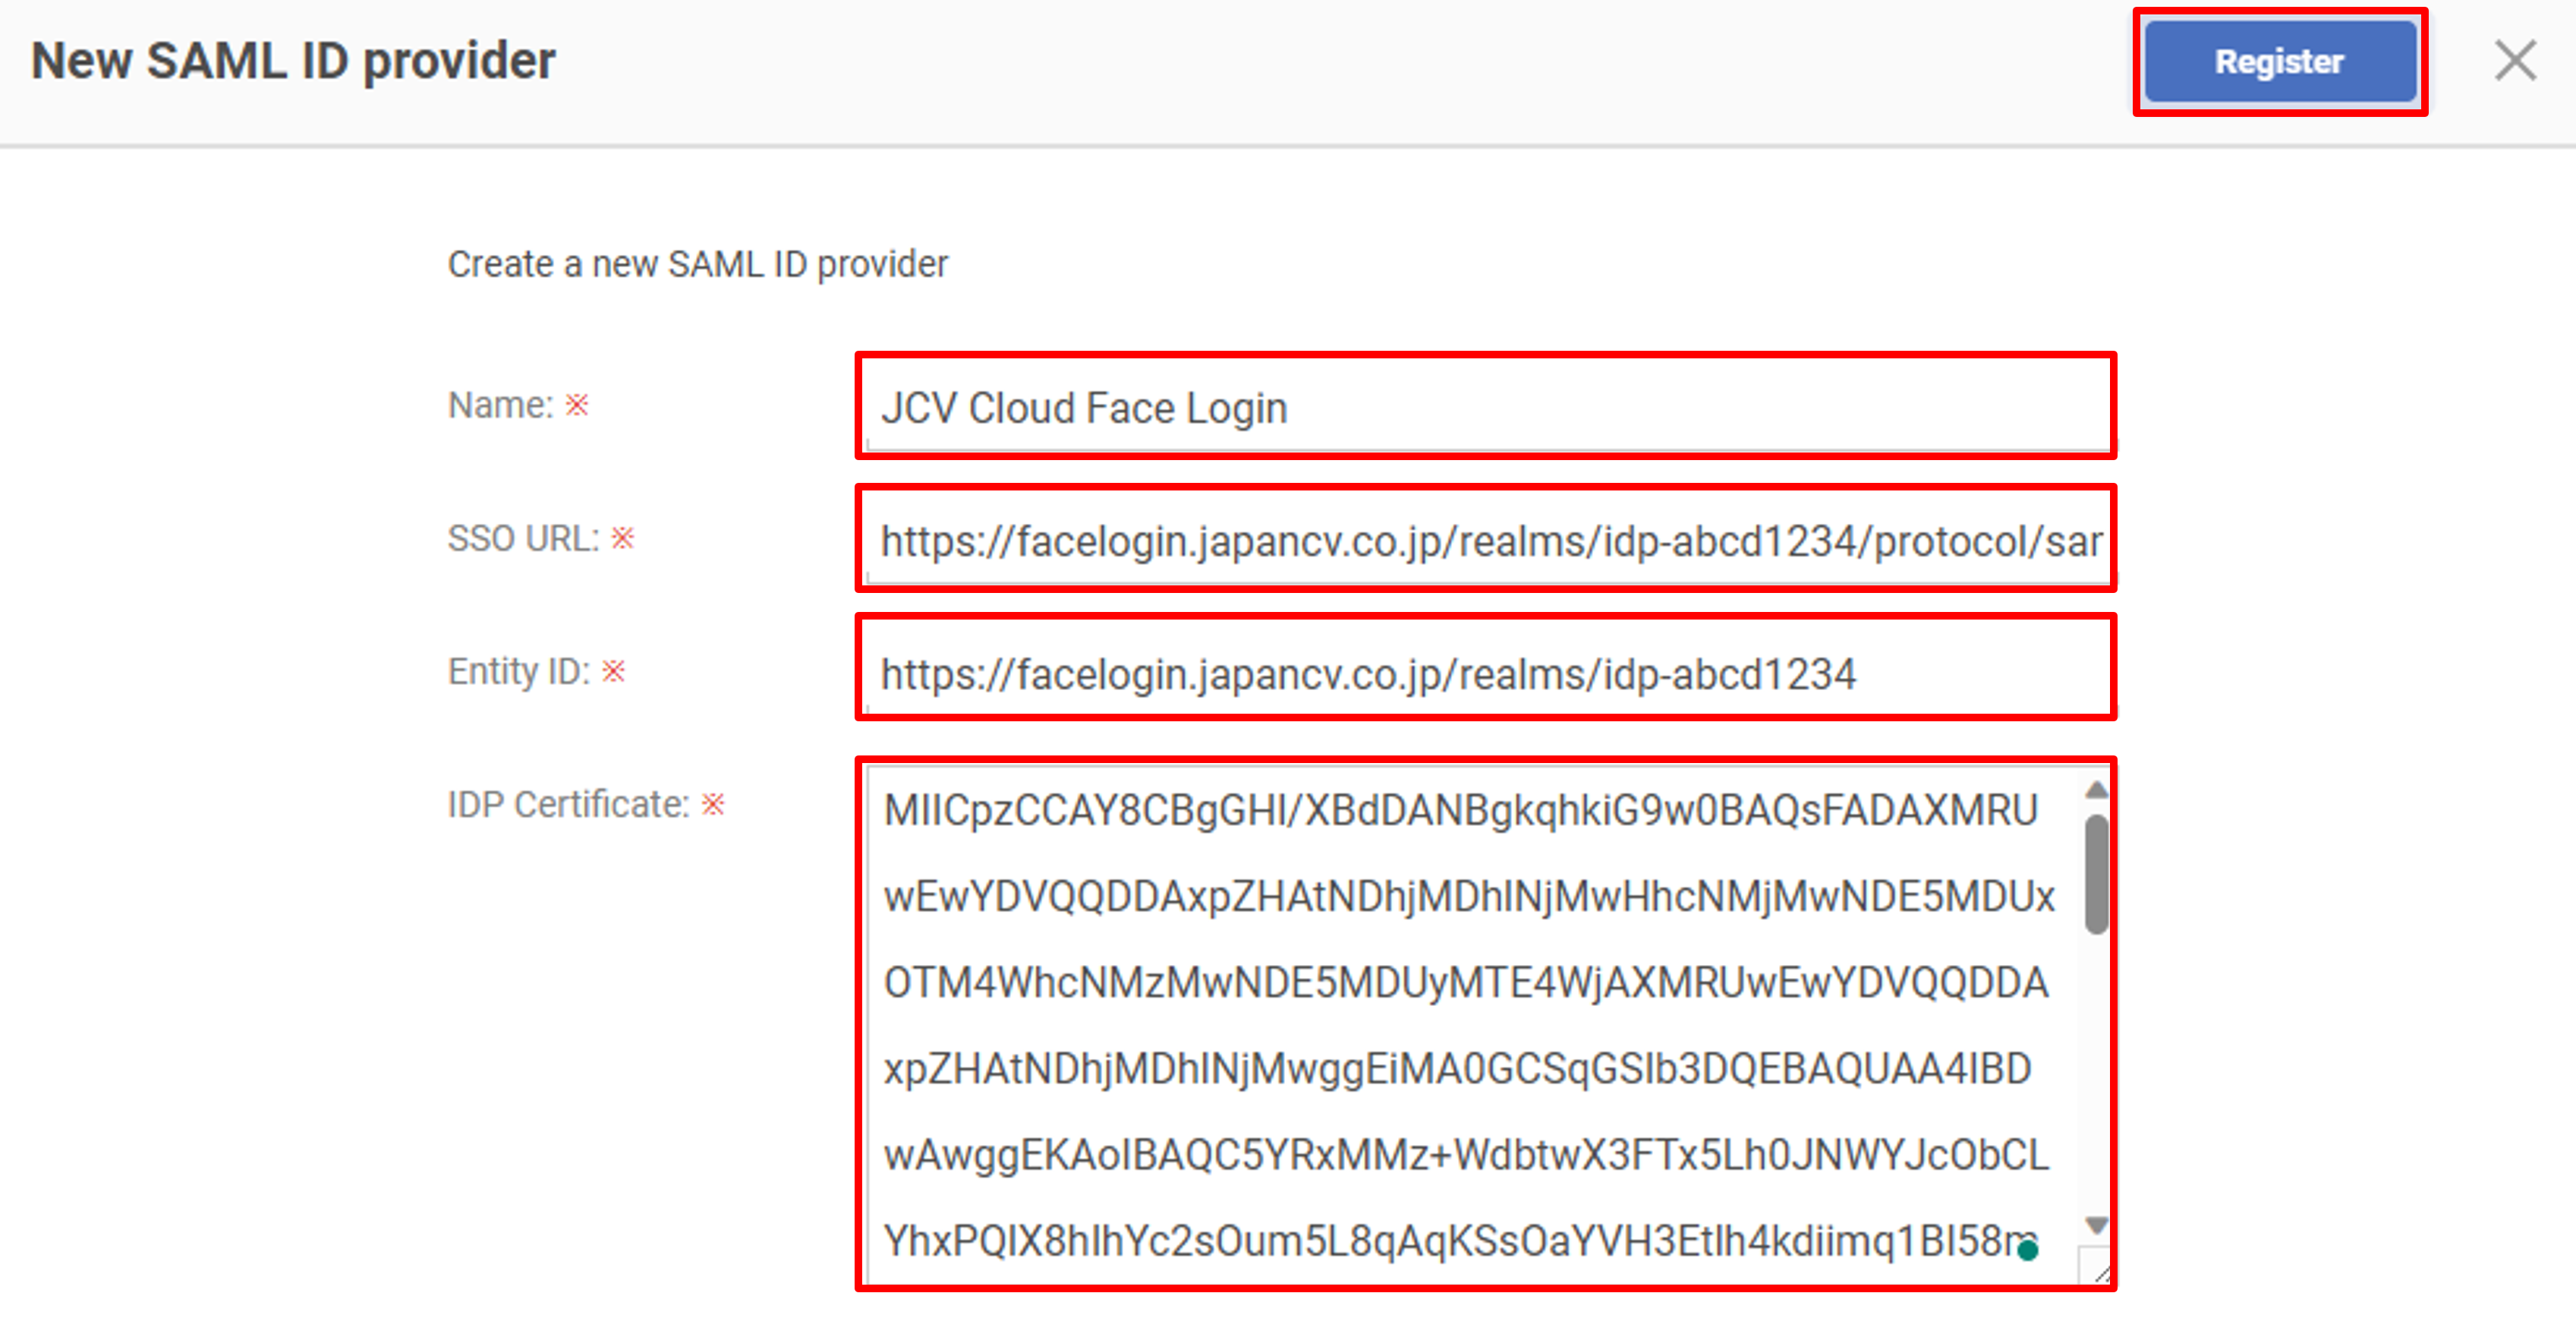
Register a SAML ID provider
Step 4. Add members/groups
Click the IDP created in Step 3 under the External IDP list.

External IDP list
Click Add member or Add group to assign members to the IDP.
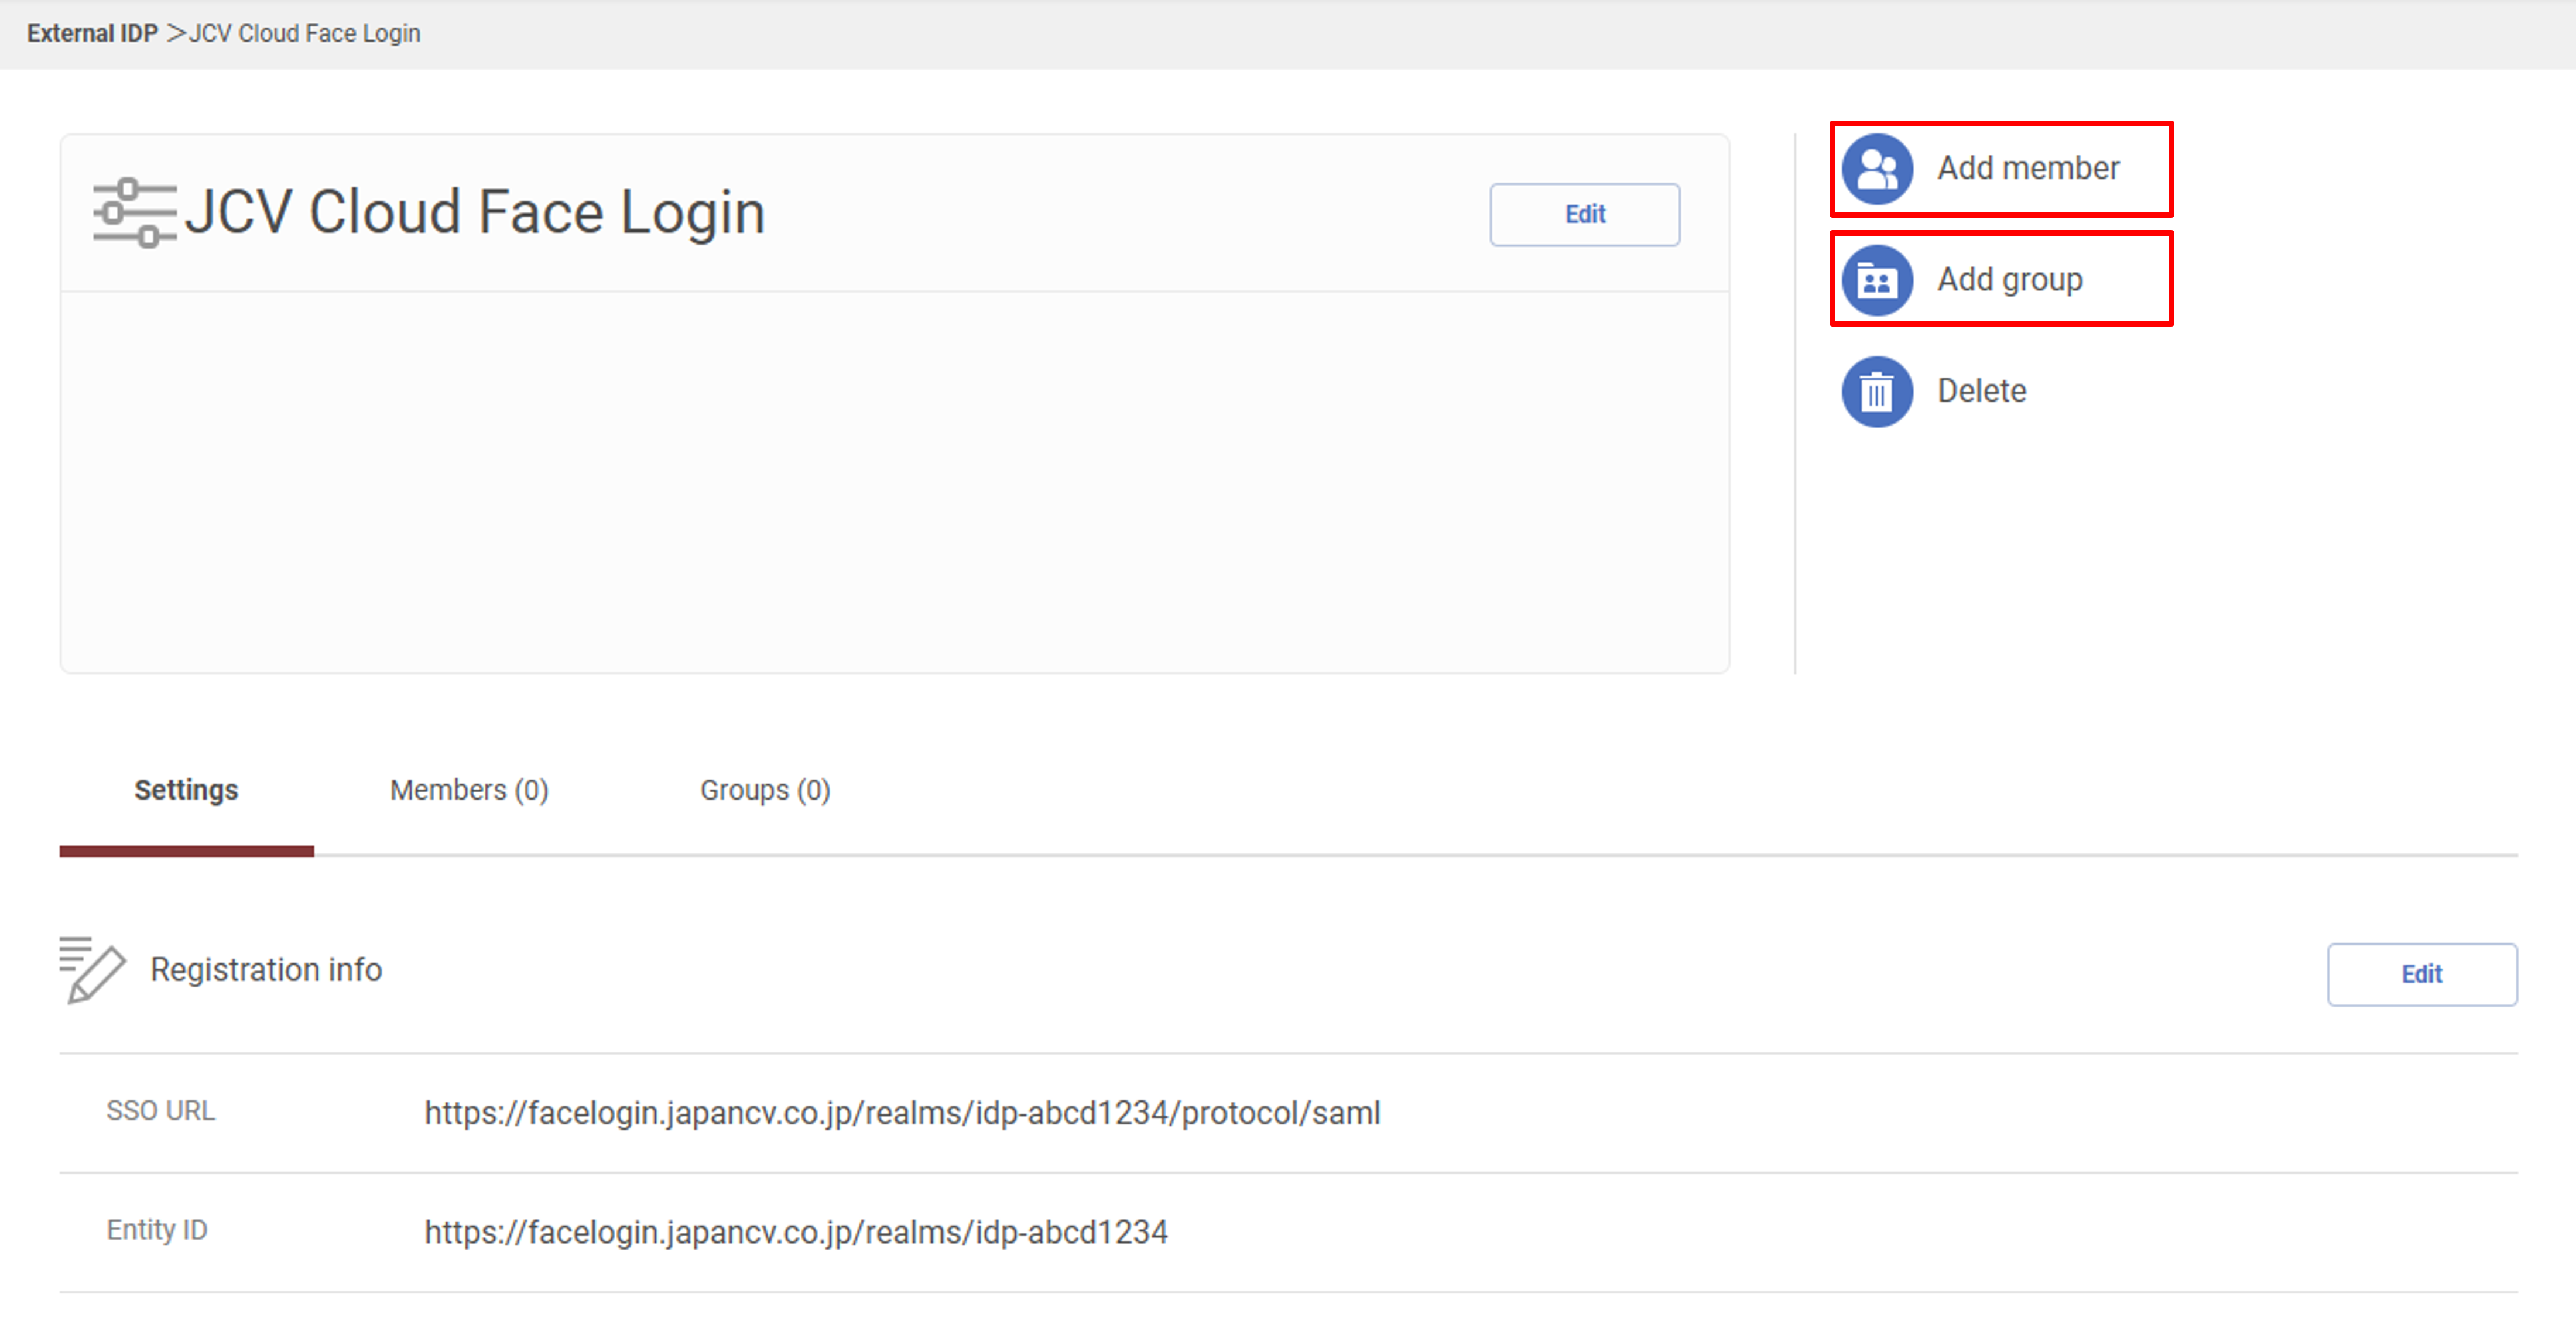
Add members/groups
Filter members/groups by the search bar, select the target members/groups and click the Register button.
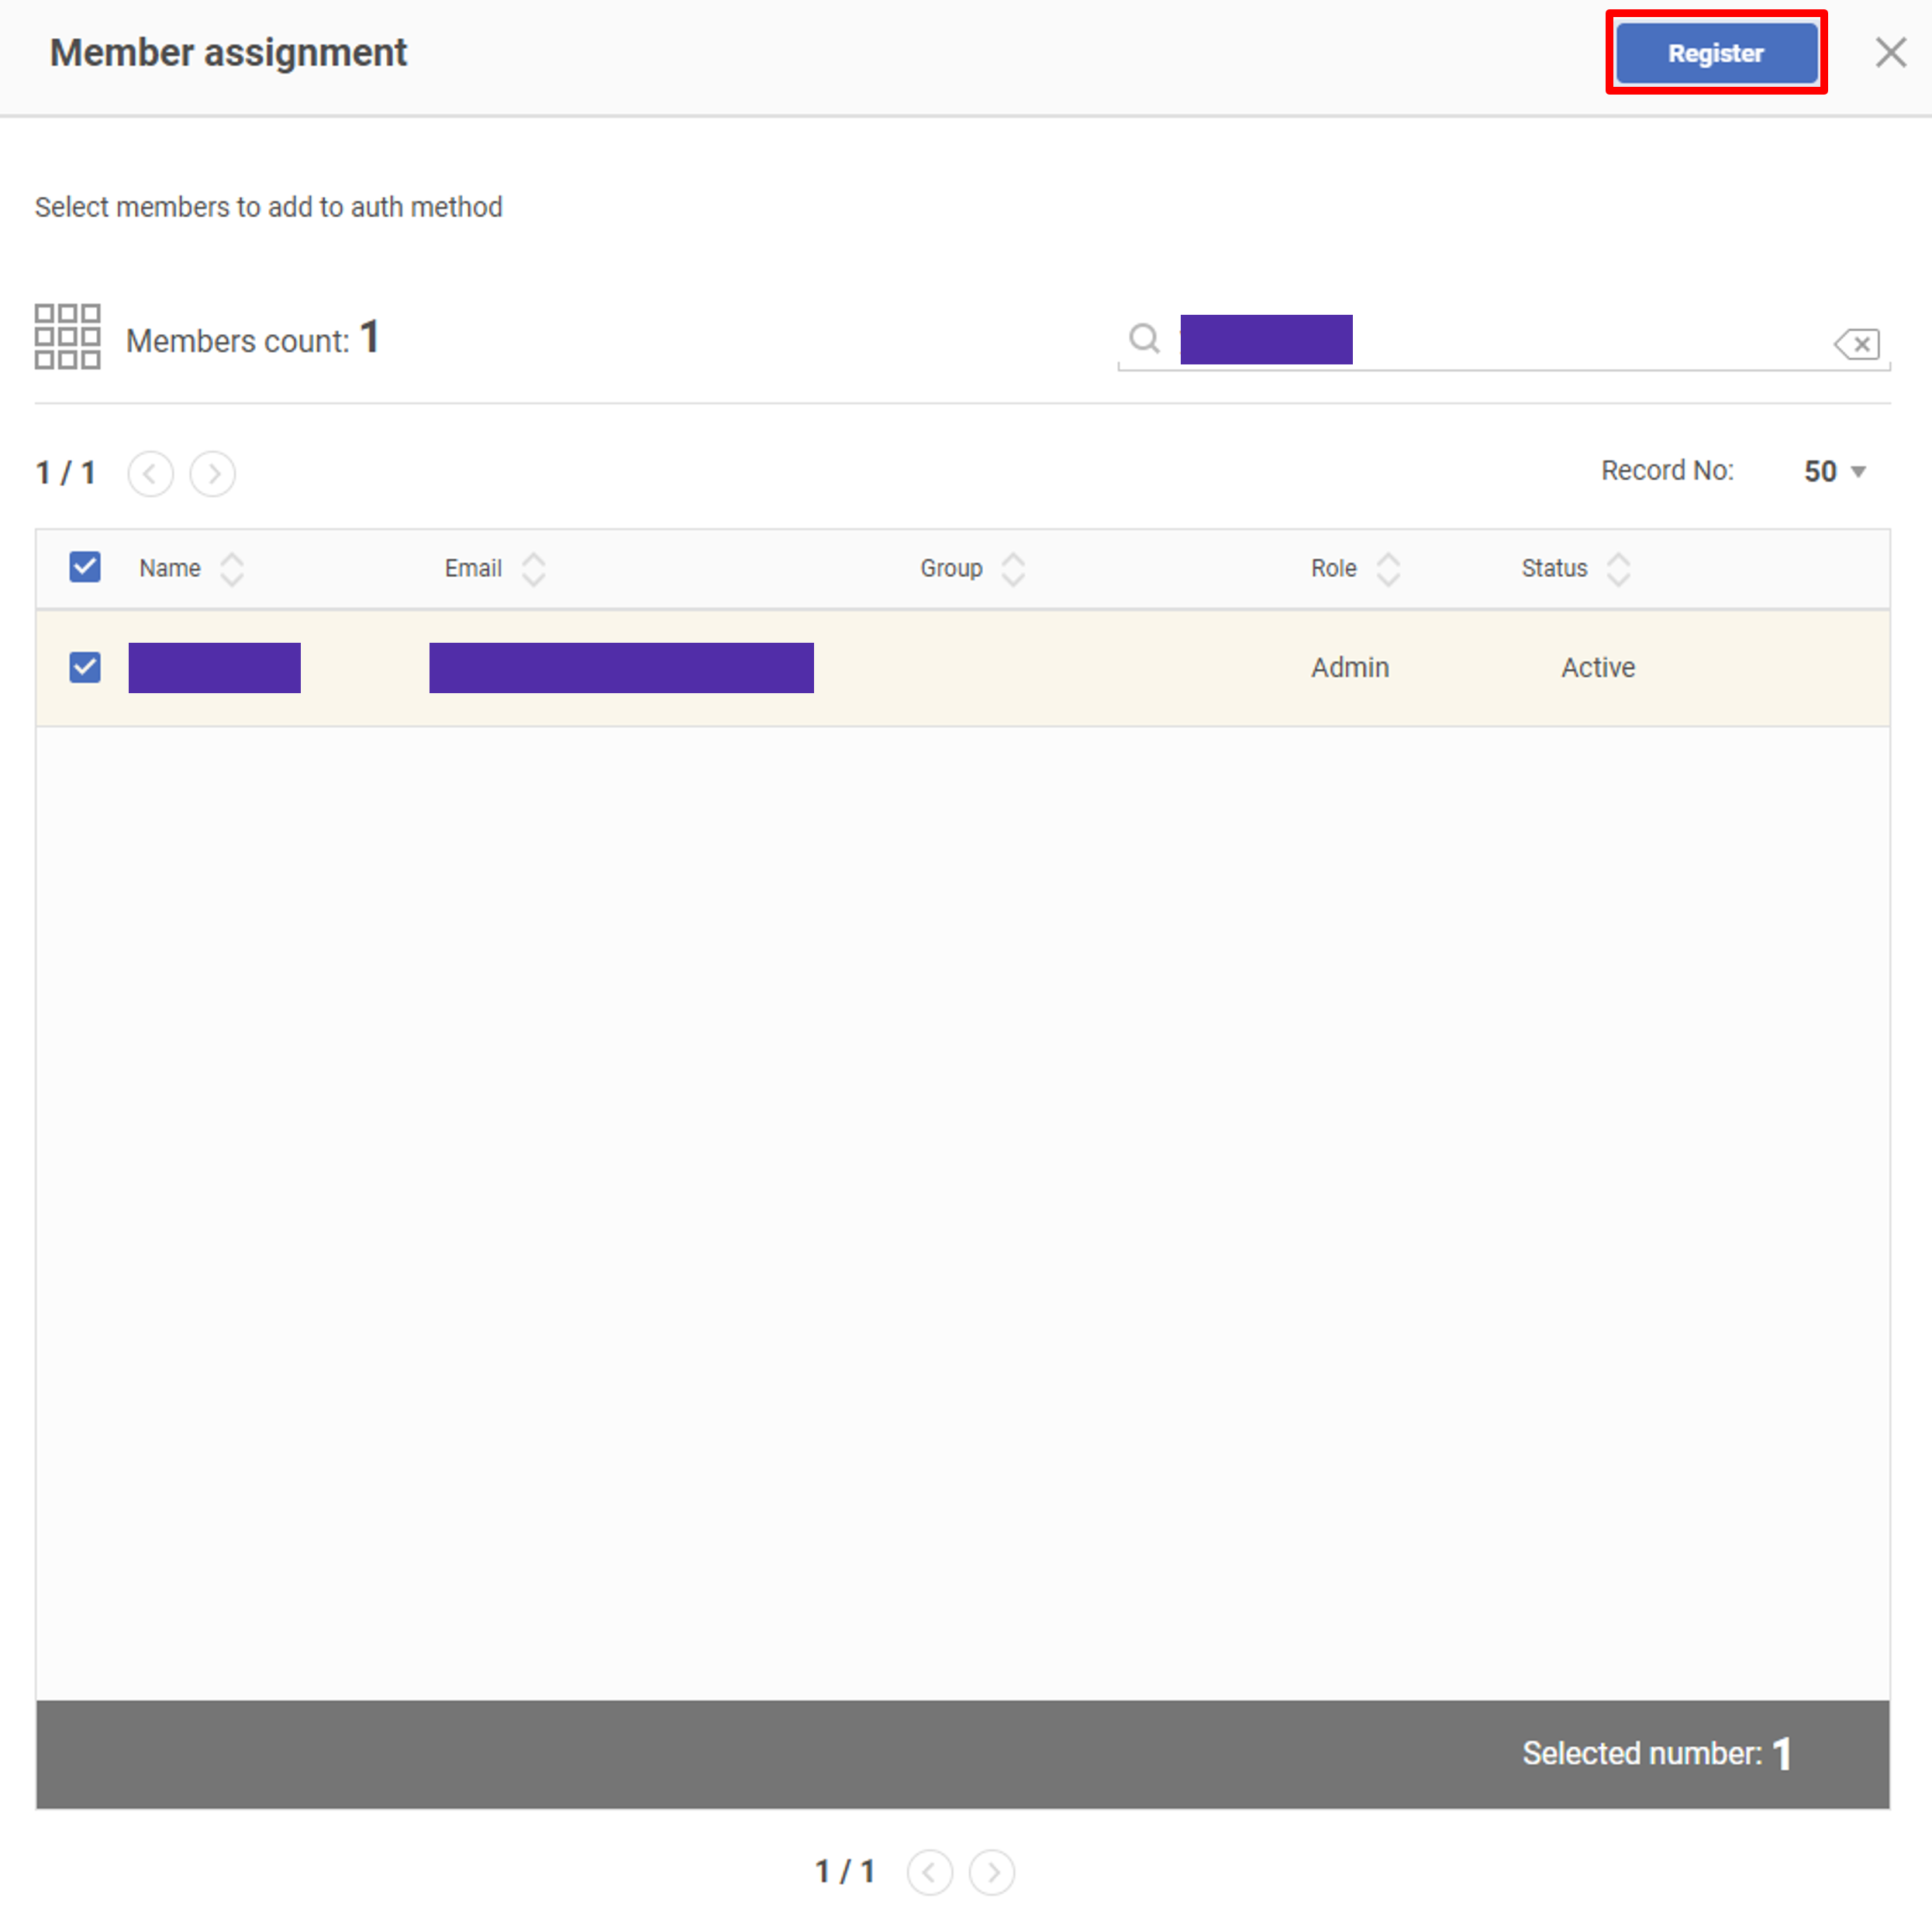
Assign members/groups
This finishes the whole setup process.
Verify the setup
Log out and re-enter https://portal.trustlogin.com/users/sign_in. Select JCV Cloud Face Login, and you will be redirected to the face login page if the above setup is correct.

Select Face Login
Updated 11 months ago