
Salesforce
This page provides detailed steps to integrate Face Login with Salesforce.
Step 1. Download the IDP metadata file
Go to the settings page of JCV Cloud Face Login, and download the XML file. Refer to IDP information section.
Step 2. Sign on to Salesforce Console
Open the URL of your Salesforce environment and log in.
Step 3. Configure the SSO setting on Salesforce
3.1 Go to the Single Sign-On Setting page
On the salesforce home page, click the gear icon at the top-right and click Setup. The setup home page will be displayed.
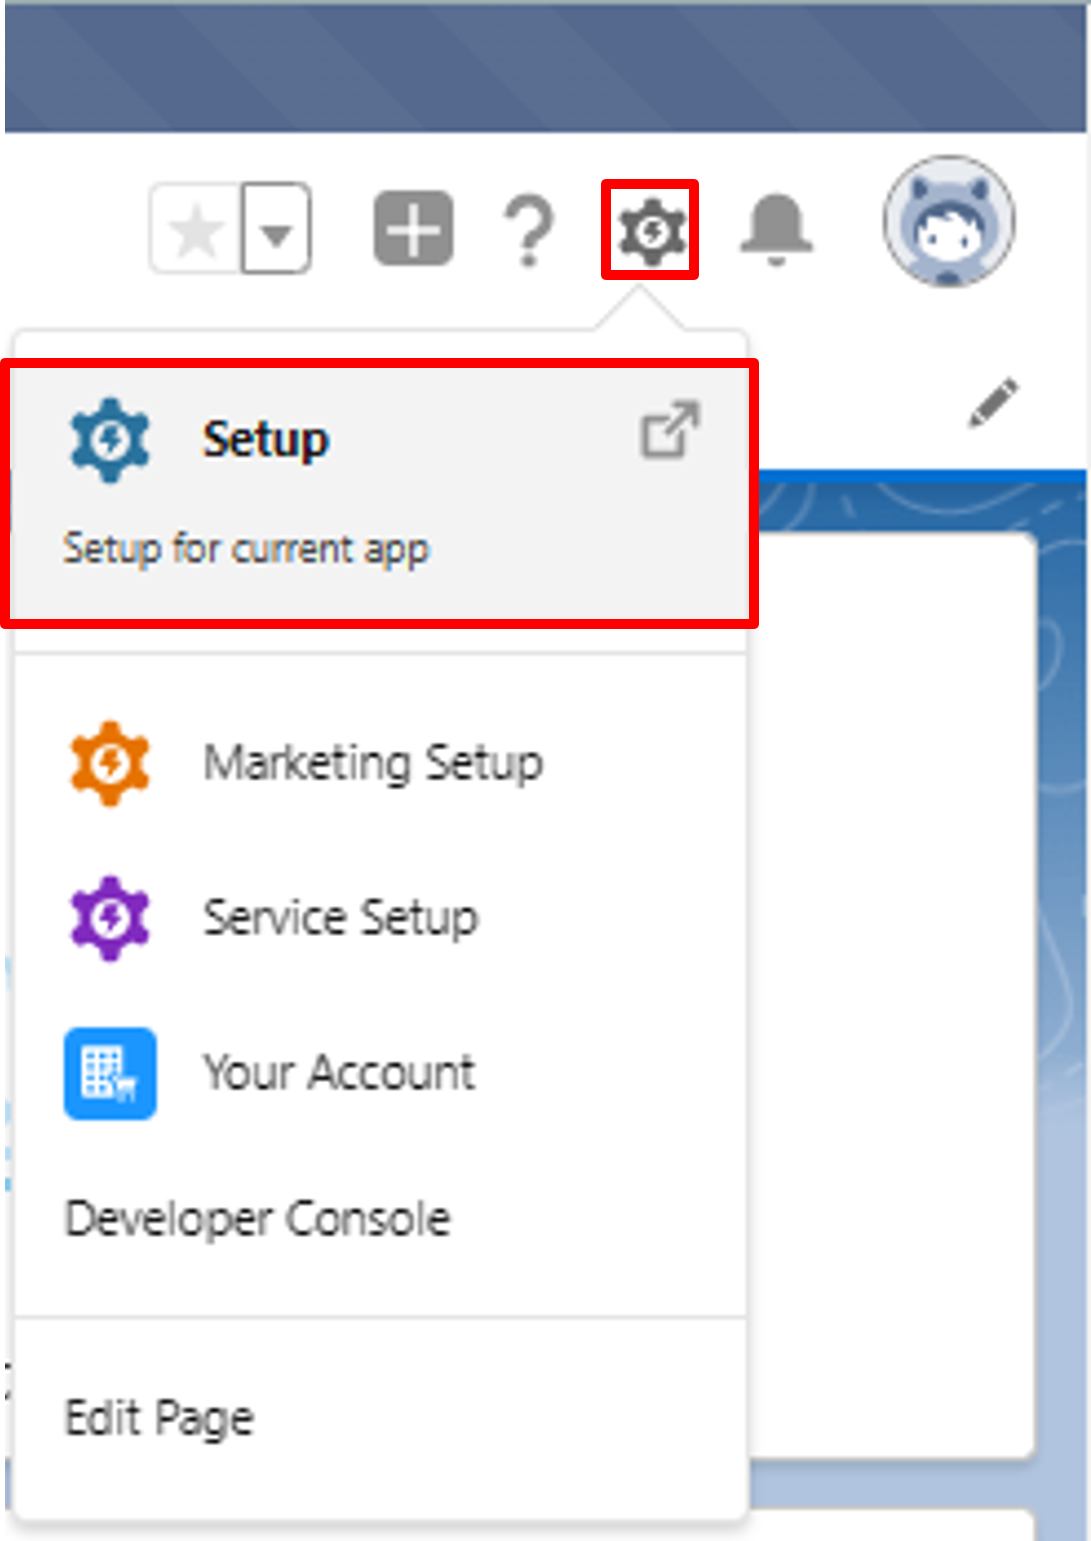
Open the Setup menu
On the setup home page, type single in the Quick Find bar and select Single Sign-On Settings. Single Sign-On Settings will be displayed.
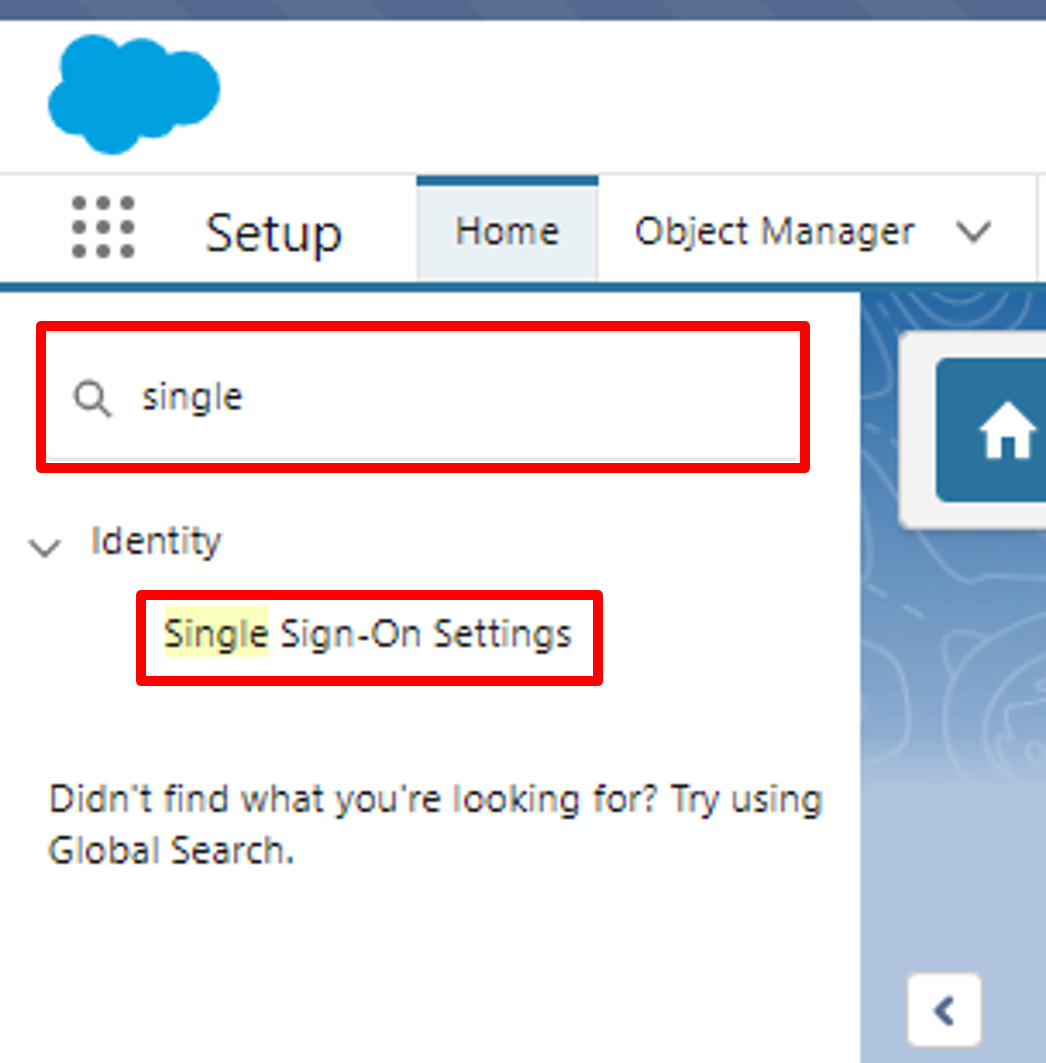
Search and Select Single Sign-On Settings
3.2 Upload the IDP metadata file
On the Single Sign-On Settings page, click New from Metadata File.
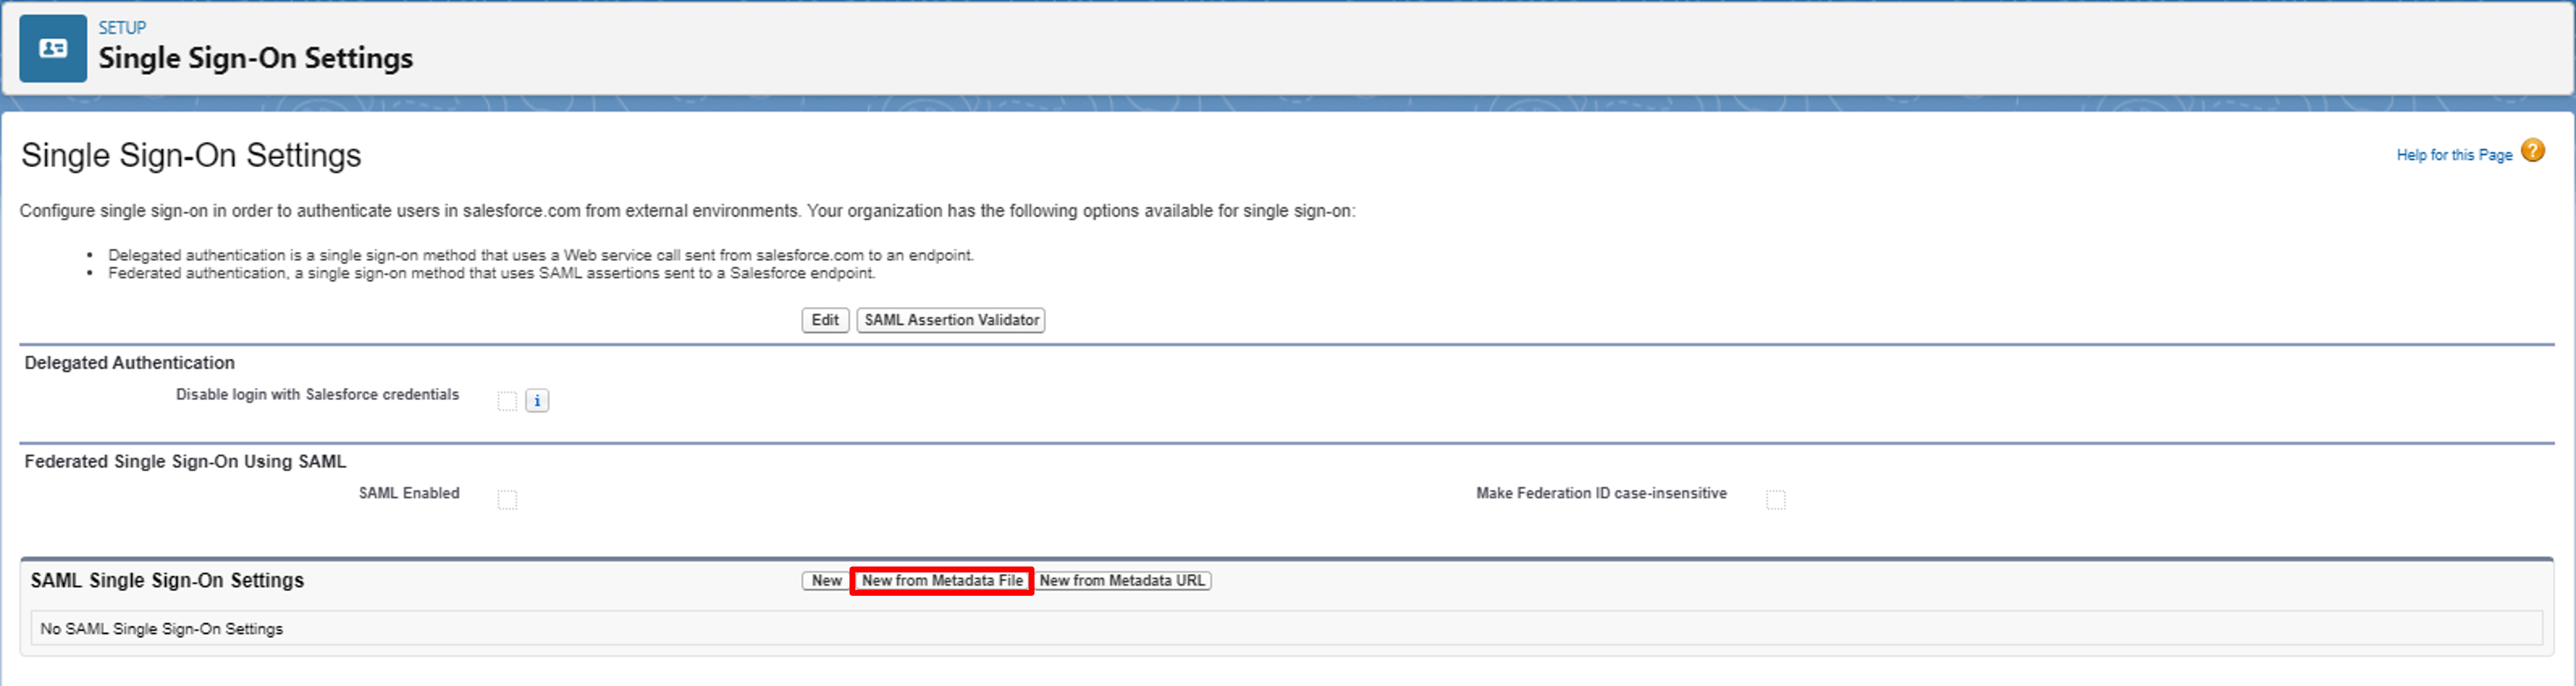
Select New from Metadata File
On the next page, click Choose File to upload the XML file downloaded in Step 1.
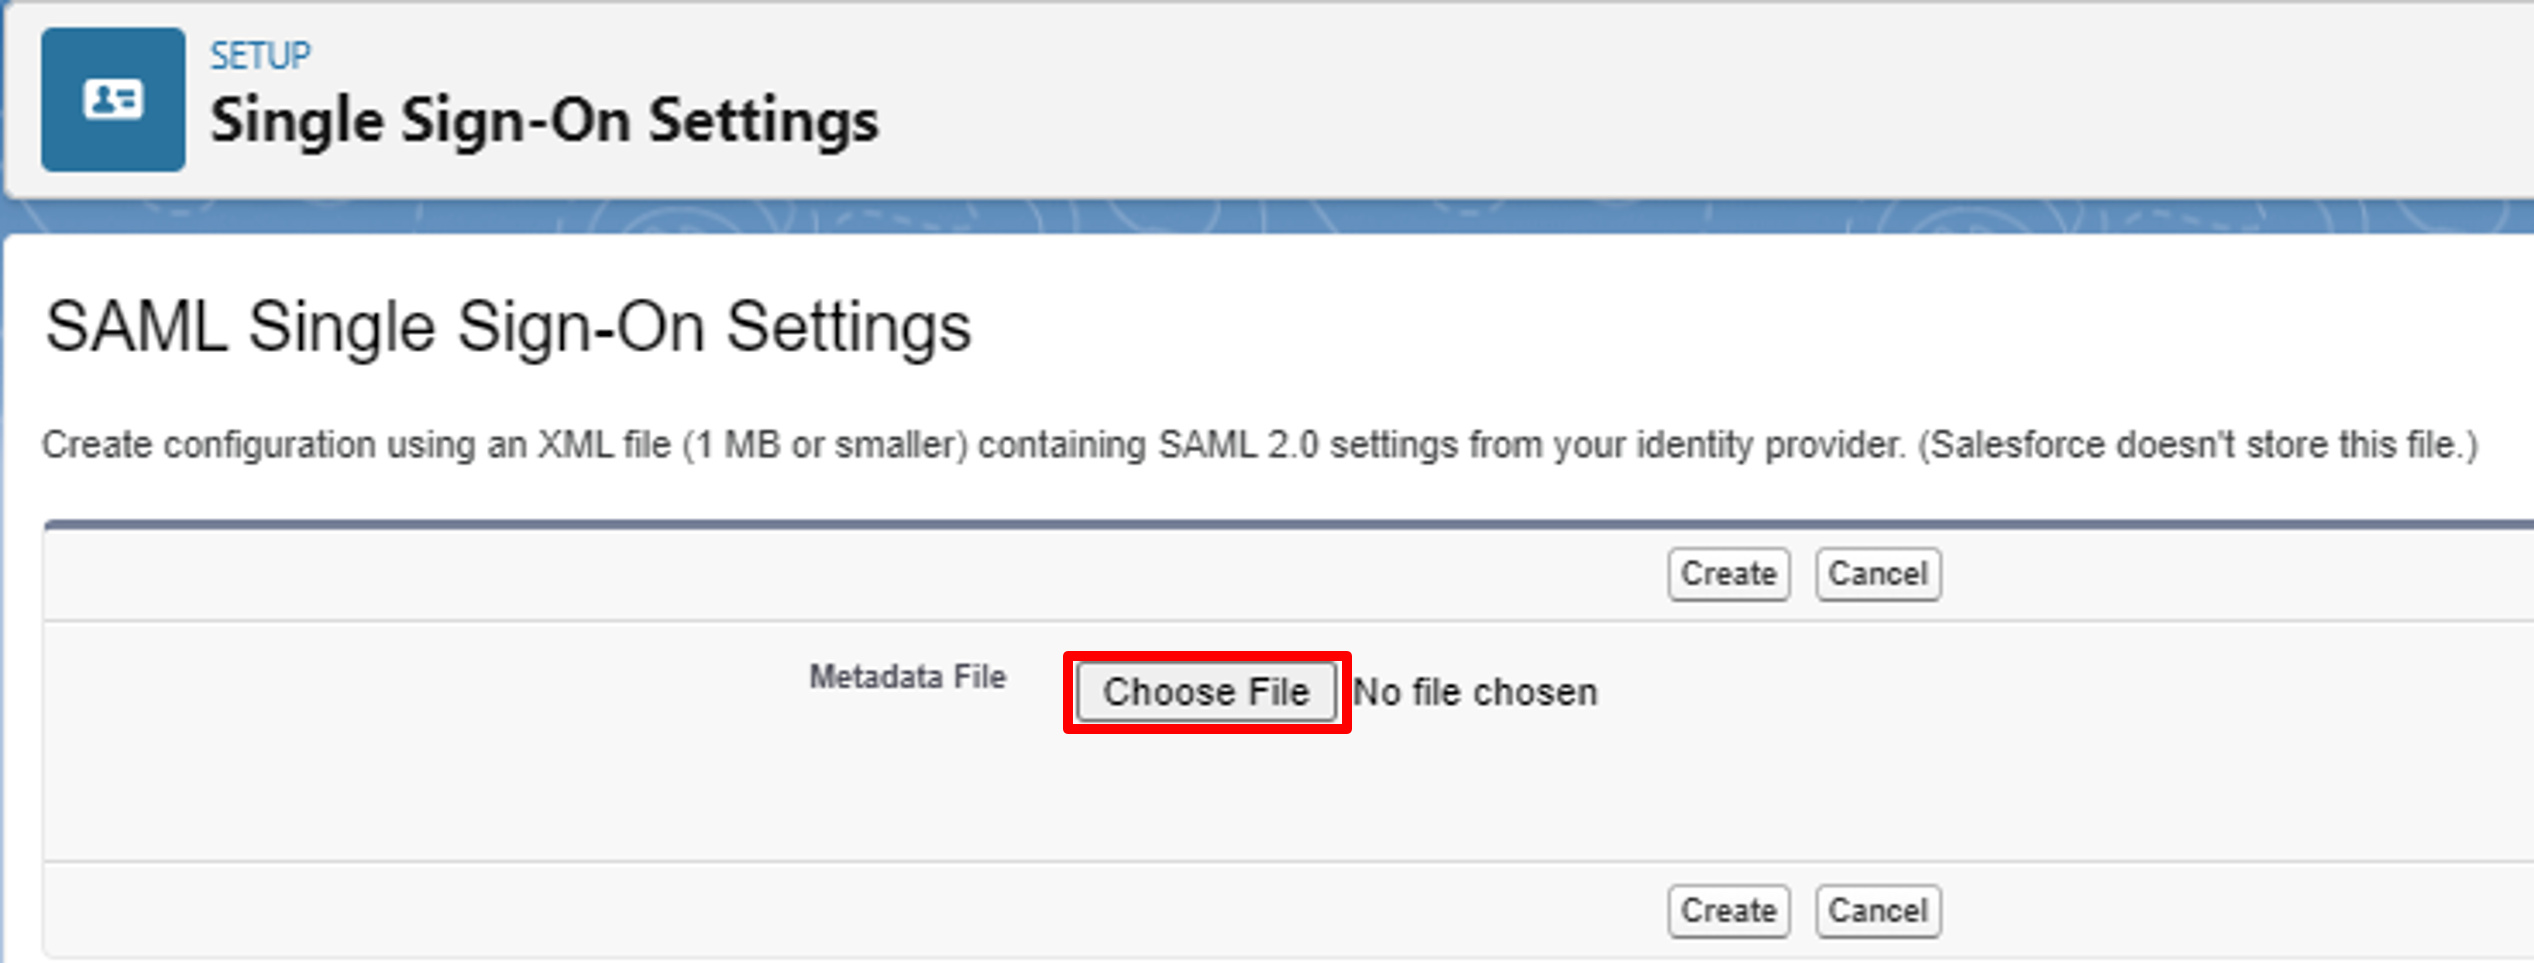
Select Choose File
Then, click Create to finish the upload.
3.3 Edit the SAML Single Sign-On Settings
On the SAML Single Sign-On Settings page, click Save to finish all settings. Some other fields can be set up for single sign-out but are not yet supported by JCV Cloud Face Login currently.
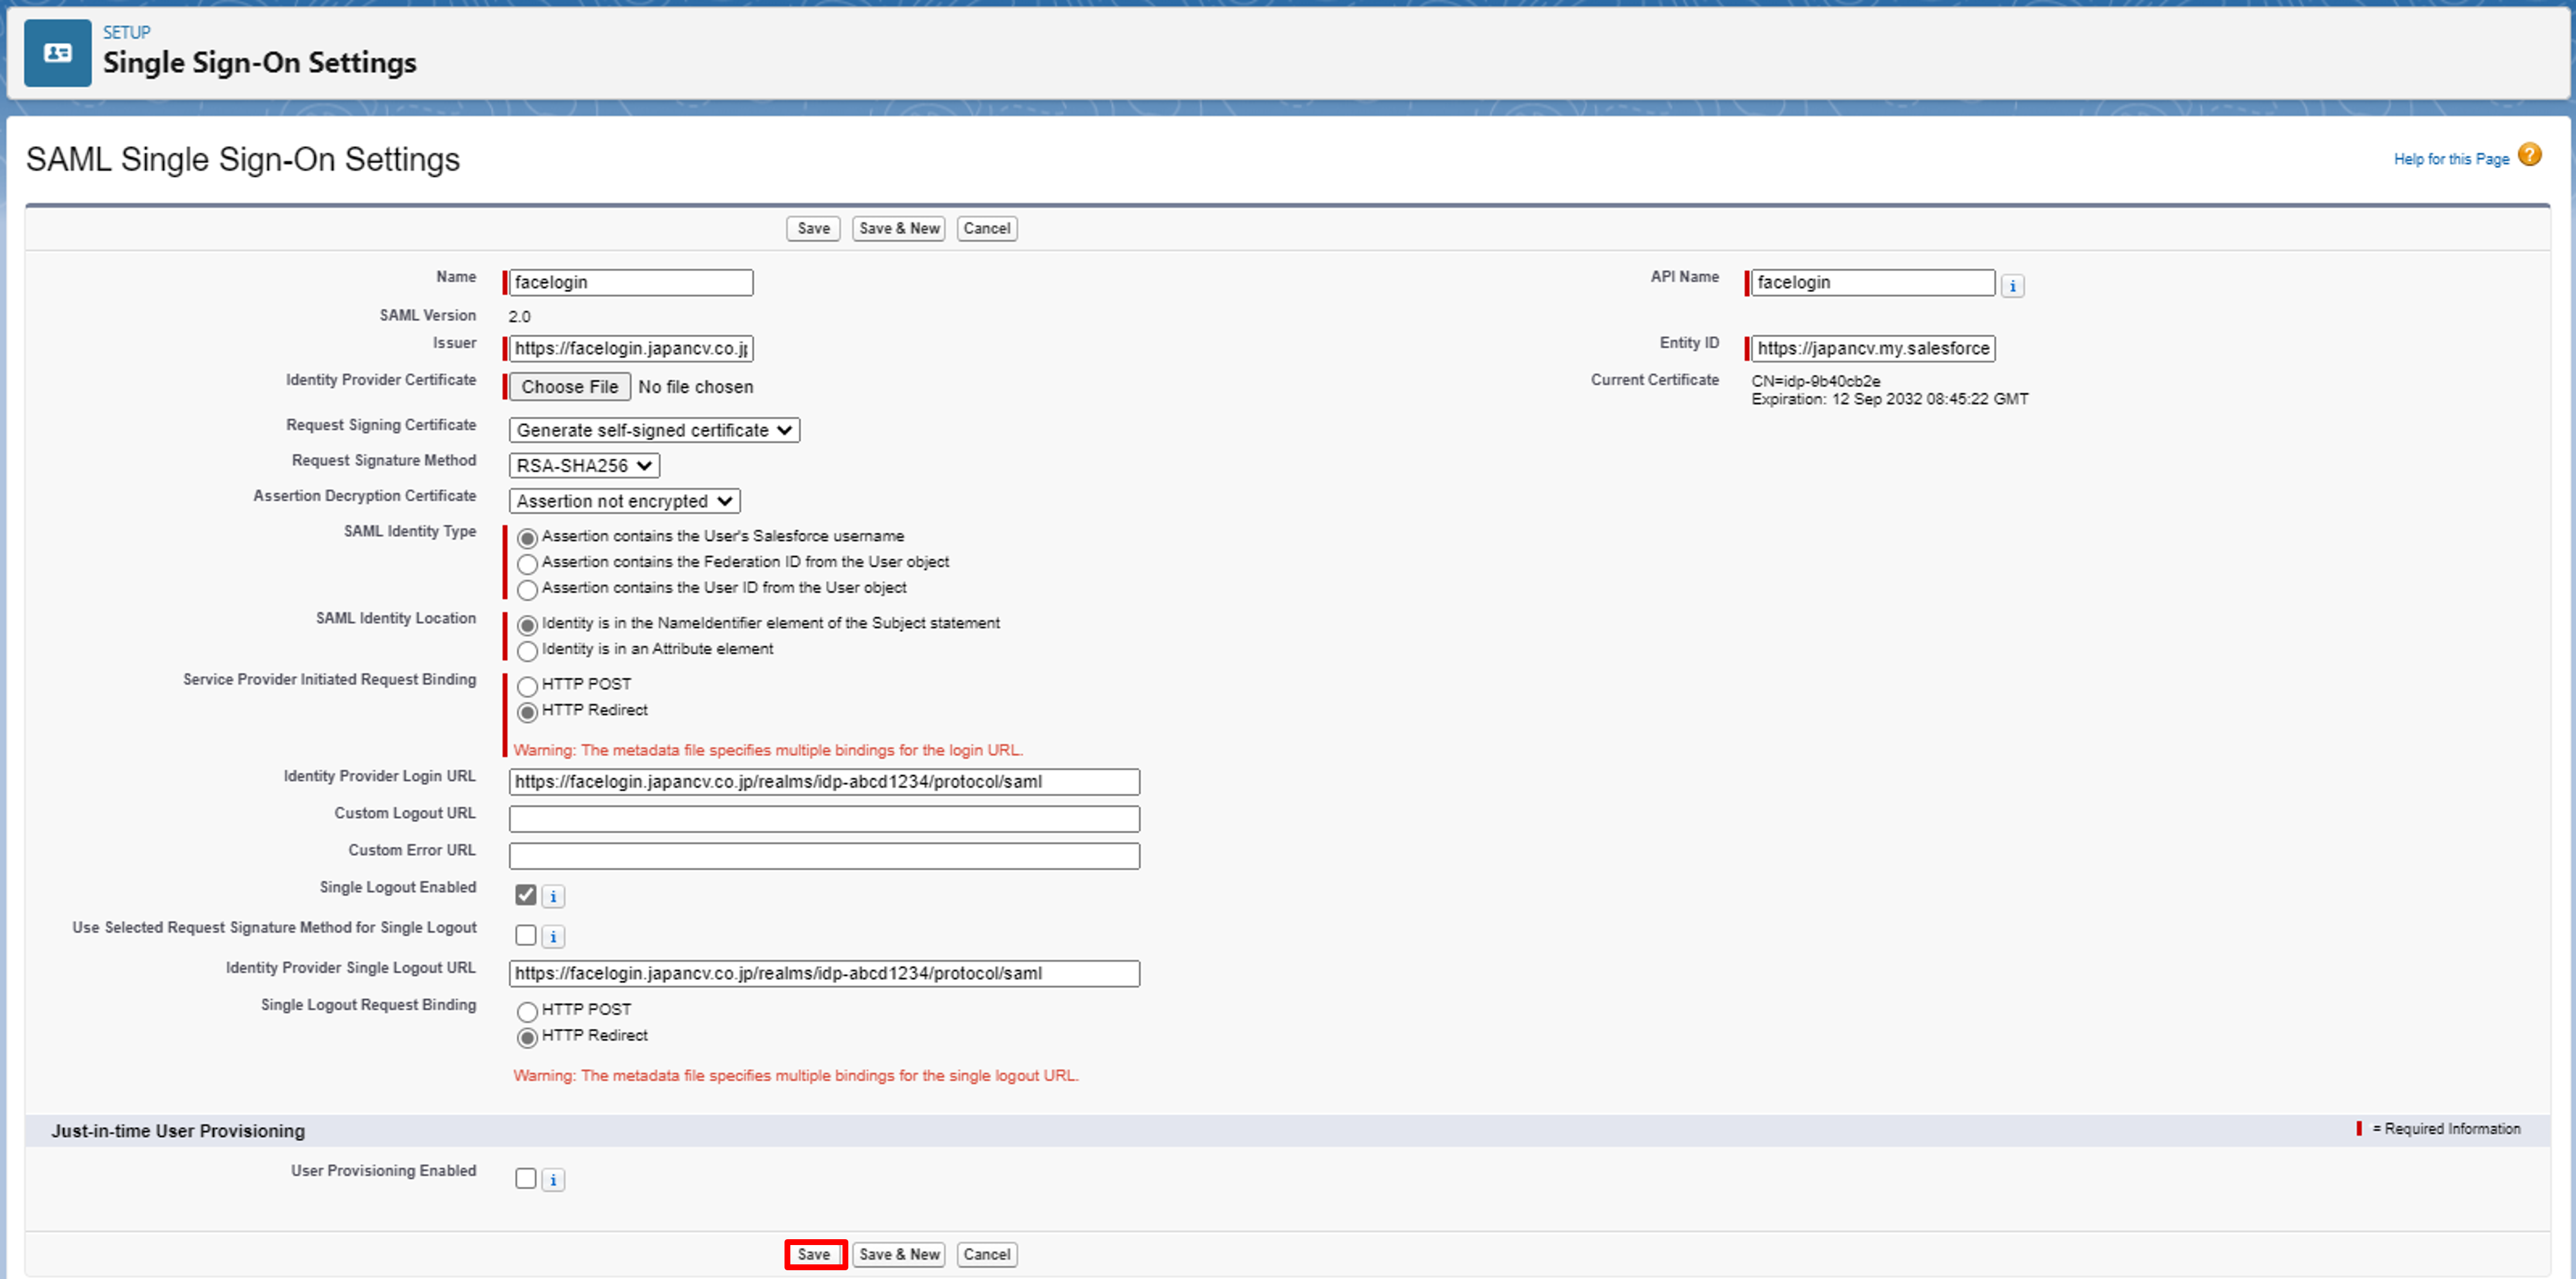
Save the SAML SSO settings
Depending on your Salesforce identity verification setting, you might be asked to confirm the operation by Salesforce Authenticator. Confirm on your mobile phone when this screen is displayed.
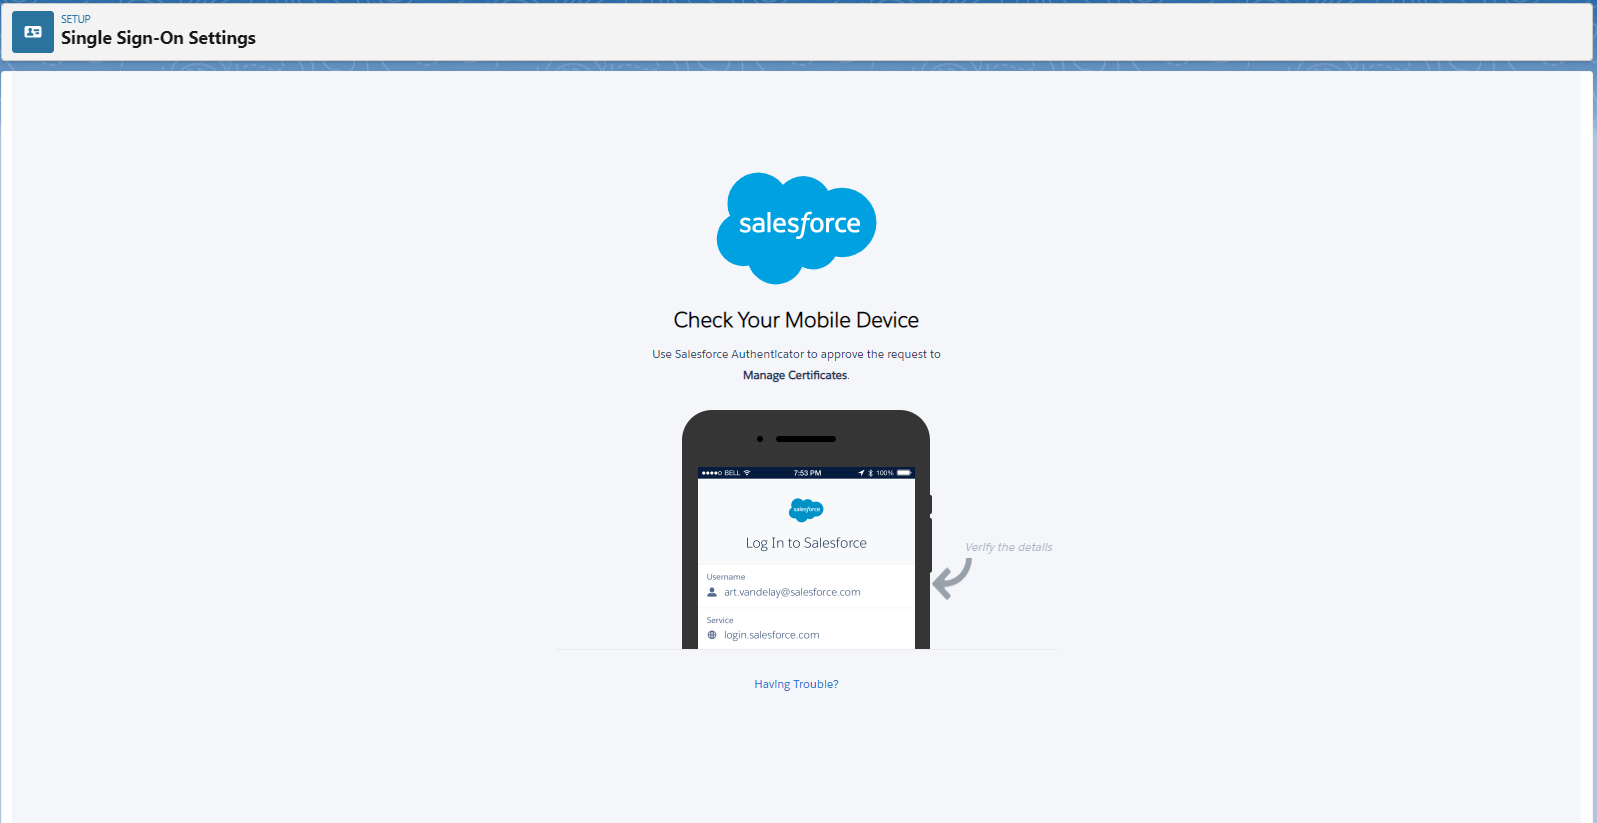
Salesforce Authenticator confirmation
After the confirmation, the SSO setting should be completed.
3.4 Download the SP metadata
On the page where the SSO setting is saved successfully, click Download Metadata to download the metadata XML file. This file is necessary to create the client on JCV Cloud.
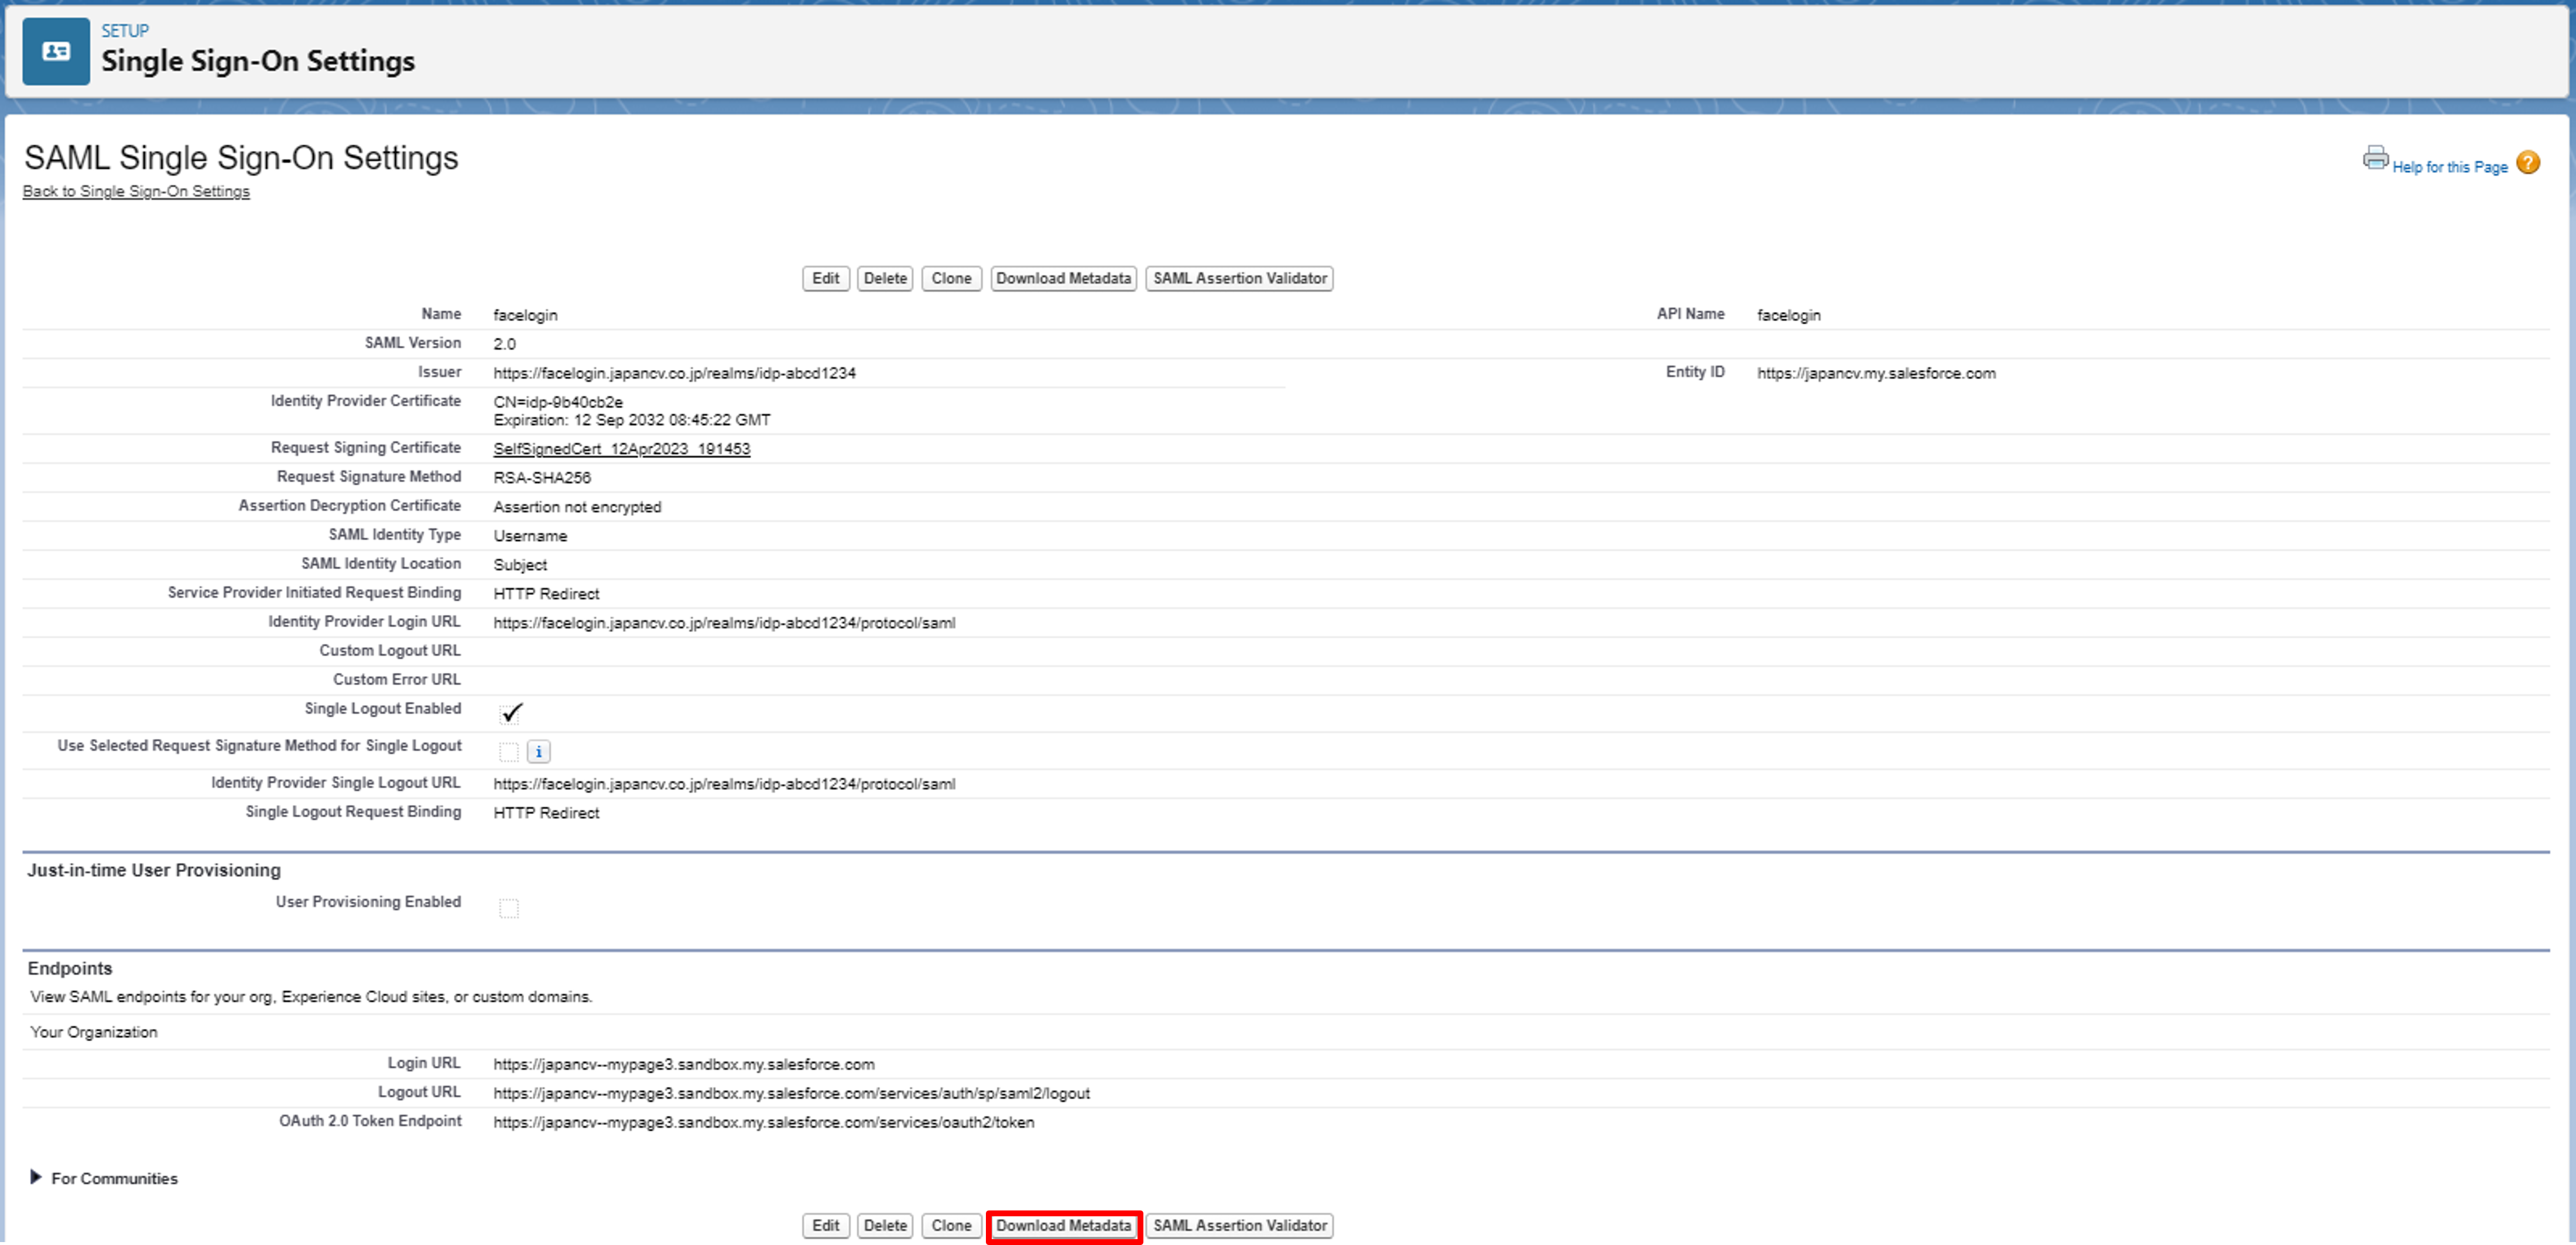
Download the SP metadata file
Step 4. Enable SAML on Salesforce
On the same page, click Back to Single Sign-On Settings to return to the Single Sign-On Settings page.
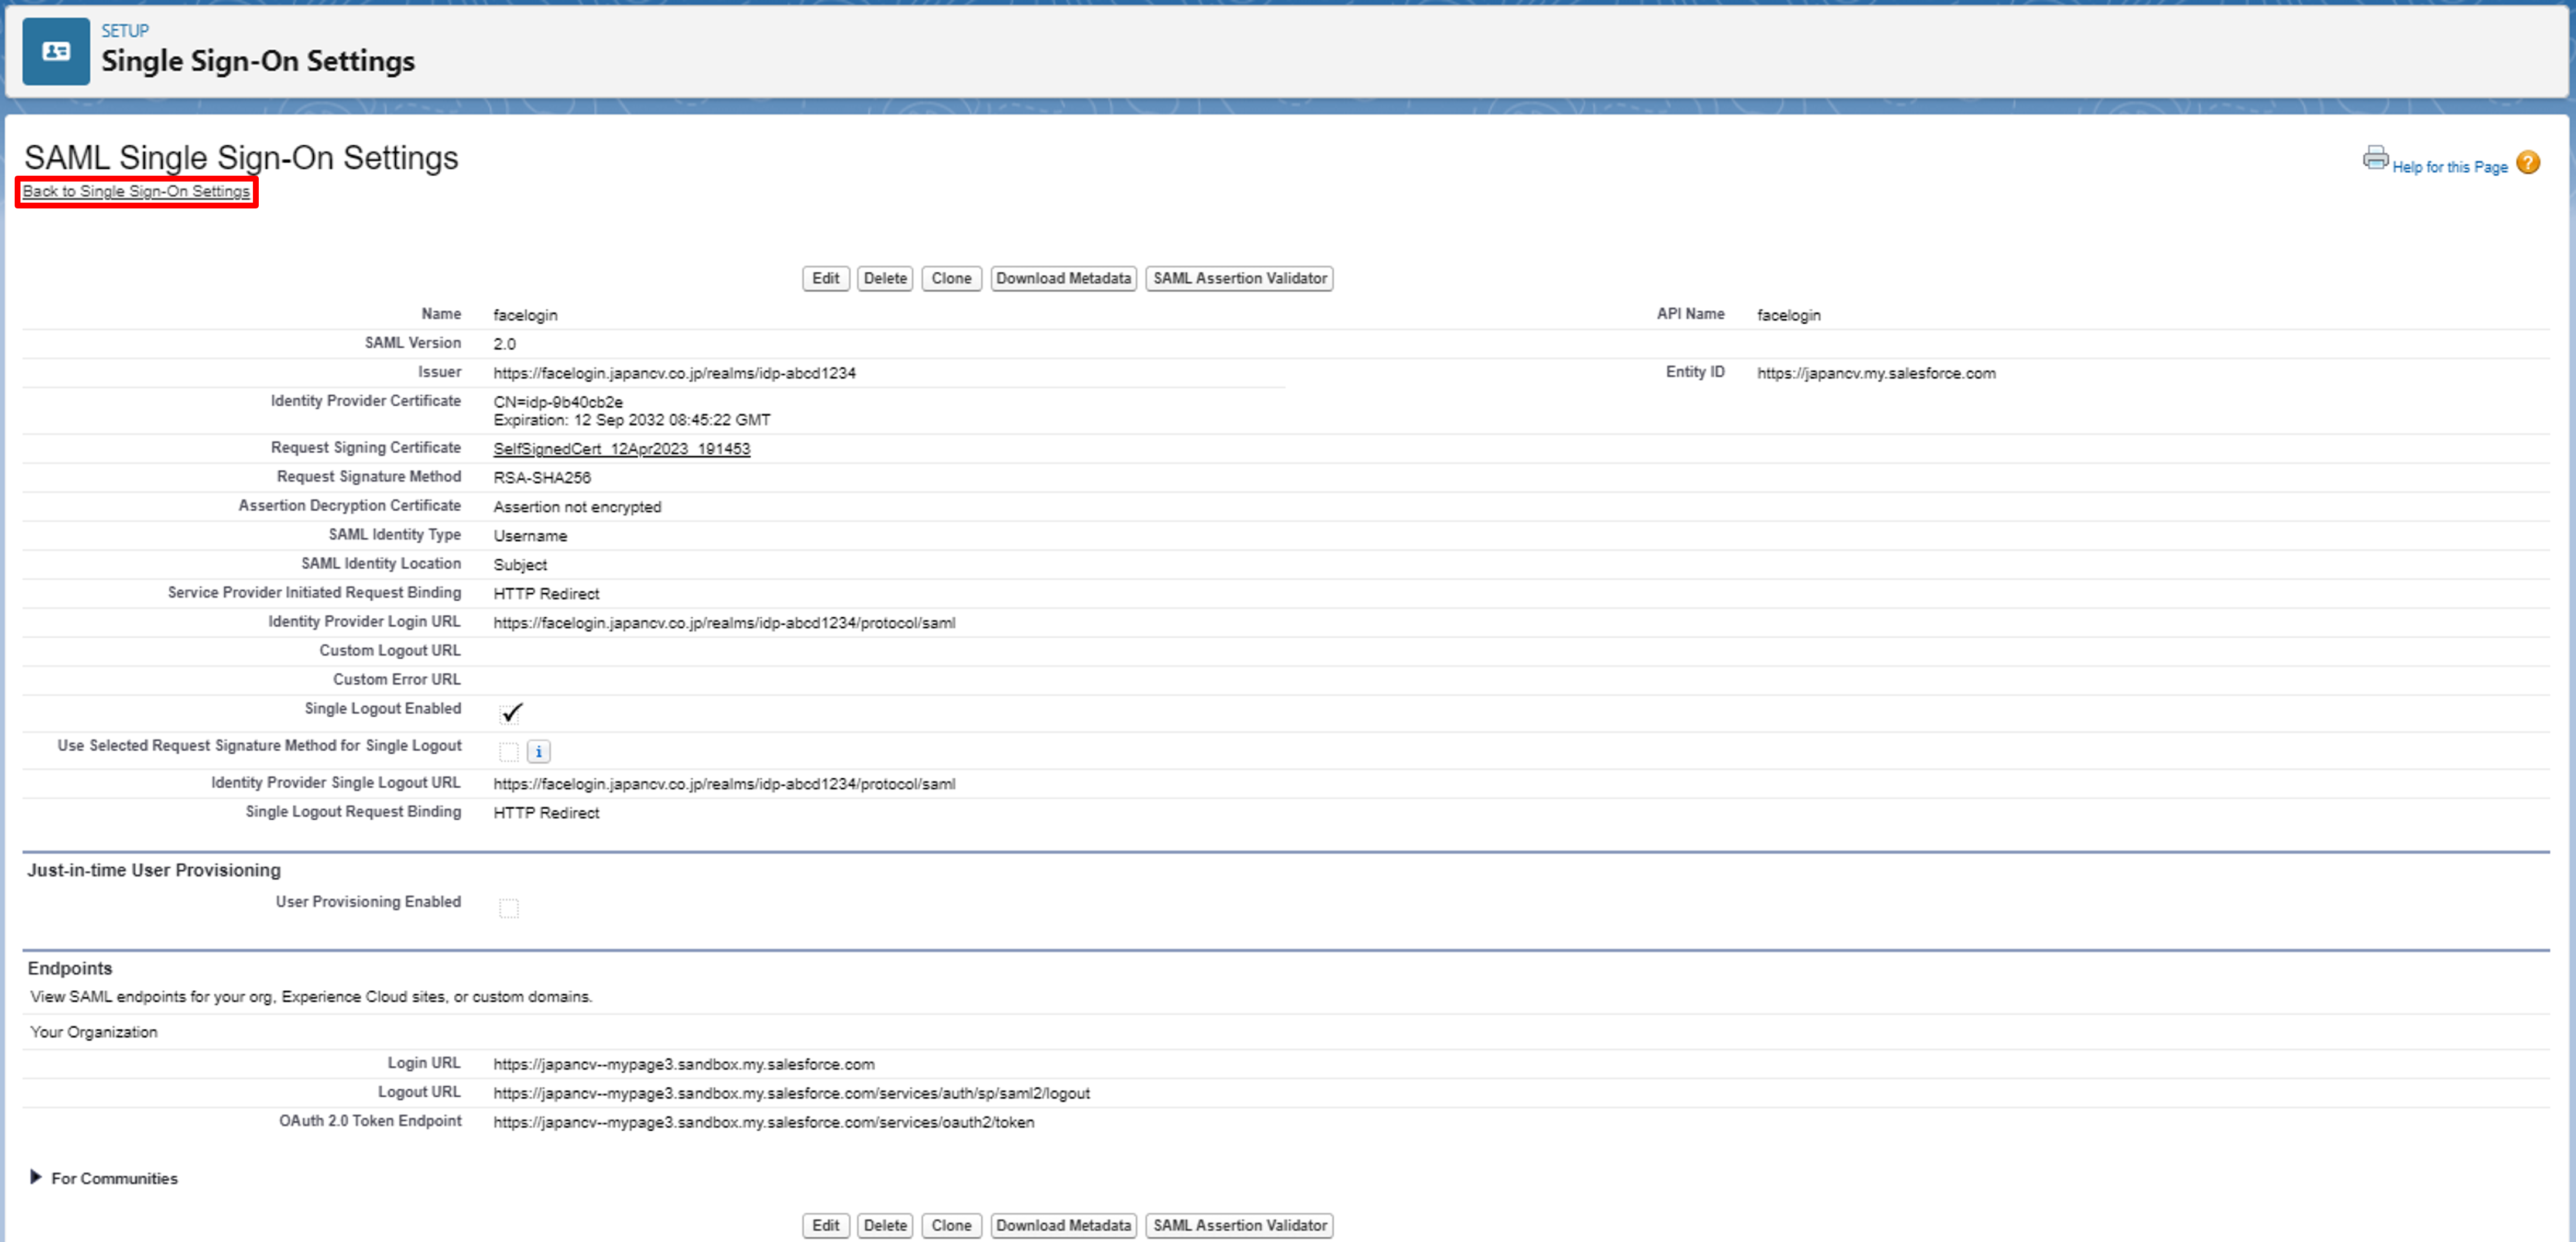
Return to the SAML SSO settings
Click Edit left to SAML Assertion Validator.
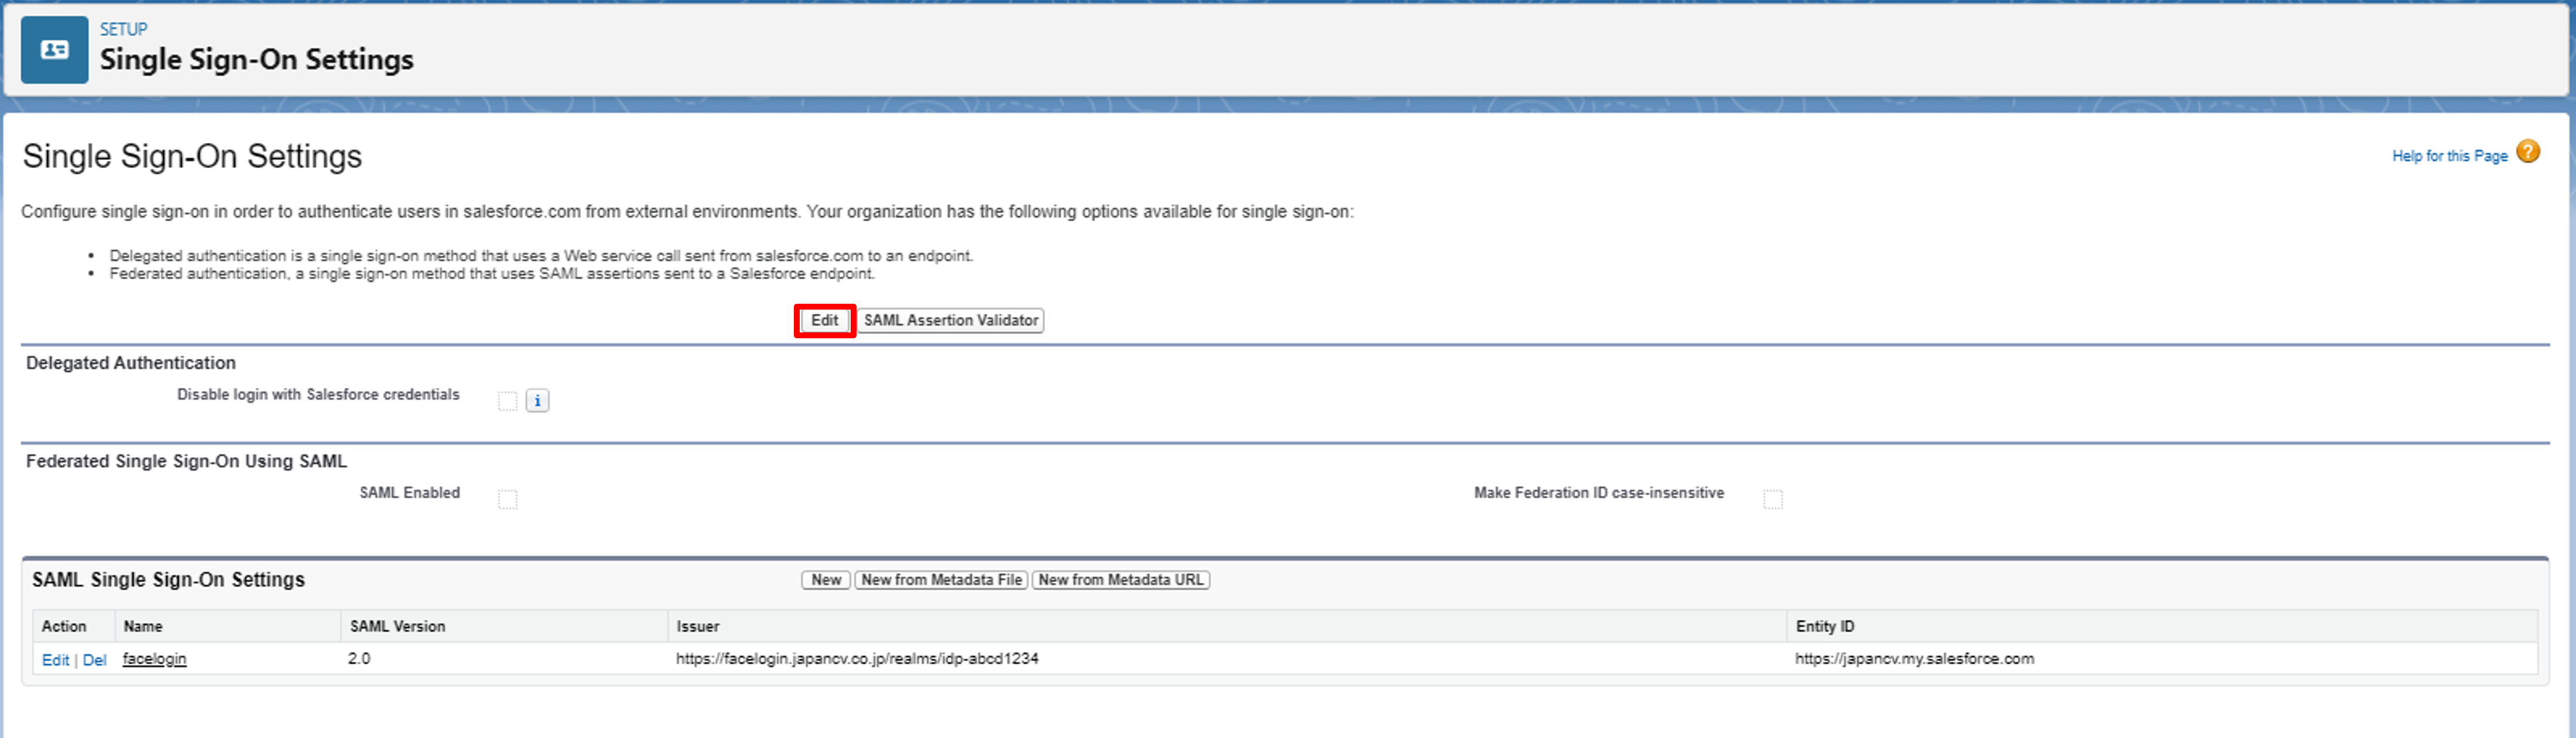
Go to the SAML setting
Tick the SAML Enabled option, and click save. SAML will be enabled for Federated Single Sign-On.
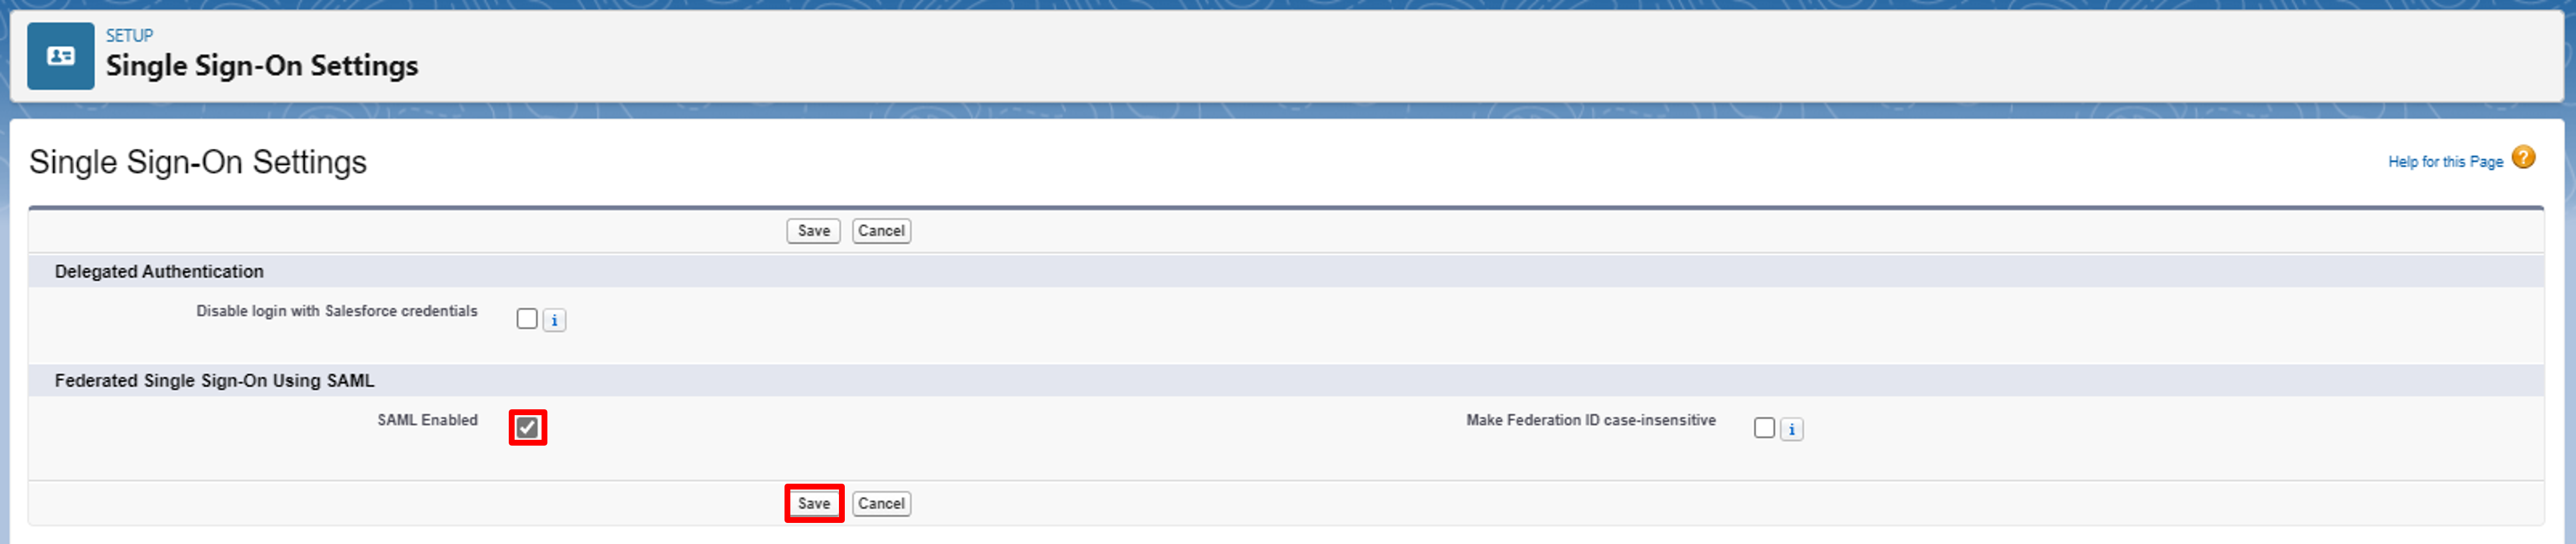
Enable SAML
Step 5. Add SSO settings to the Salesforce domain
Type domain in the Quick Find bar of any setting page and select My Domain. My Domain Settings will be displayed.
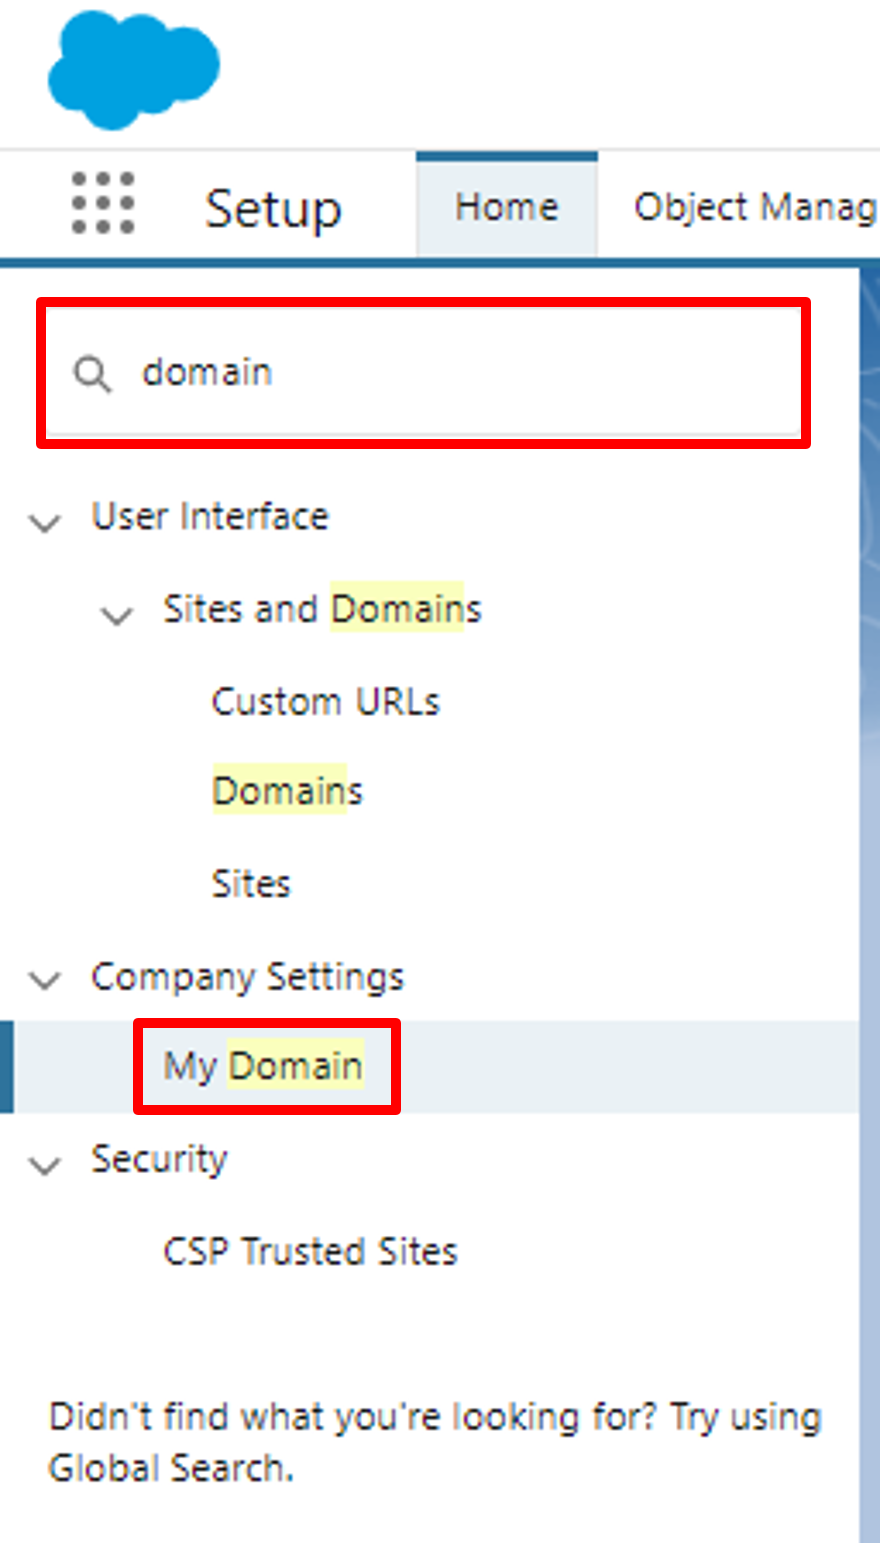
Go to My Domain settings
On the Authentication Configuration, click Edit. The Authentication Configuration page will be displayed.
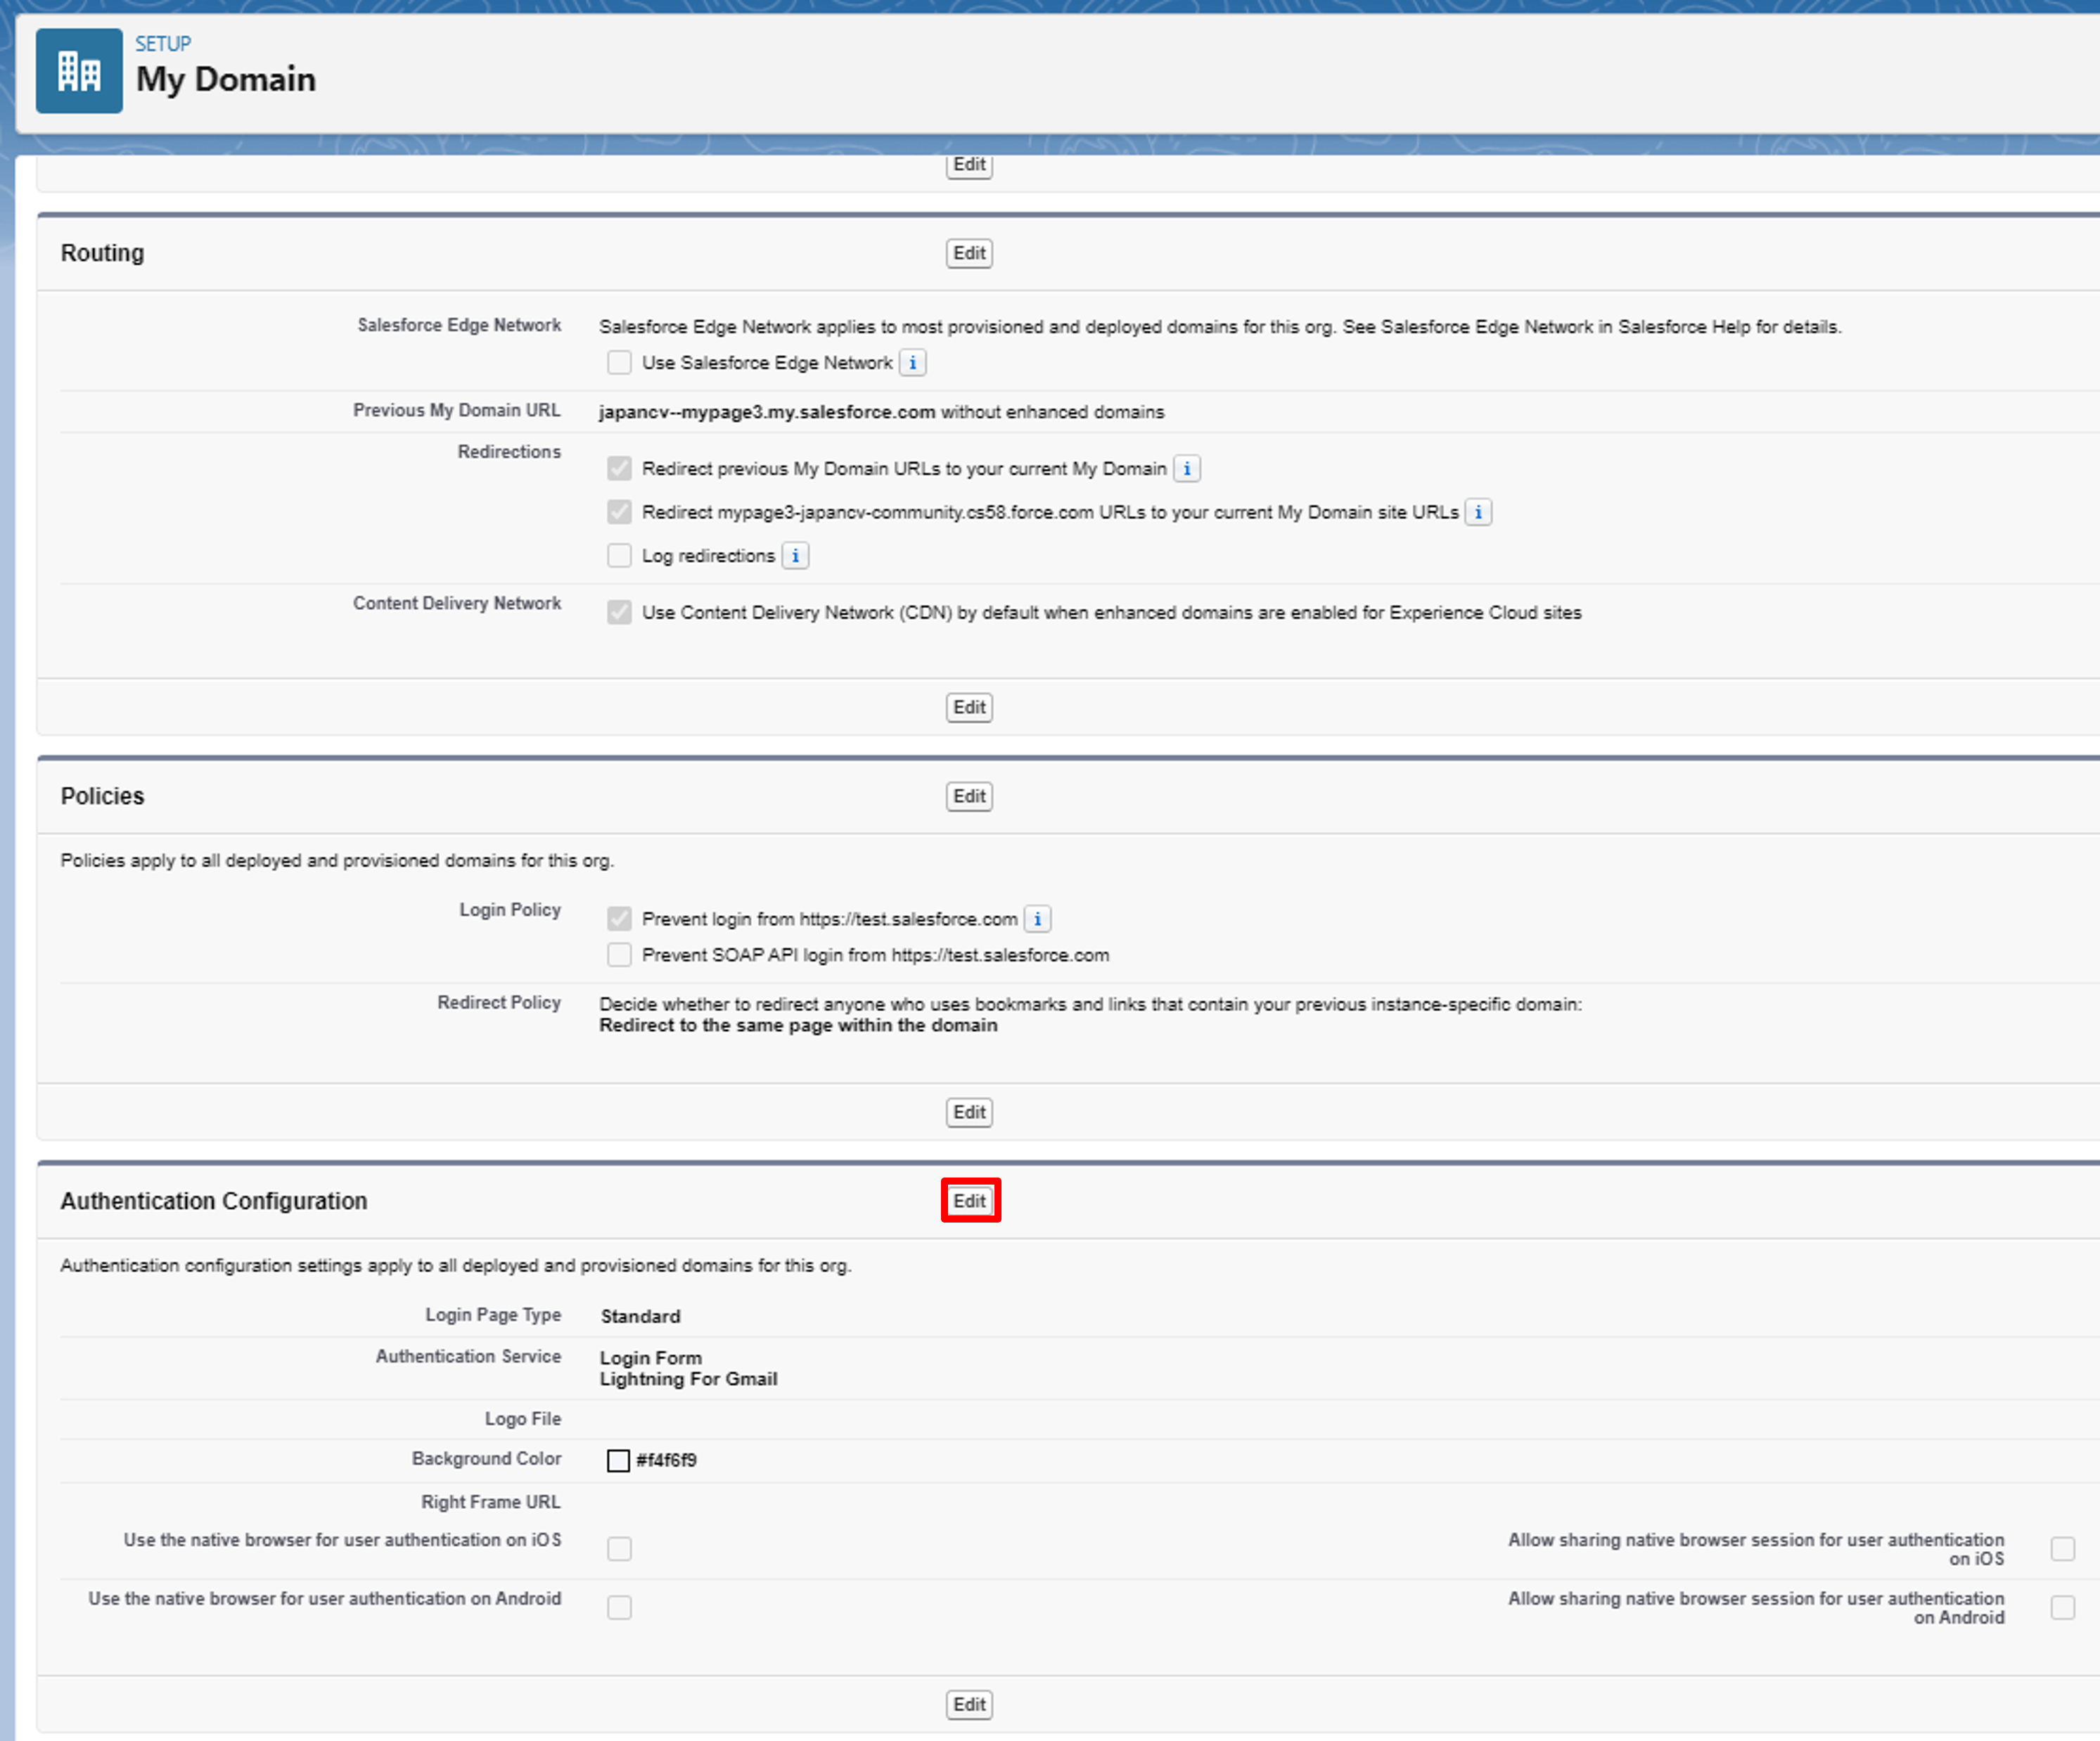
Edit Authentication Configuration
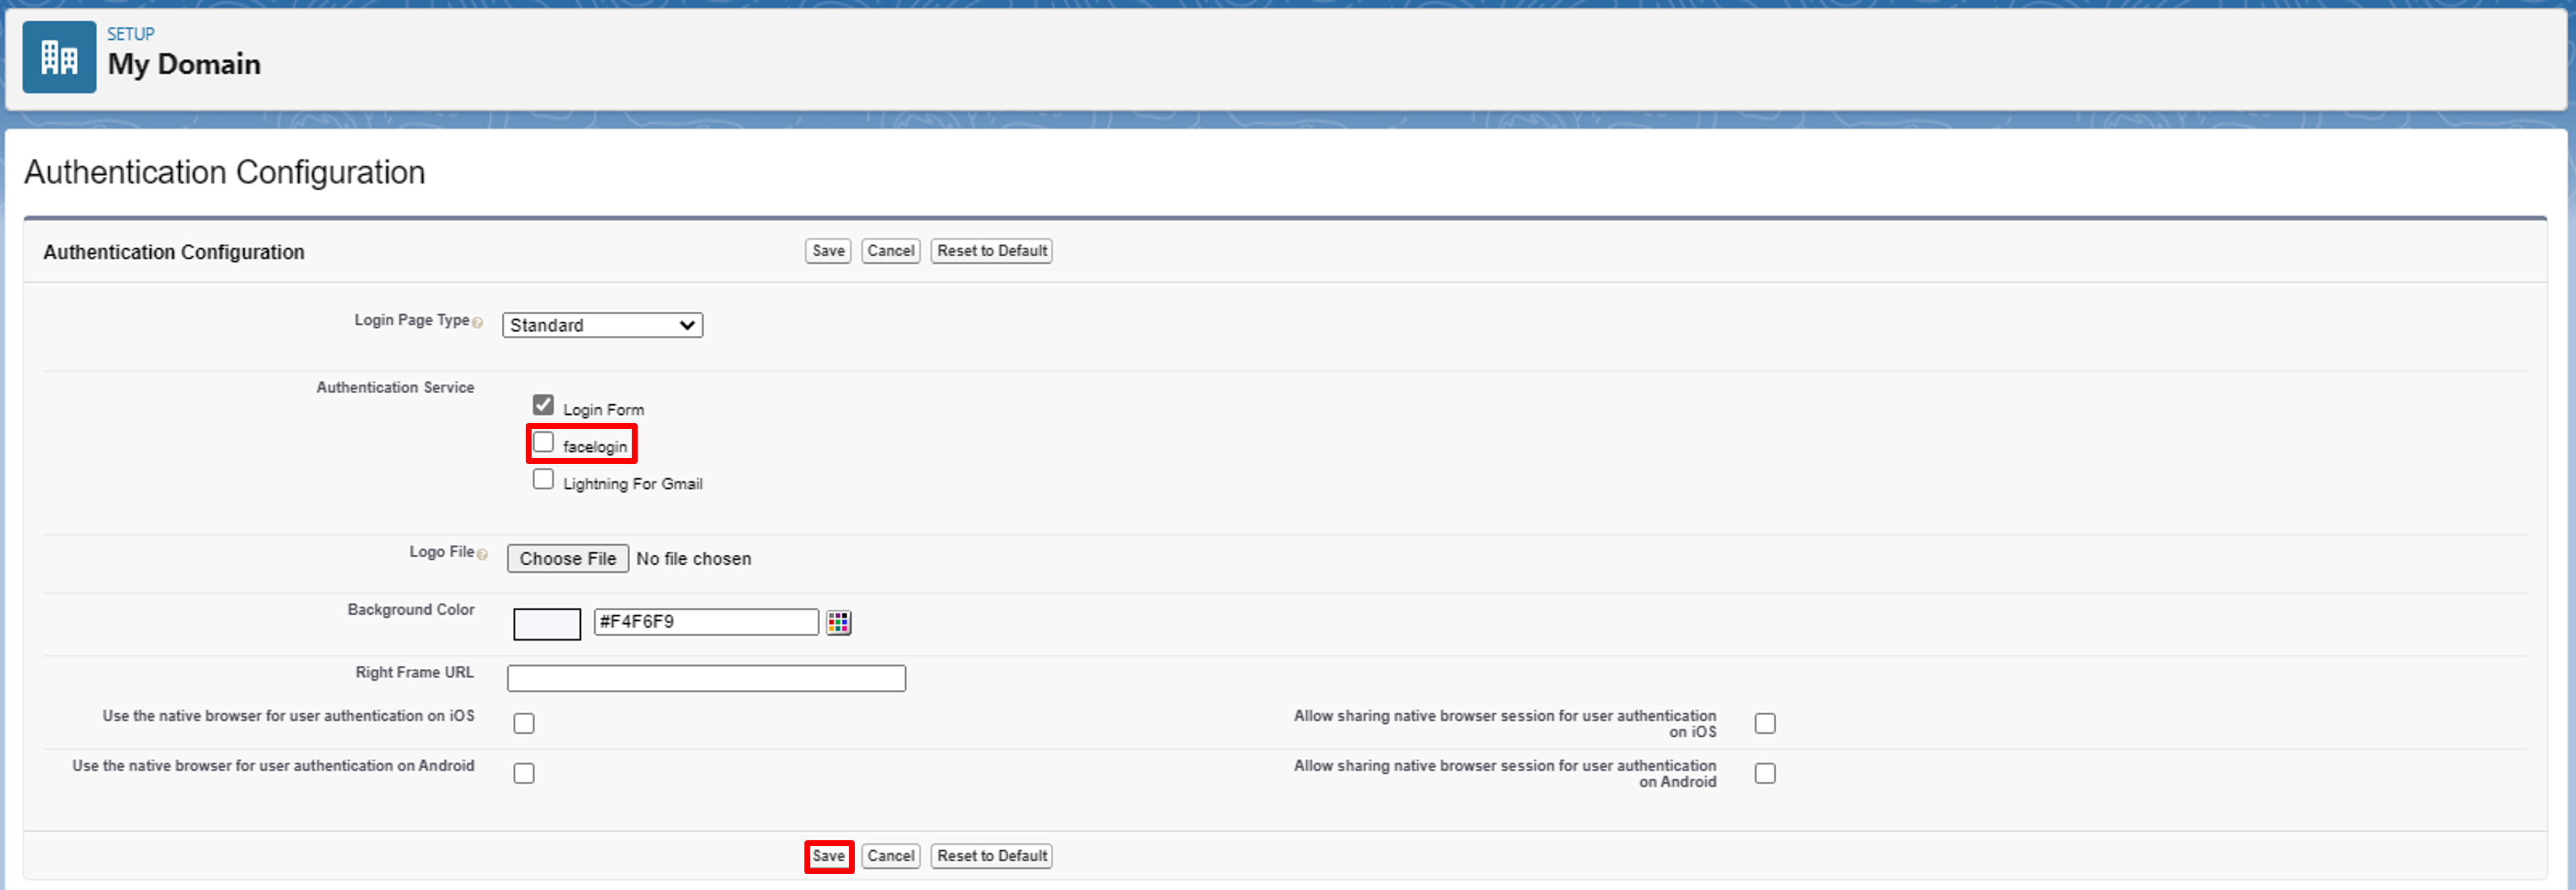
Tick the SAML SSO setting name you created, and click save. The SAML SSO setting will be added to your domain.
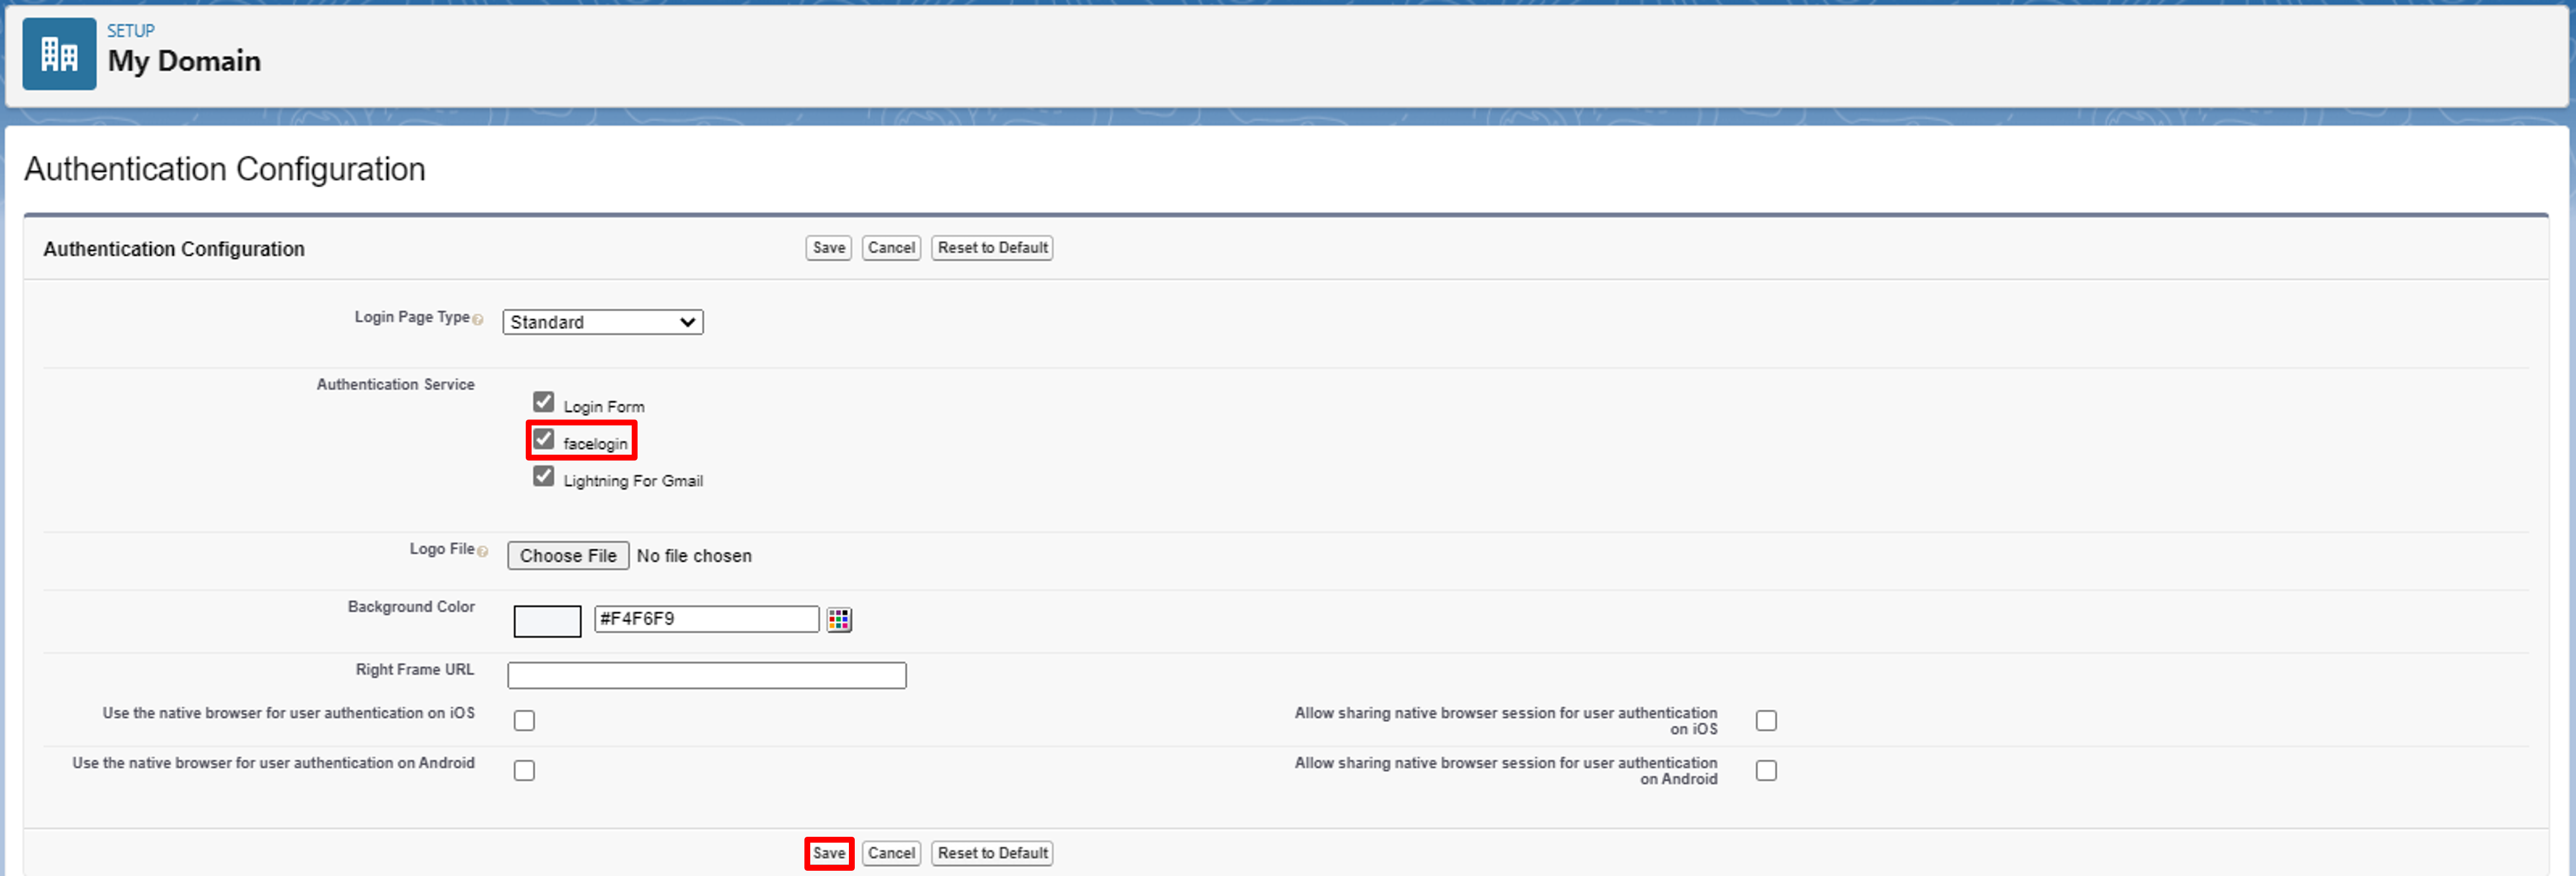
Save Authentication Configuration
Step 6. Set up a client on JCV Cloud Face Login
Refer to the clients section to set up a client.
Fill in the Client name and select Salesforce as the Service provider.
Click the tab to upload the SAML SP metadata file. All settings will be automatically set.
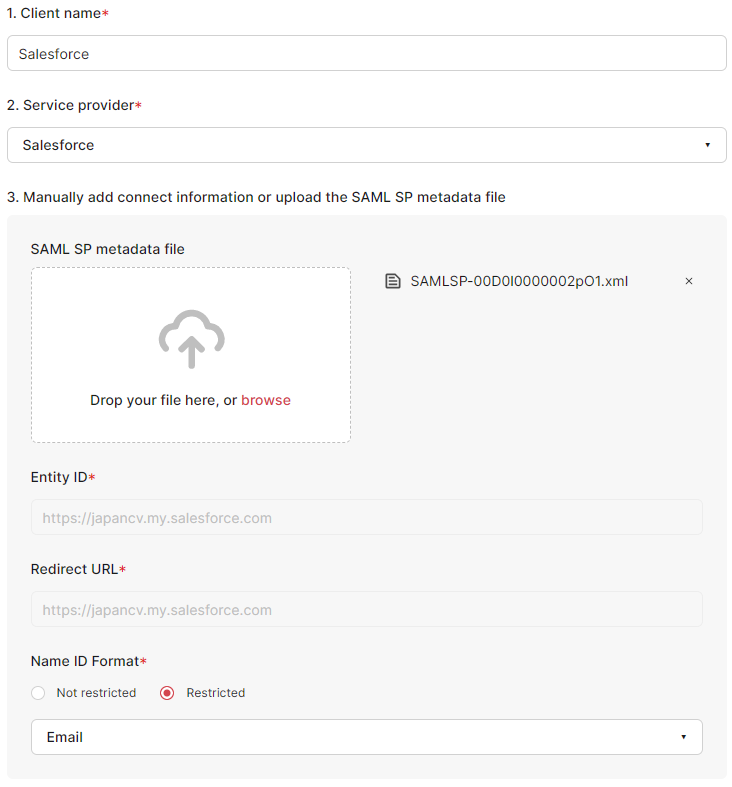
Salesforce client example
This finishes the whole setup process.
Verify the setup
Open the URL of your Salesforce environment and select Log in with facelogin below the Username and Password entry area.
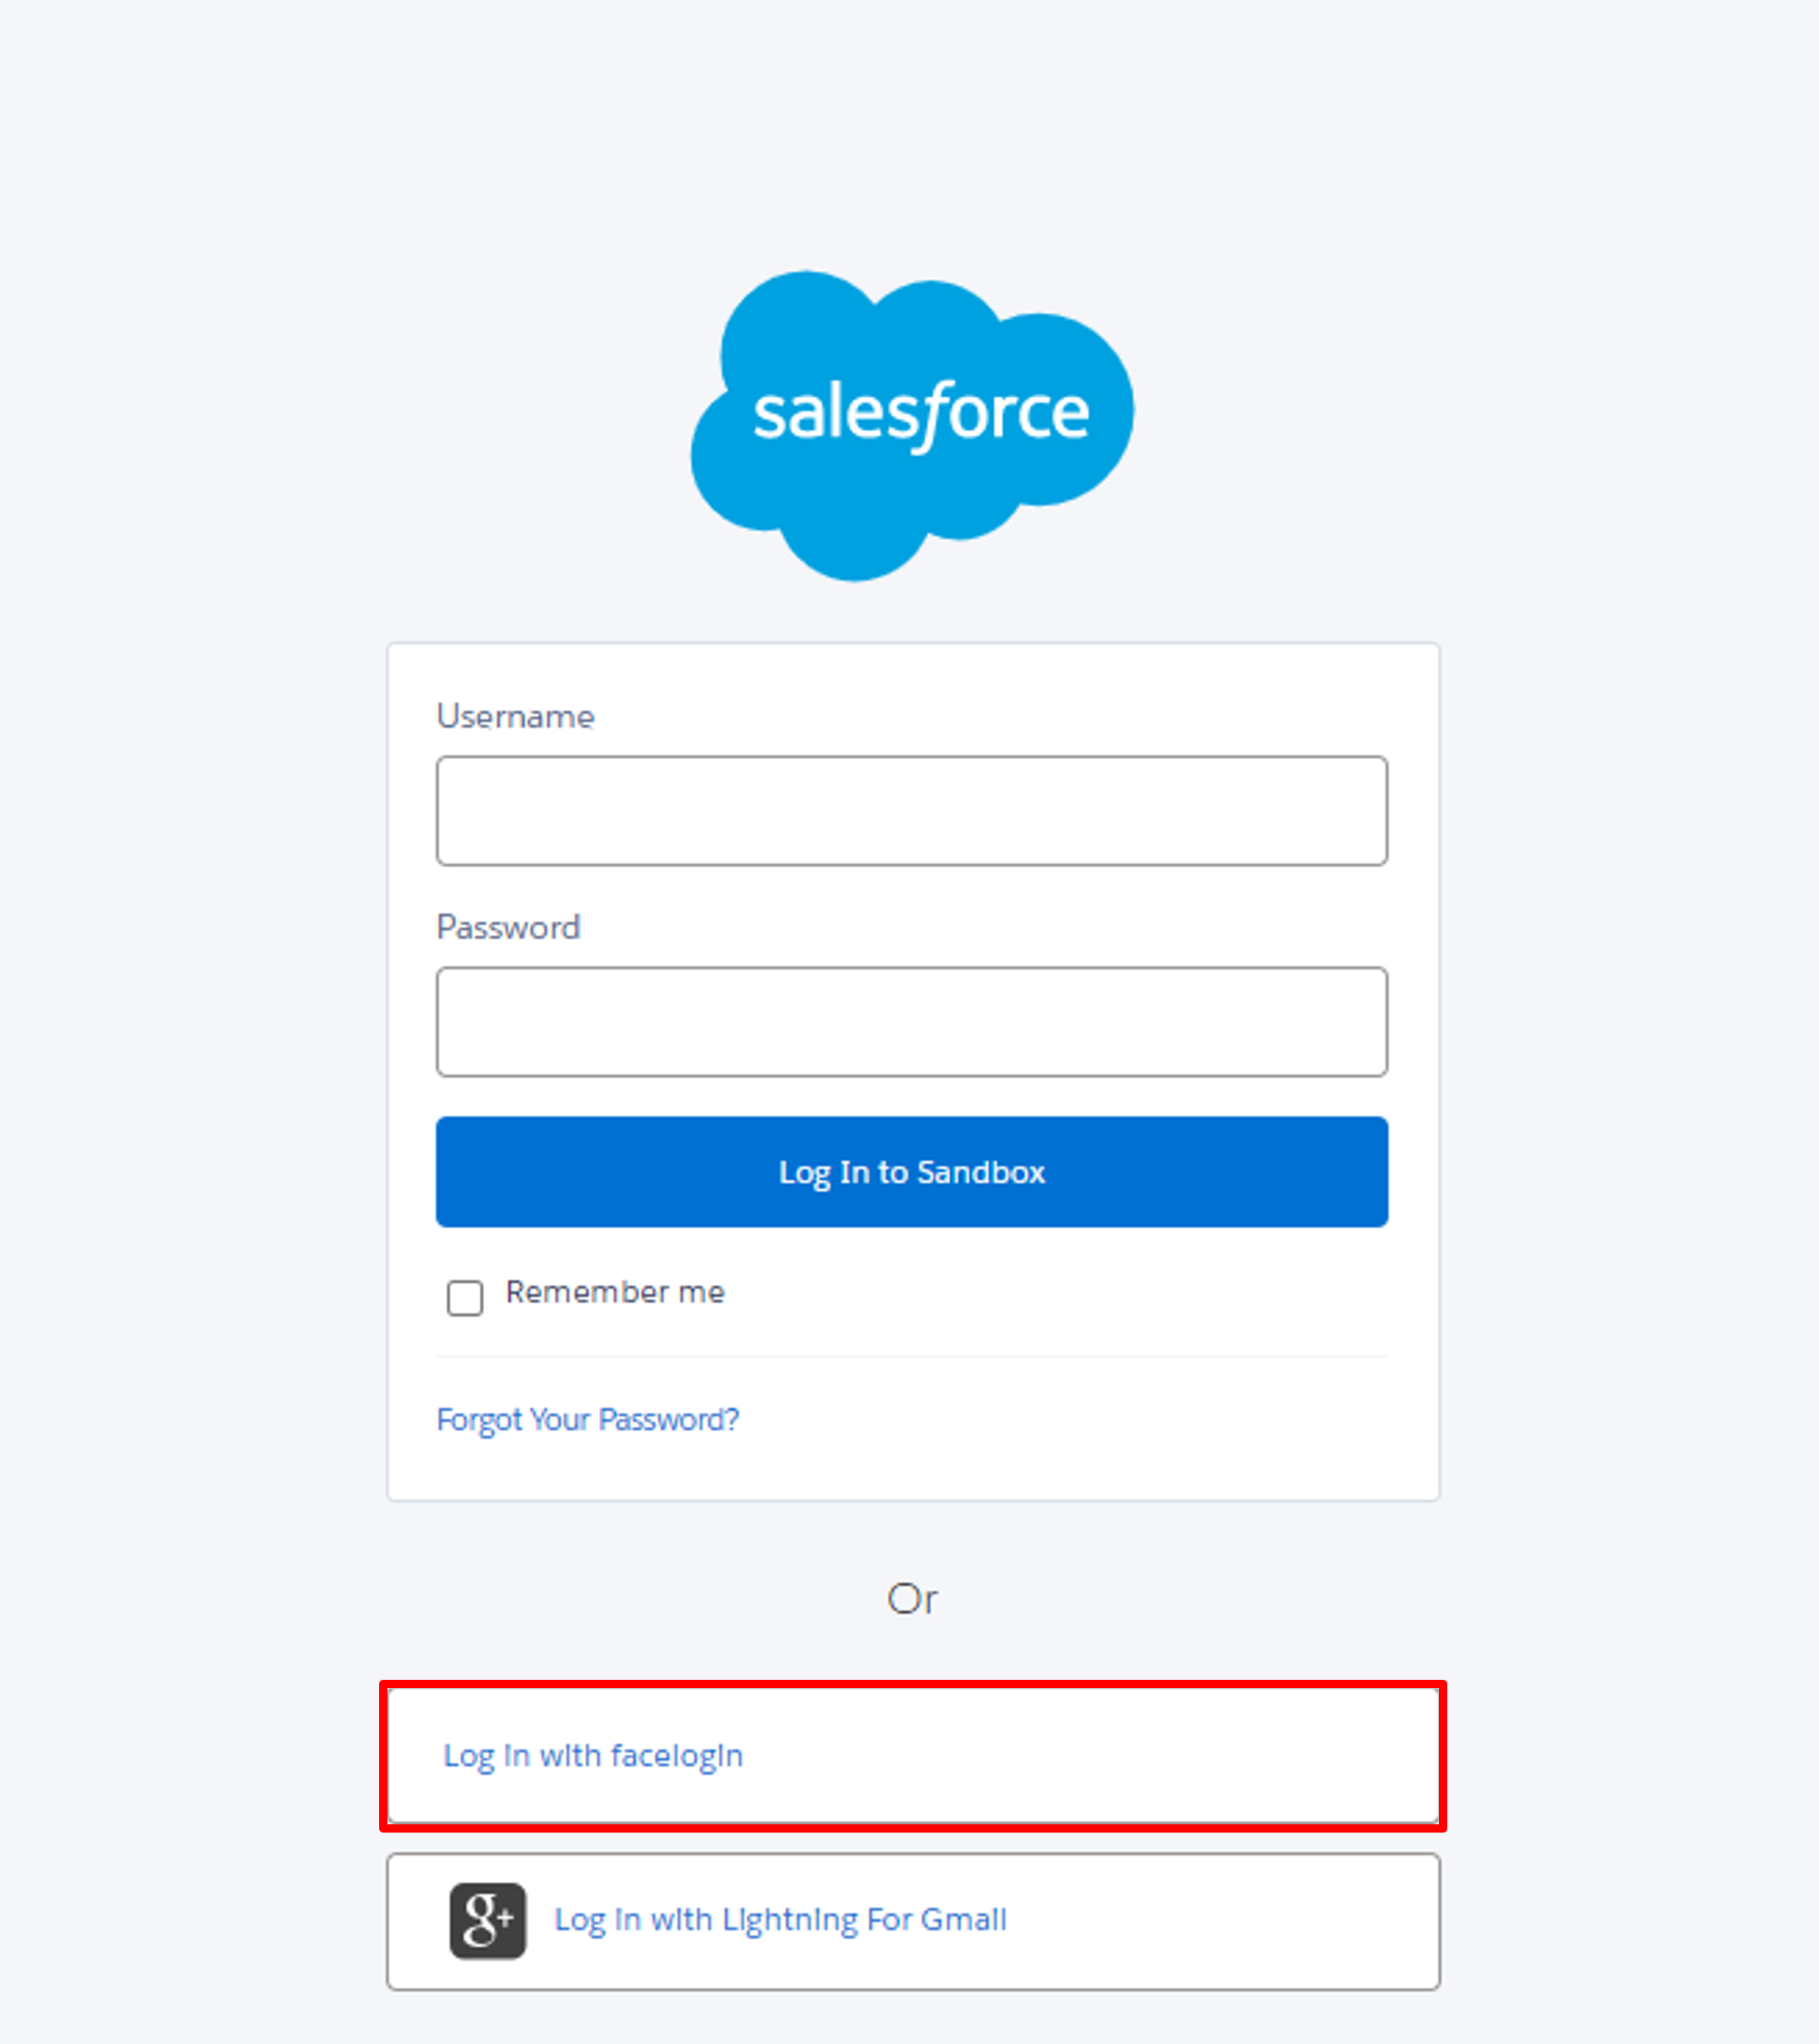
Log in with Face Login
If the above setup is correct, you will be redirected to the face login page.
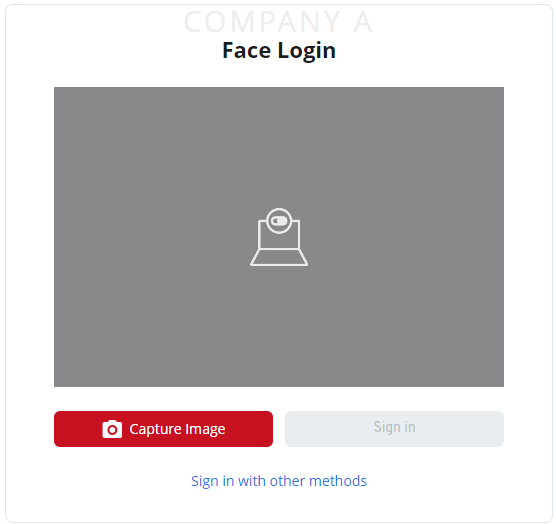
Face Login page
Disable the SSO setup
You must remove the SSO settings from the Salesforce domain to delete the SSO setup.
Open the URL of your Salesforce environment and log in. On the salesforce home page, click the gear icon at the top-right and click Setup. The setup home page will be displayed.
Type domain in the Quick Find bar of the setting home page and select My Domain.
On the Authentication Configuration, click Edit. Unselect the SAML SSO setting name you created, and click save. The SAML SSO setting will be removed from your domain.
Remove Authentication Configuration
On the setup home page, type single in the Quick Find bar and select Single Sign-On Settings.
Delete the SAML Single Sign-On Settings by clicking the del button.
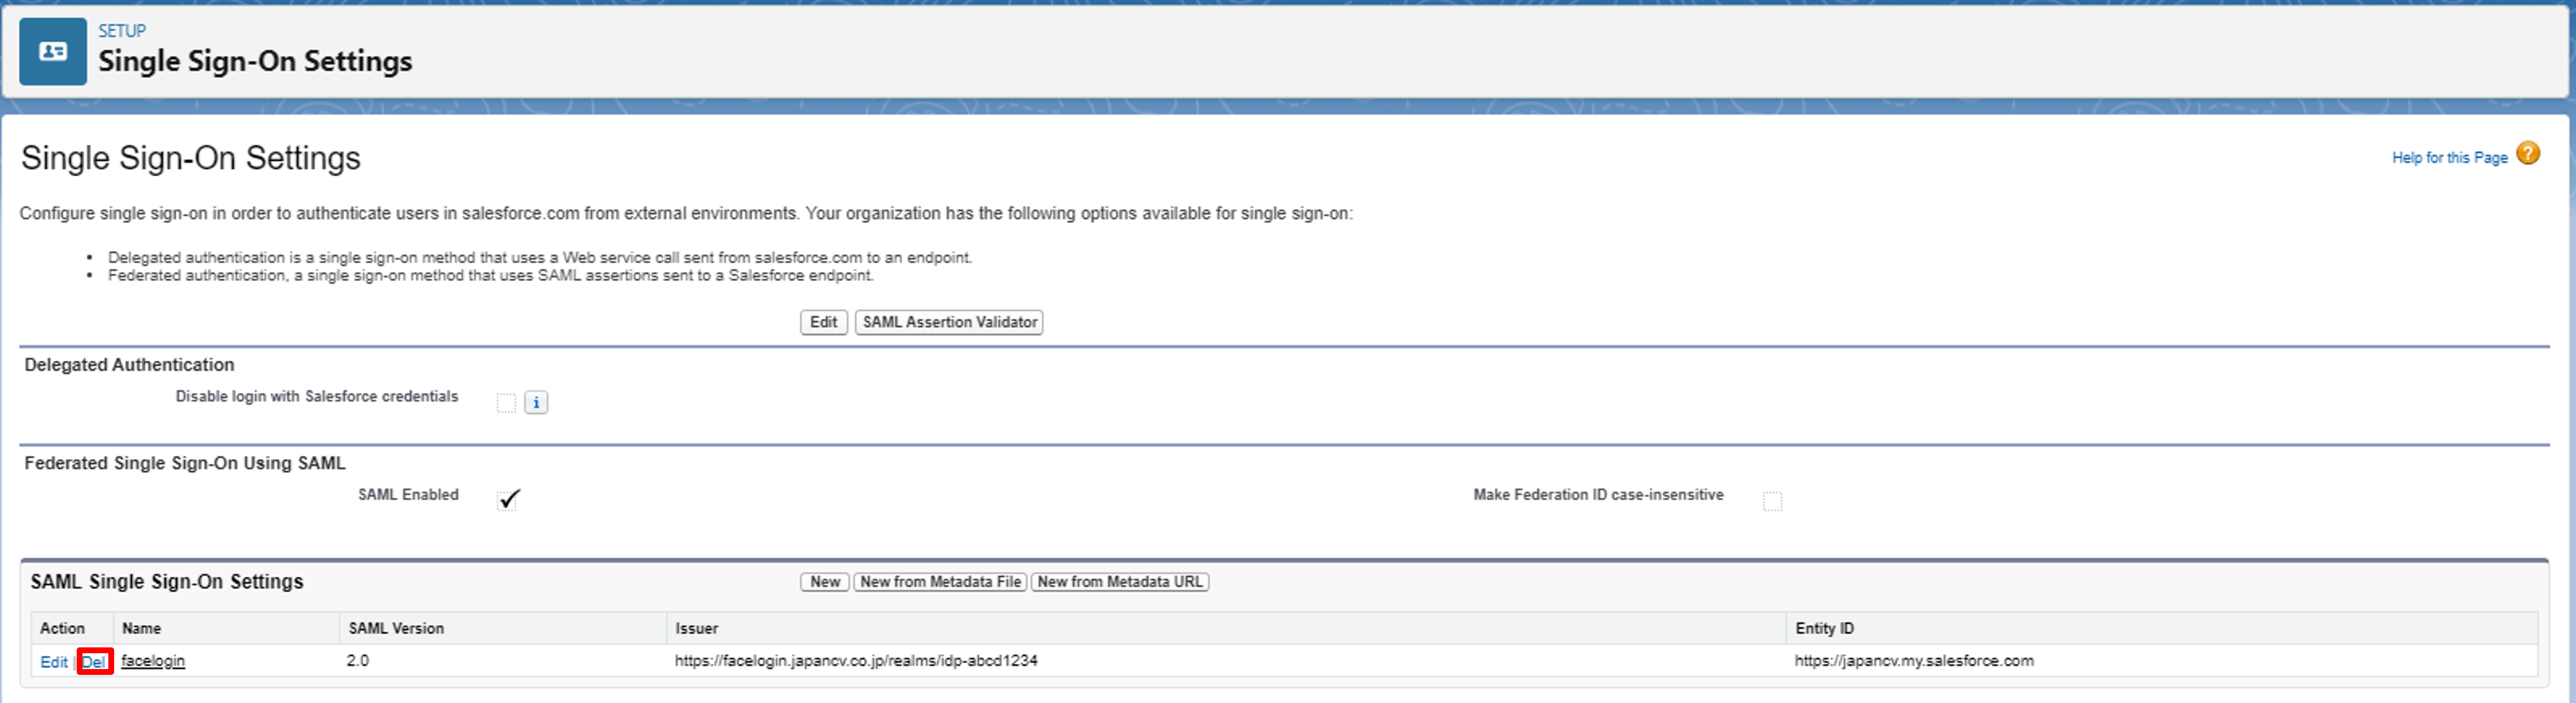
Delete the SAML SSO setting
Updated 11 months ago