
SCIM Server (ID Provisioning)
This page provides detailed information on the SCIM Server setup to establish the provisioning with Microsoft Azure AD.
Identity Manager provides an Azure AD provisioning solution based on SCIM. By setting up the SCIM server and provisioning settings correctly, any changes (adding, deleting, and updating) of identities on Azure AD will be reflected in Identity Manager by the frequency set by the users.
Step 1. Enable SCIM Server
Click the SCIM Server tab on the screen, and the SCIM Server page will be displayed.
To enable the SCIM Server, switch the bar to enable, and detailed information about the SCIM server will be displayed.
Step 2. Open the Azure AD Console
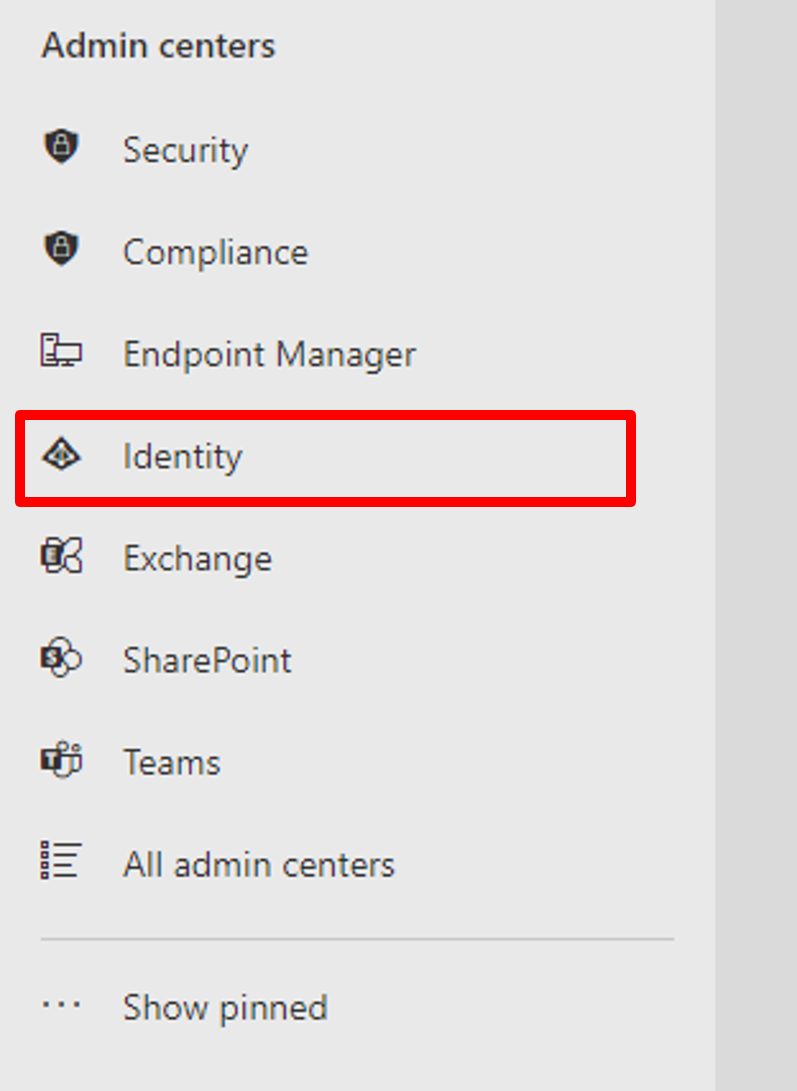
Open the Microsoft 365 admin center. Click Show all on the left-side menu first to display all available options. After all items are displayed, click Identity in the Admin centers to bring up the Azure AD Console.
Go to the Azure AD console
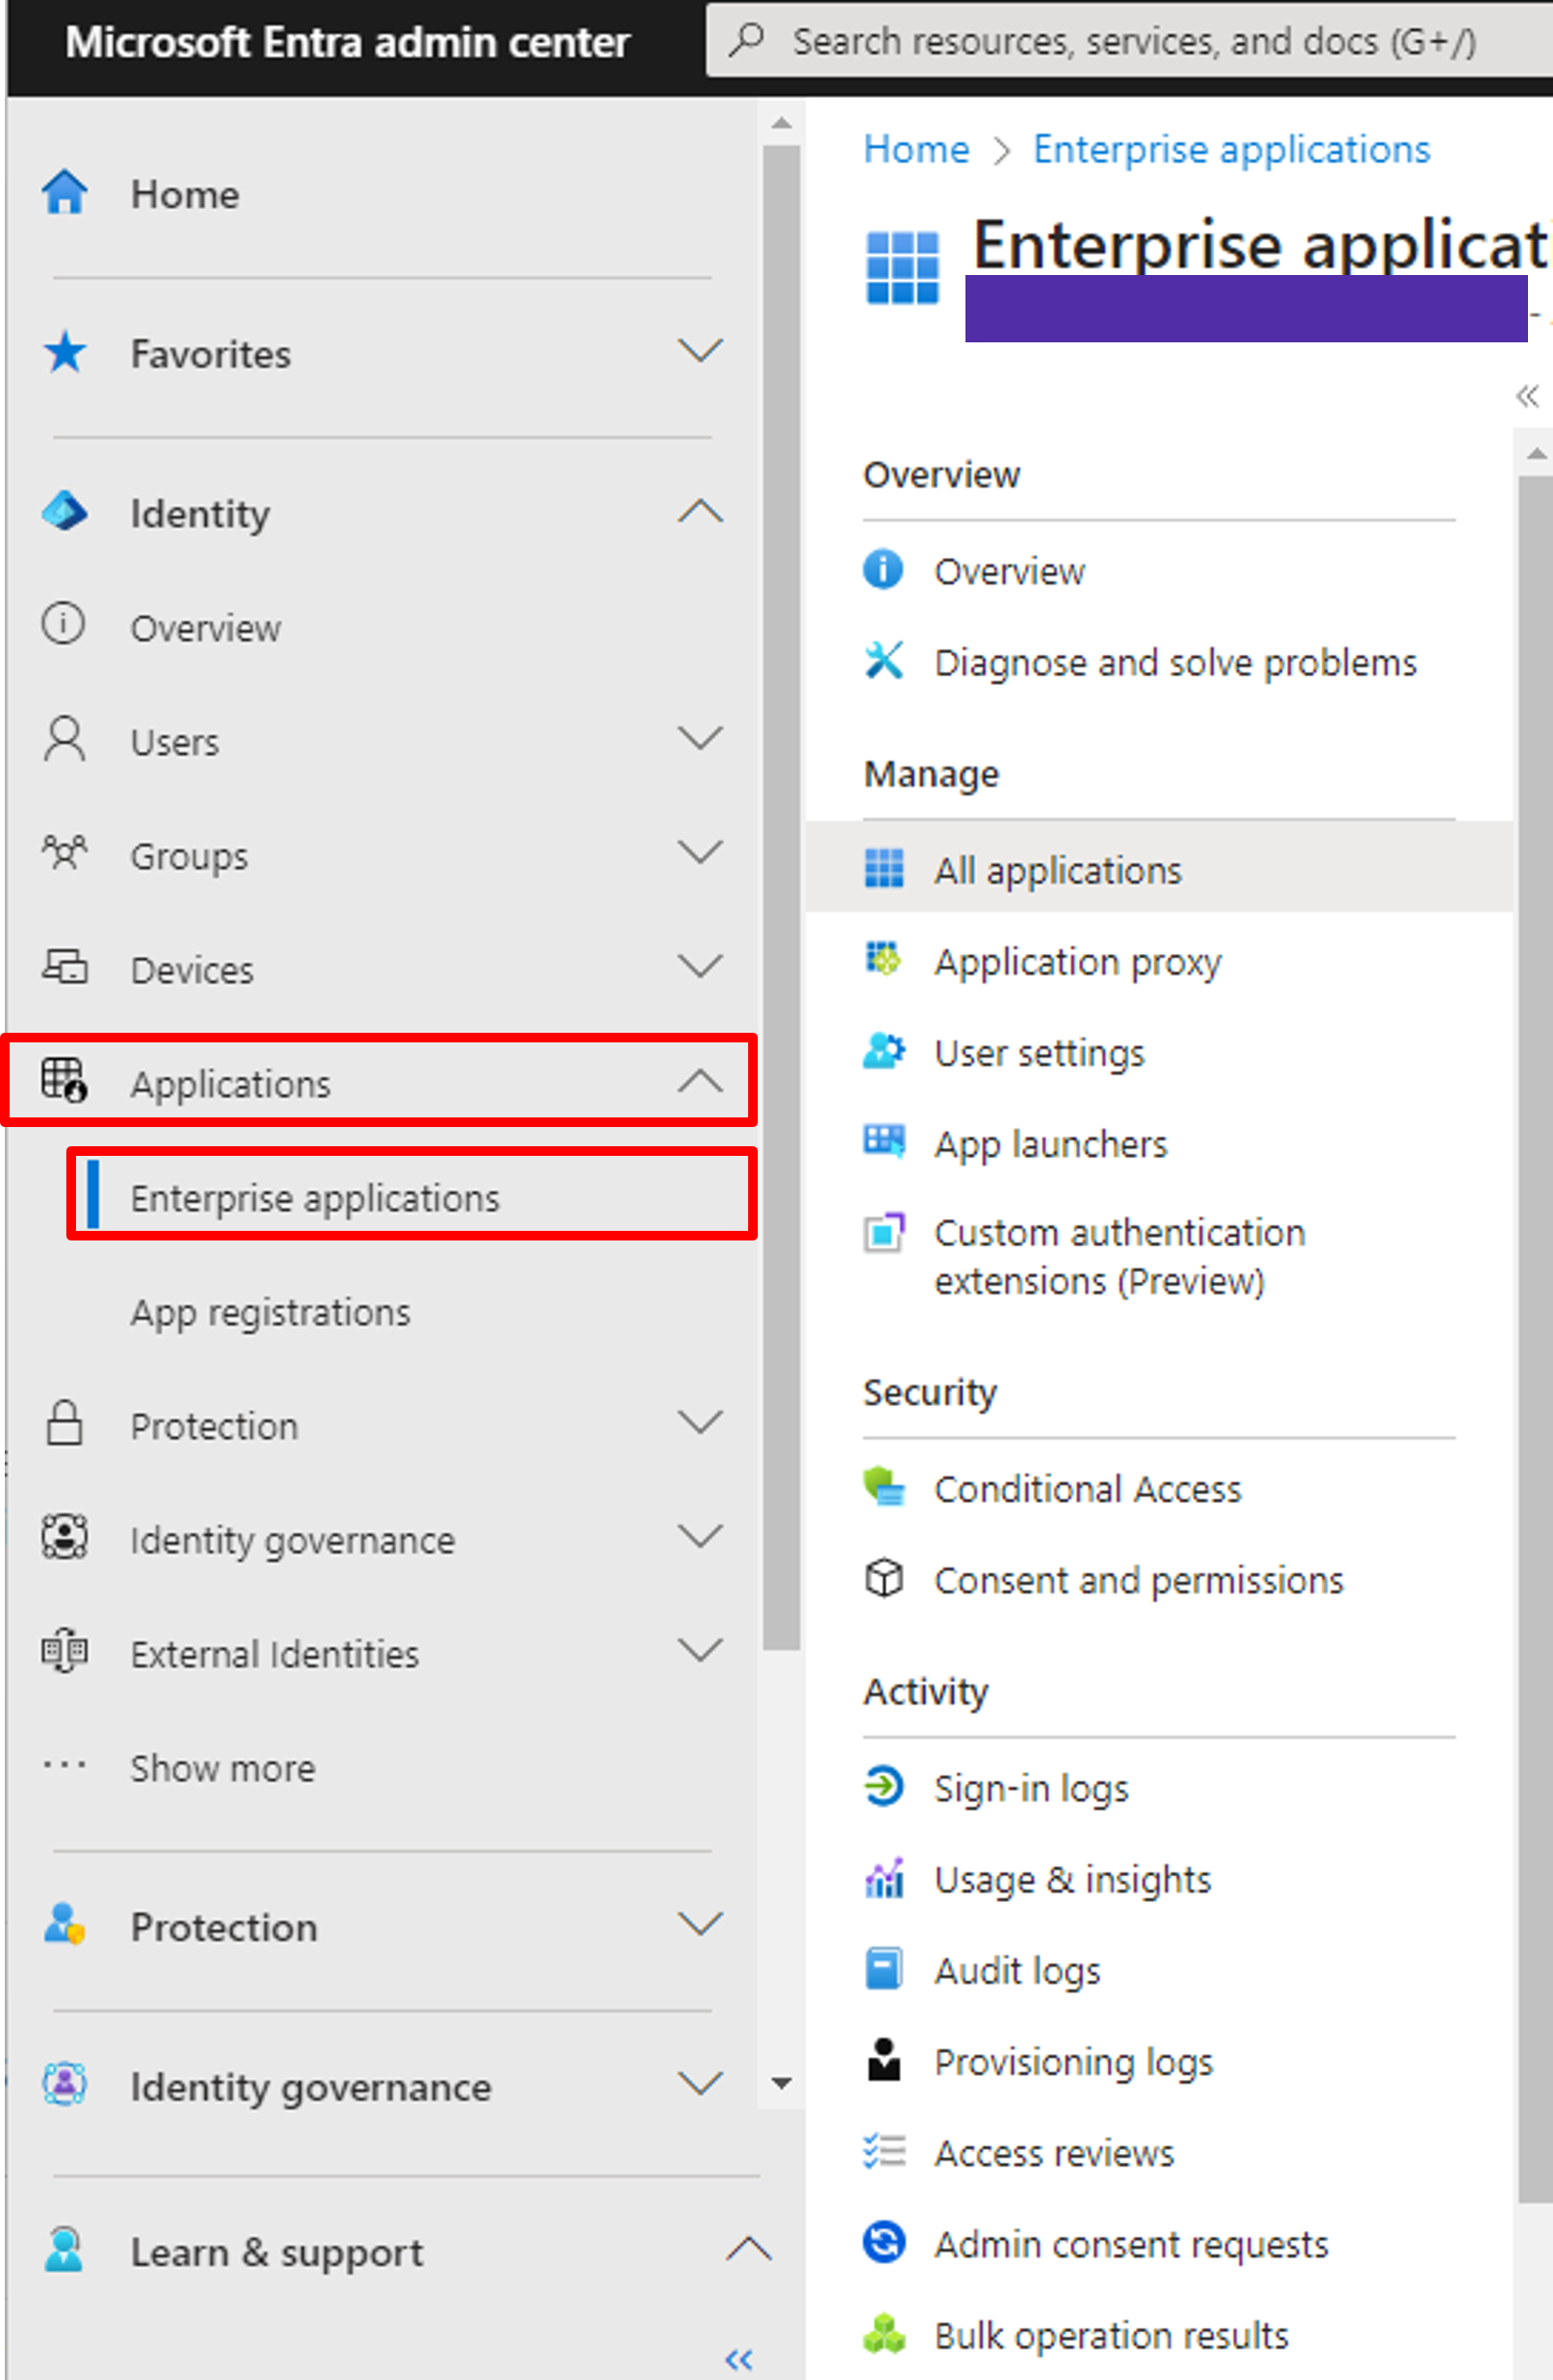
On the left of the Azure AD Console (also called Microsoft Entra admin center), click Applications - Enterprise applications under the Identity category.
Go to the Application settings
Step 3. Add an application for provisioning
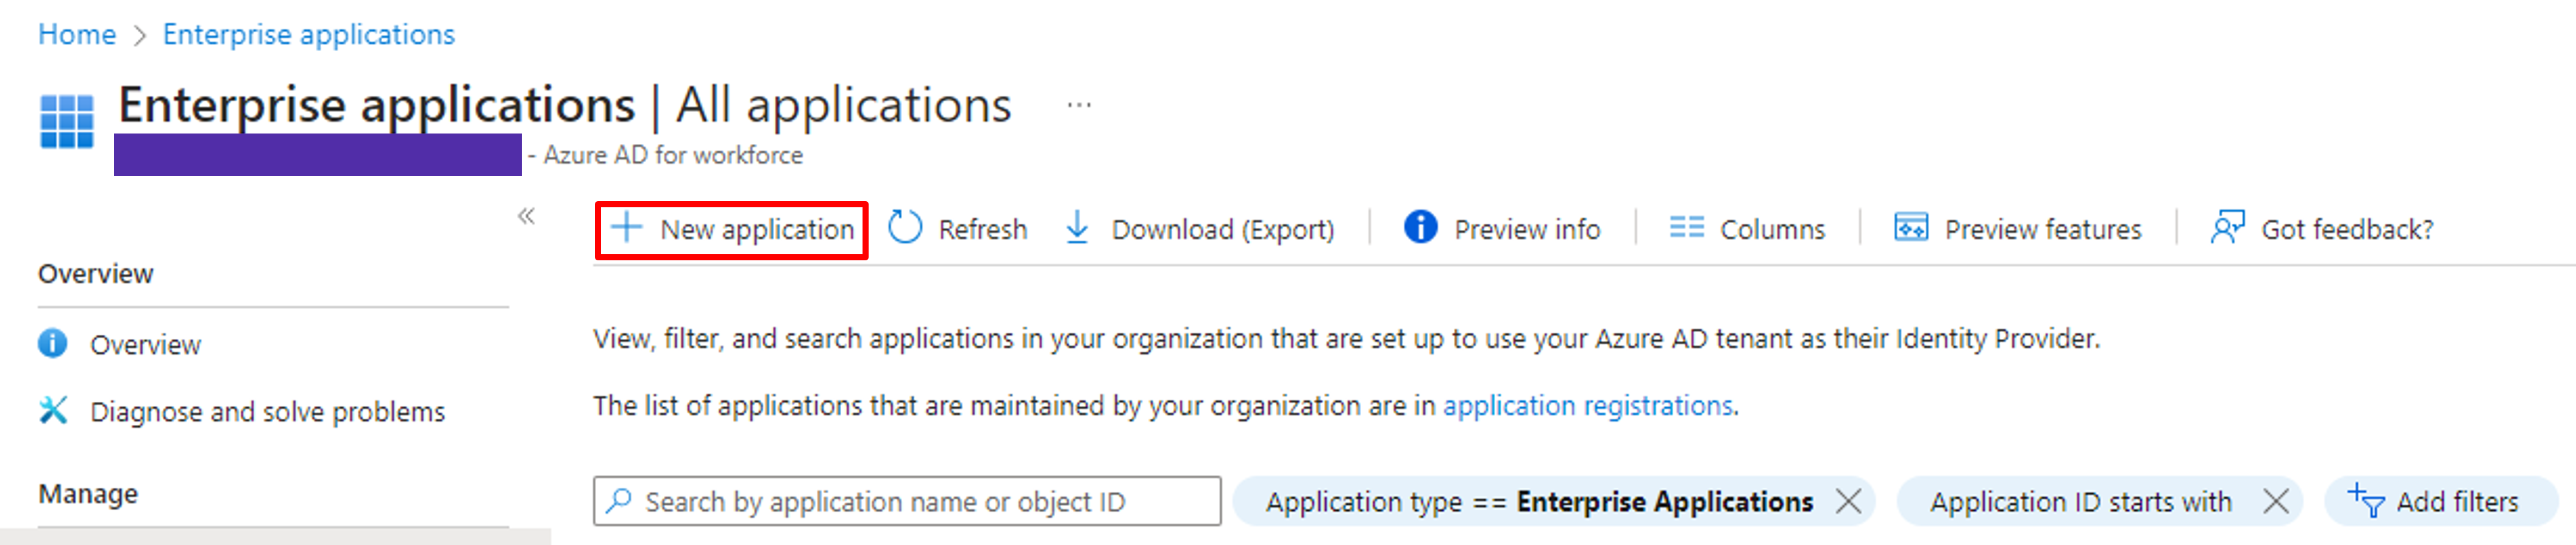
Click + New application on the upper part of the Enterprise application screen.
Add a new application
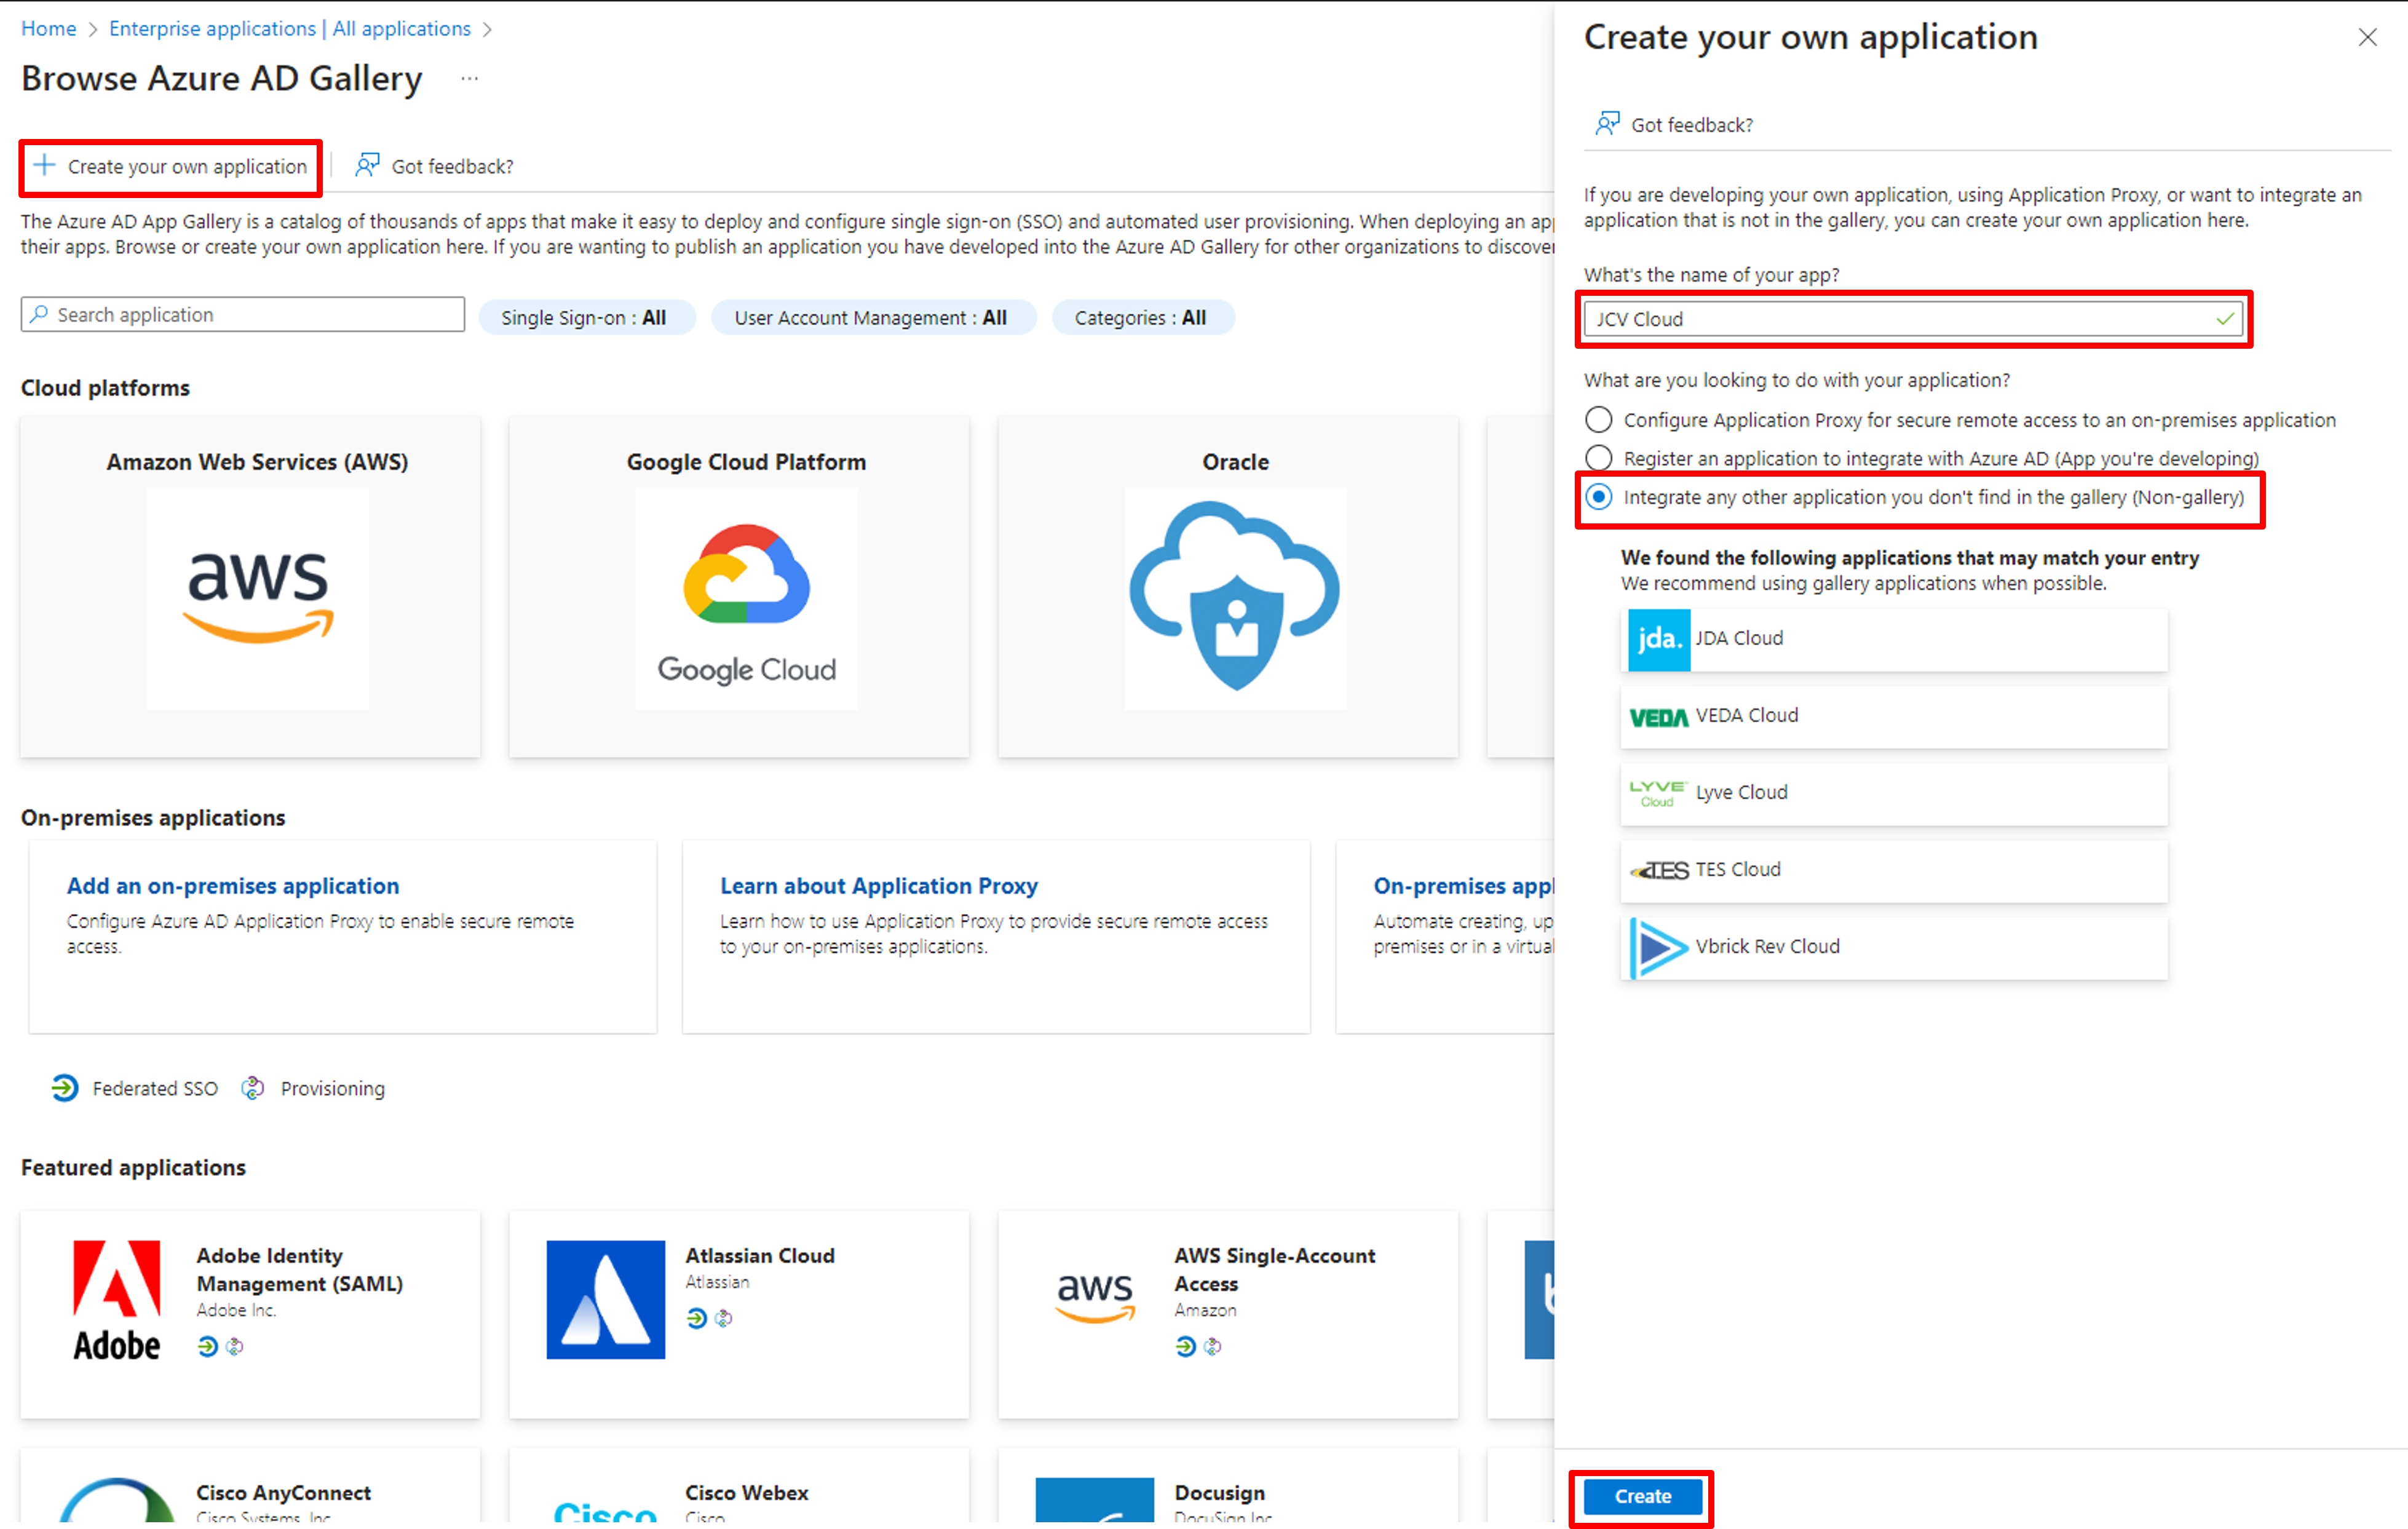
Click Create your own application, and the customized application creation page will be displayed on the right side of the screen. Type in the app's name, select the Integrate any other application you don't find in the gallery (Non-gallery) option, and click Create to finish creating the application. We here use JCV Cloud as an example. You can change it to any name you want.
Create application
It might take some time for the application to be created. Please wait patiently.
Step 4. Apply applications to users and groups
After creating the application, on the overview of the application, click 1. Assign users and groups.
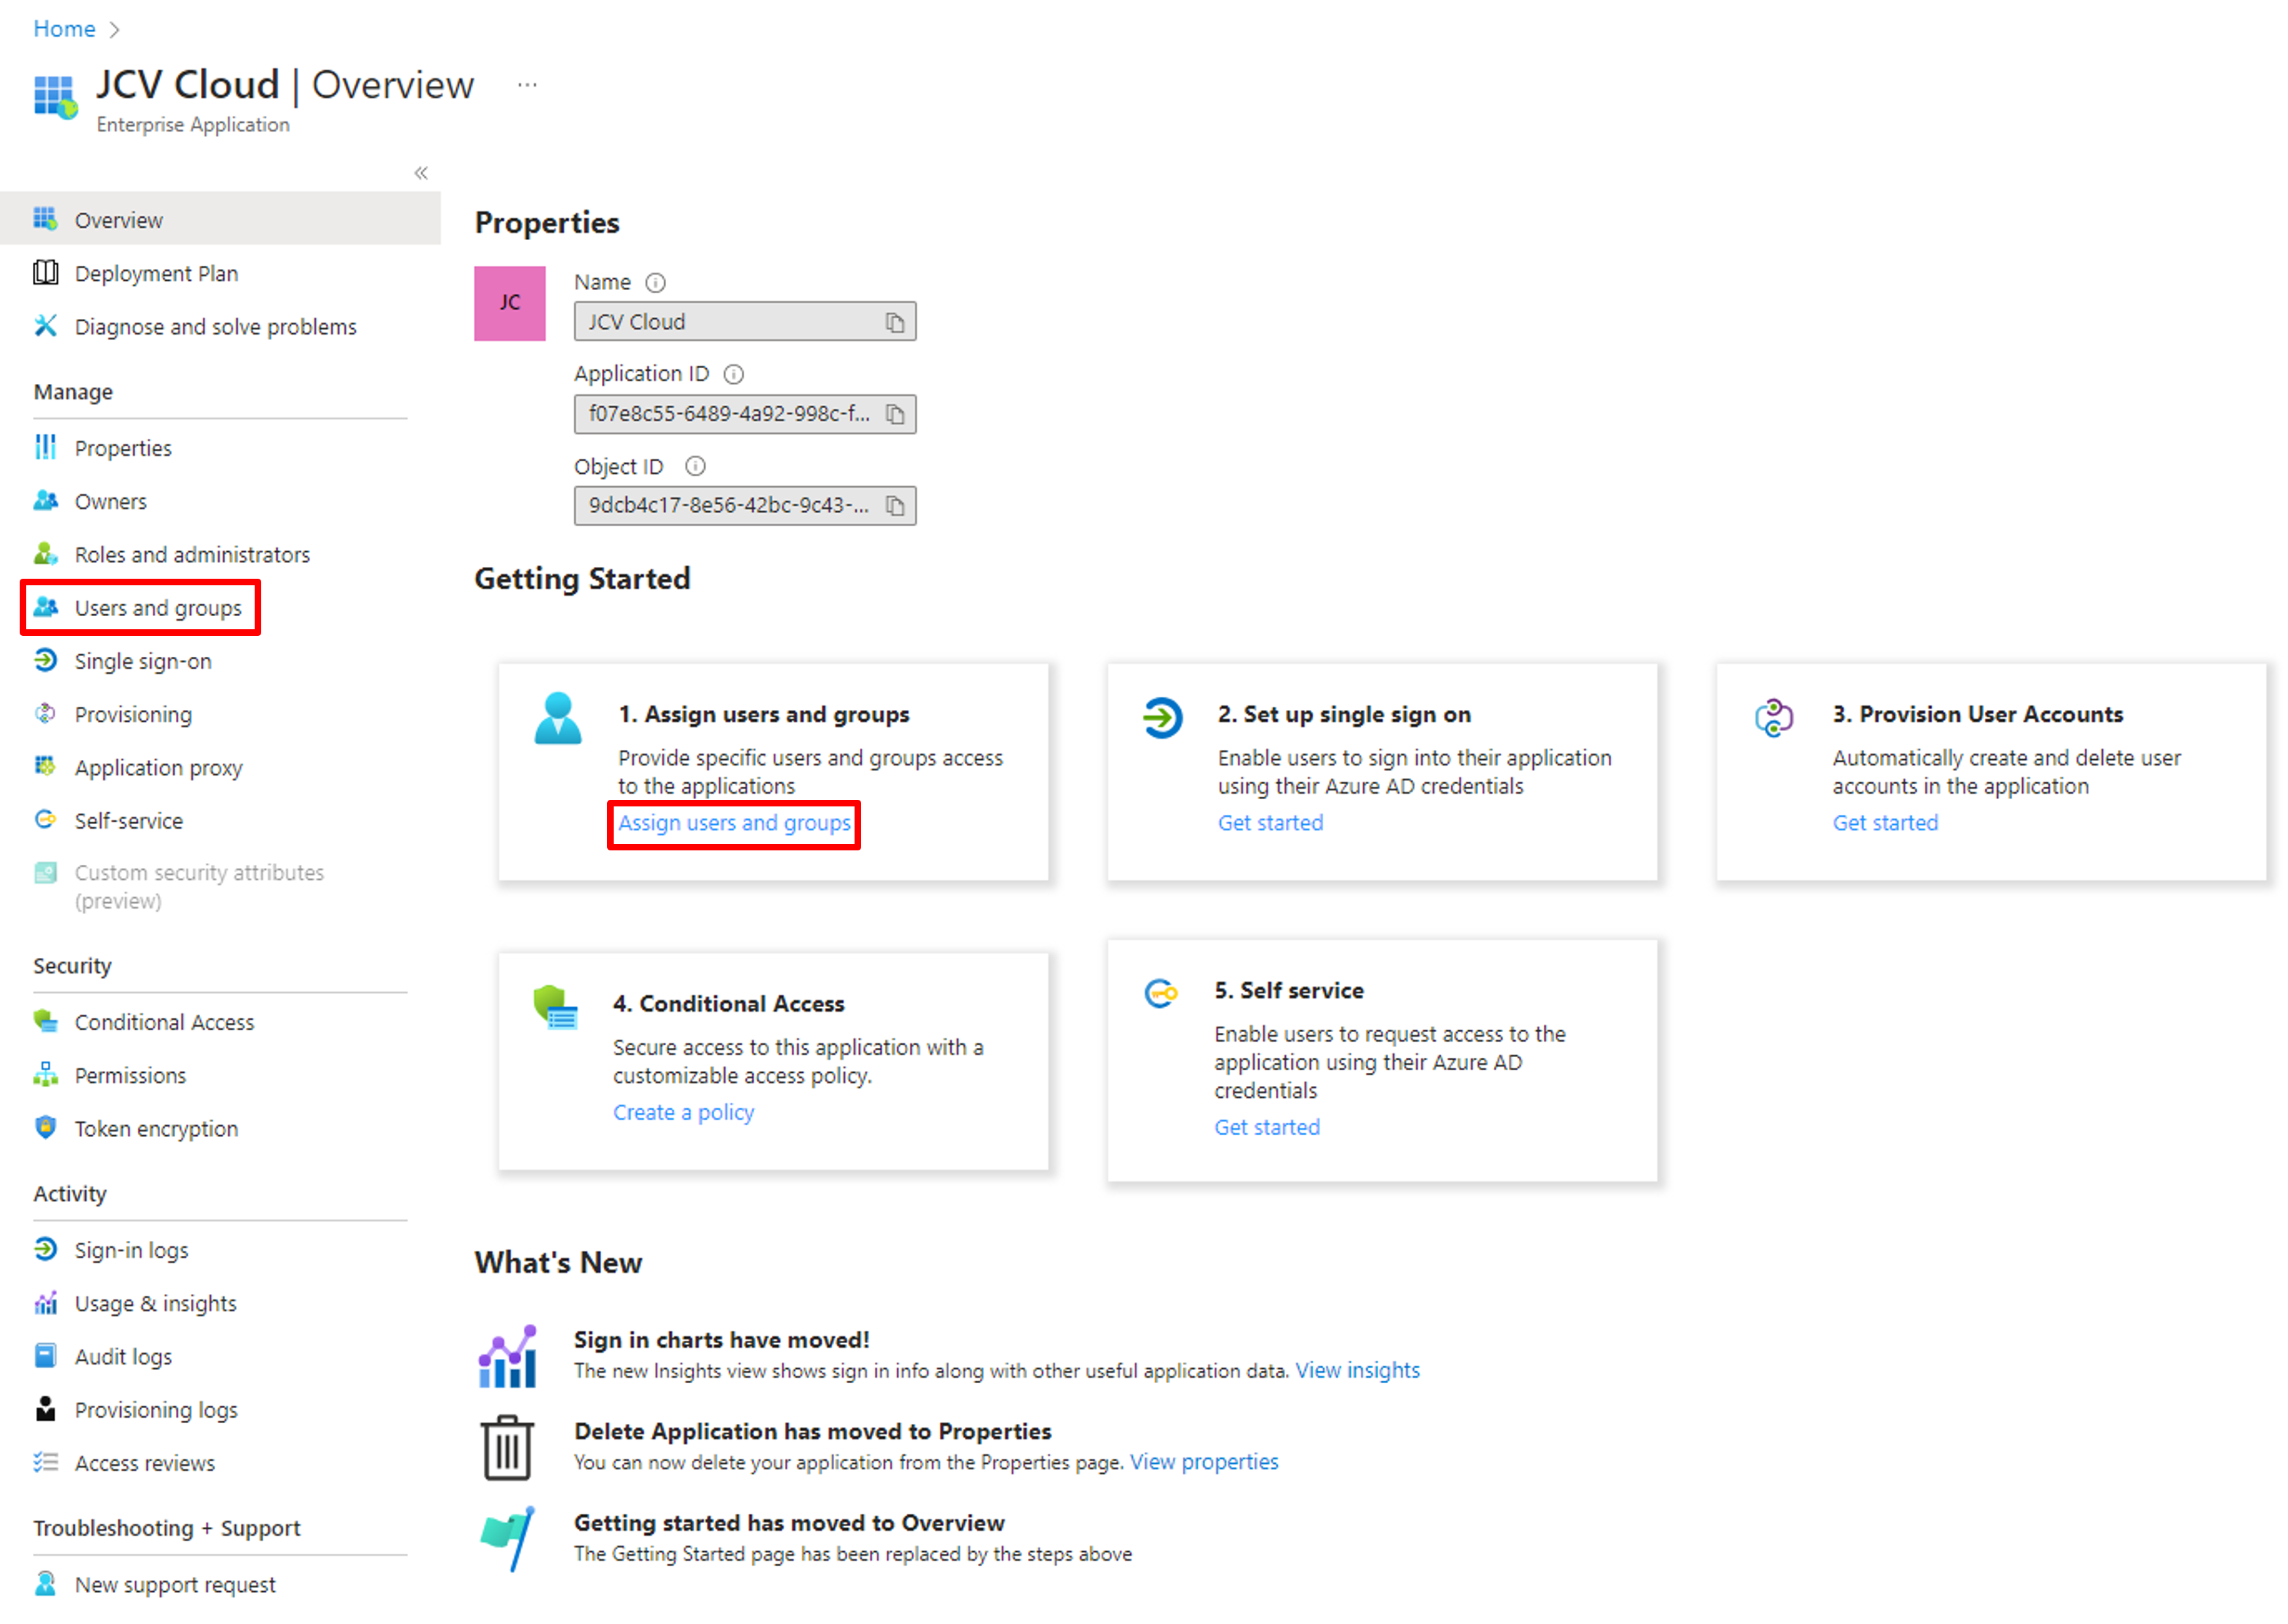
Go to Assign users and groups
Click Add user/group.
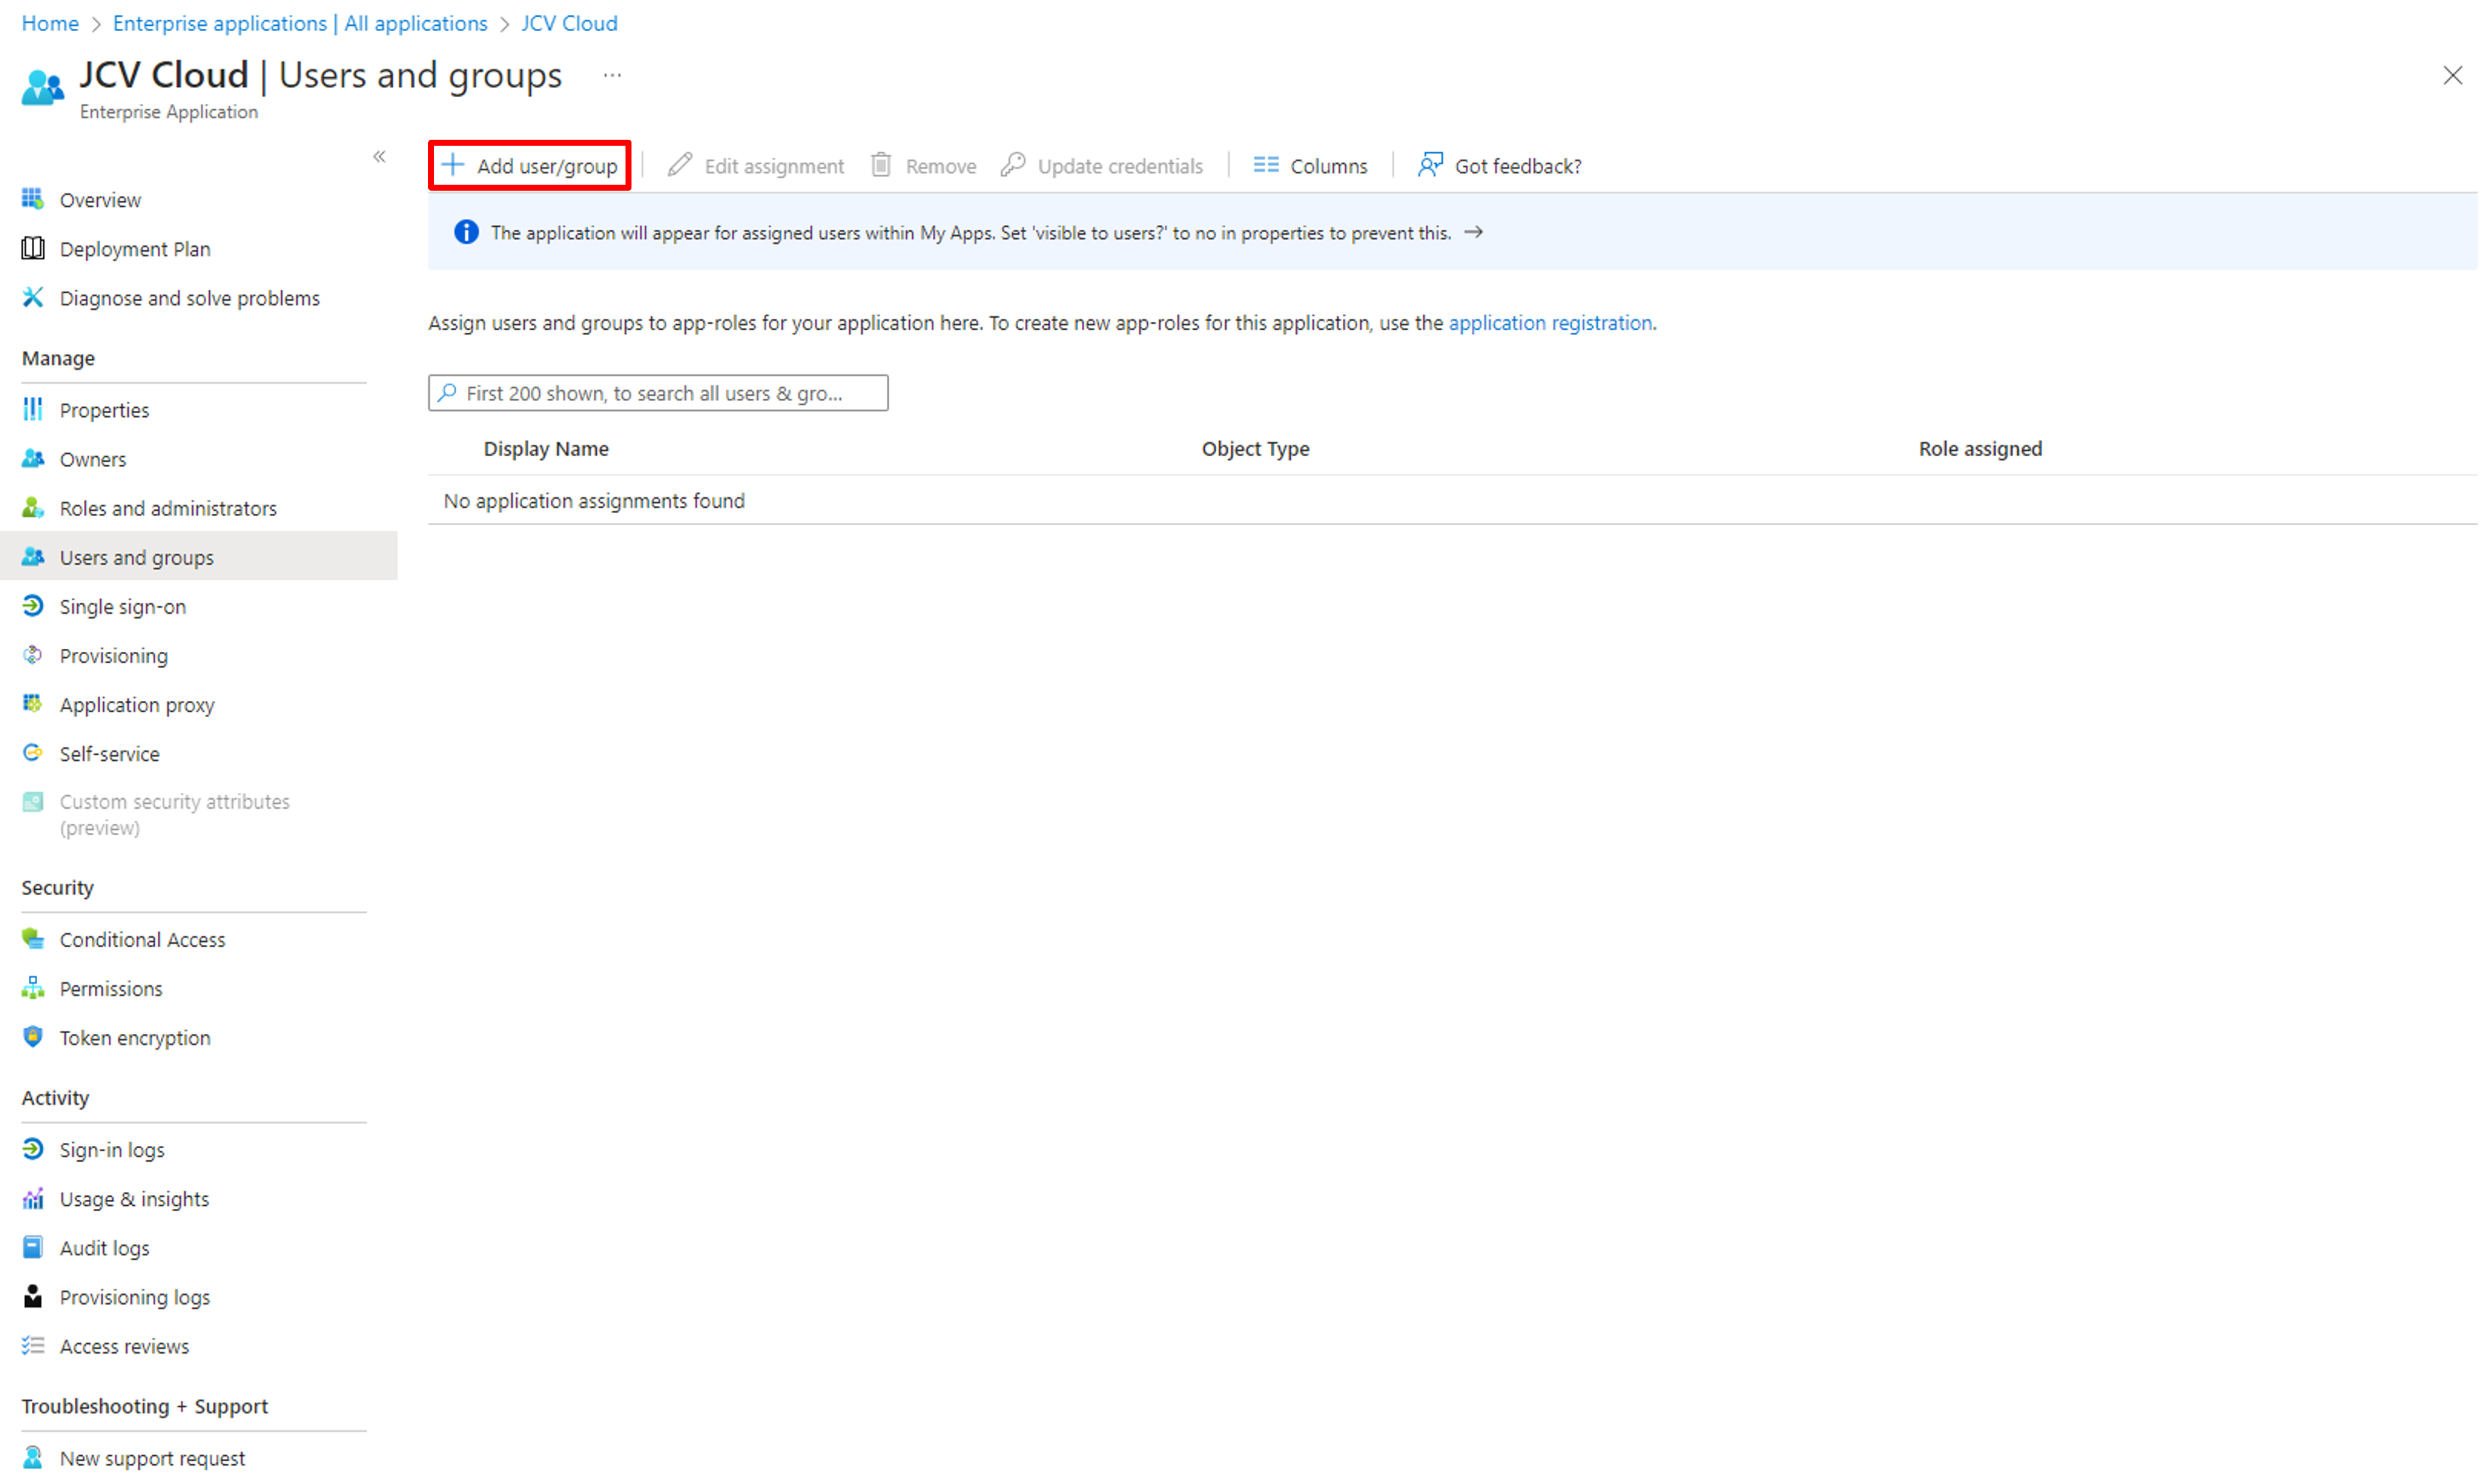
Add users/groups
Click None Selected first, type the keyword in the search bar, select the target groups or users, click Select to apply the selection, and click Assign to save.
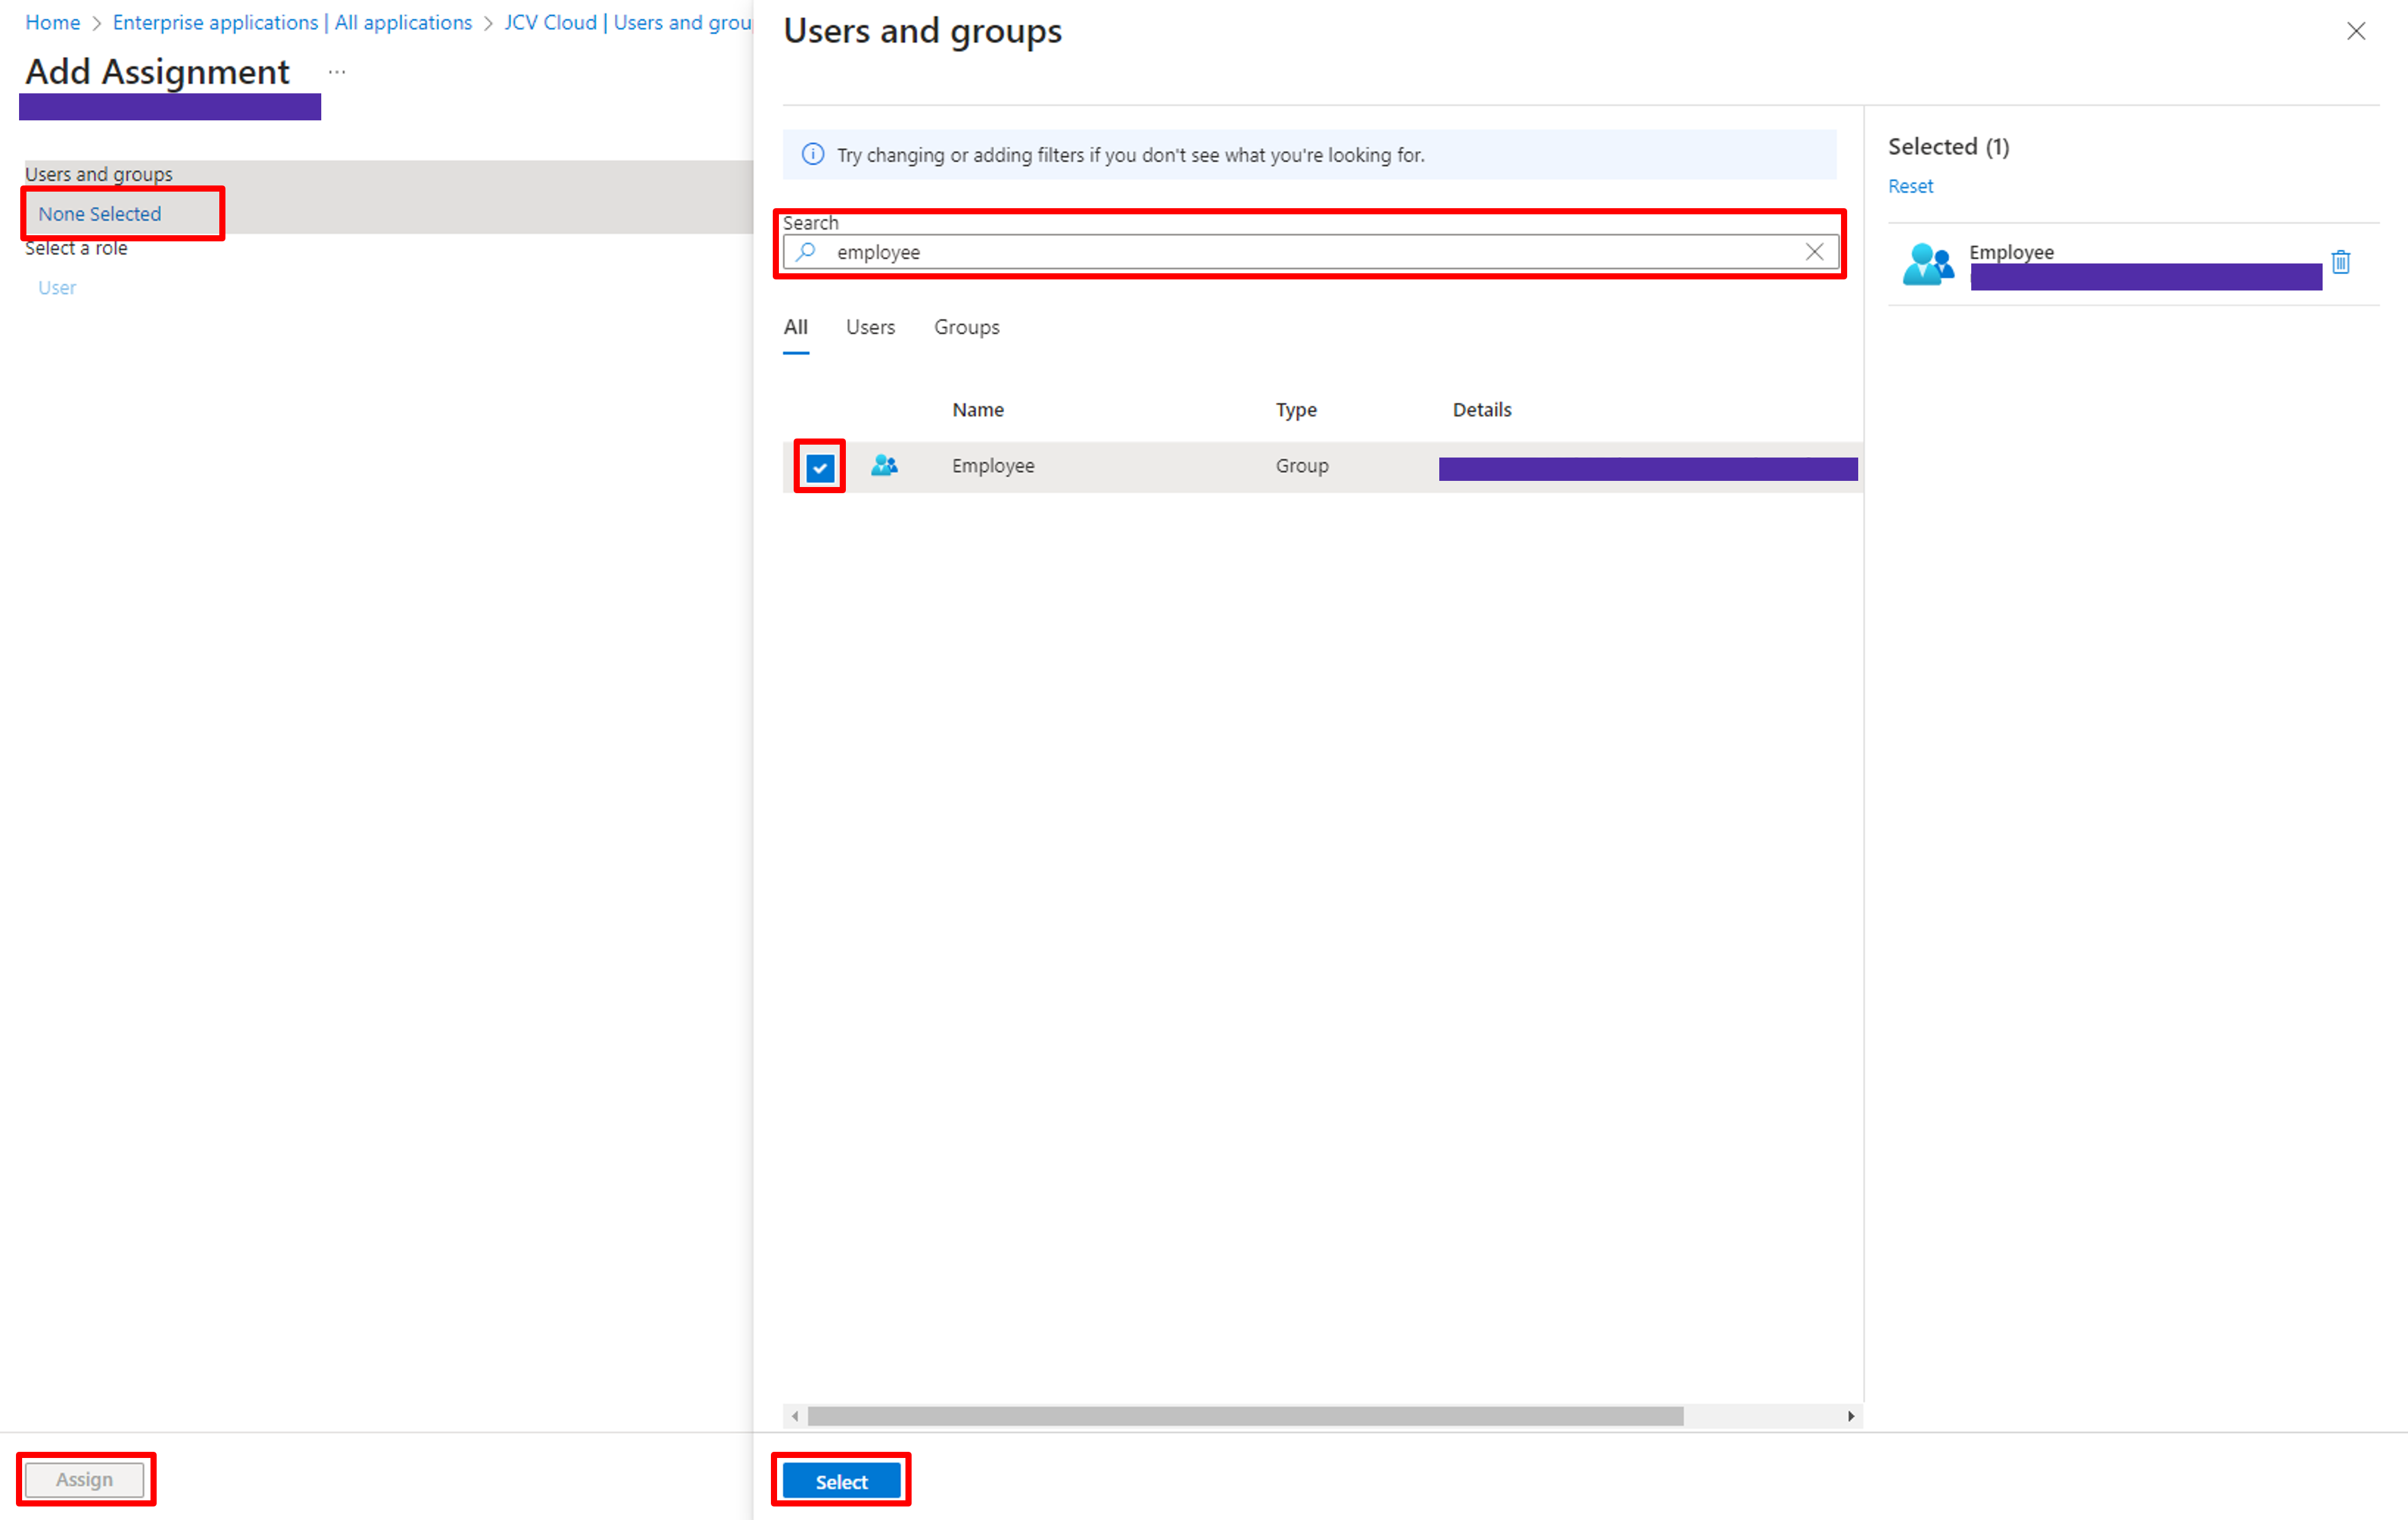
Save users/groups assignment
Step 5. Set Admin credentials
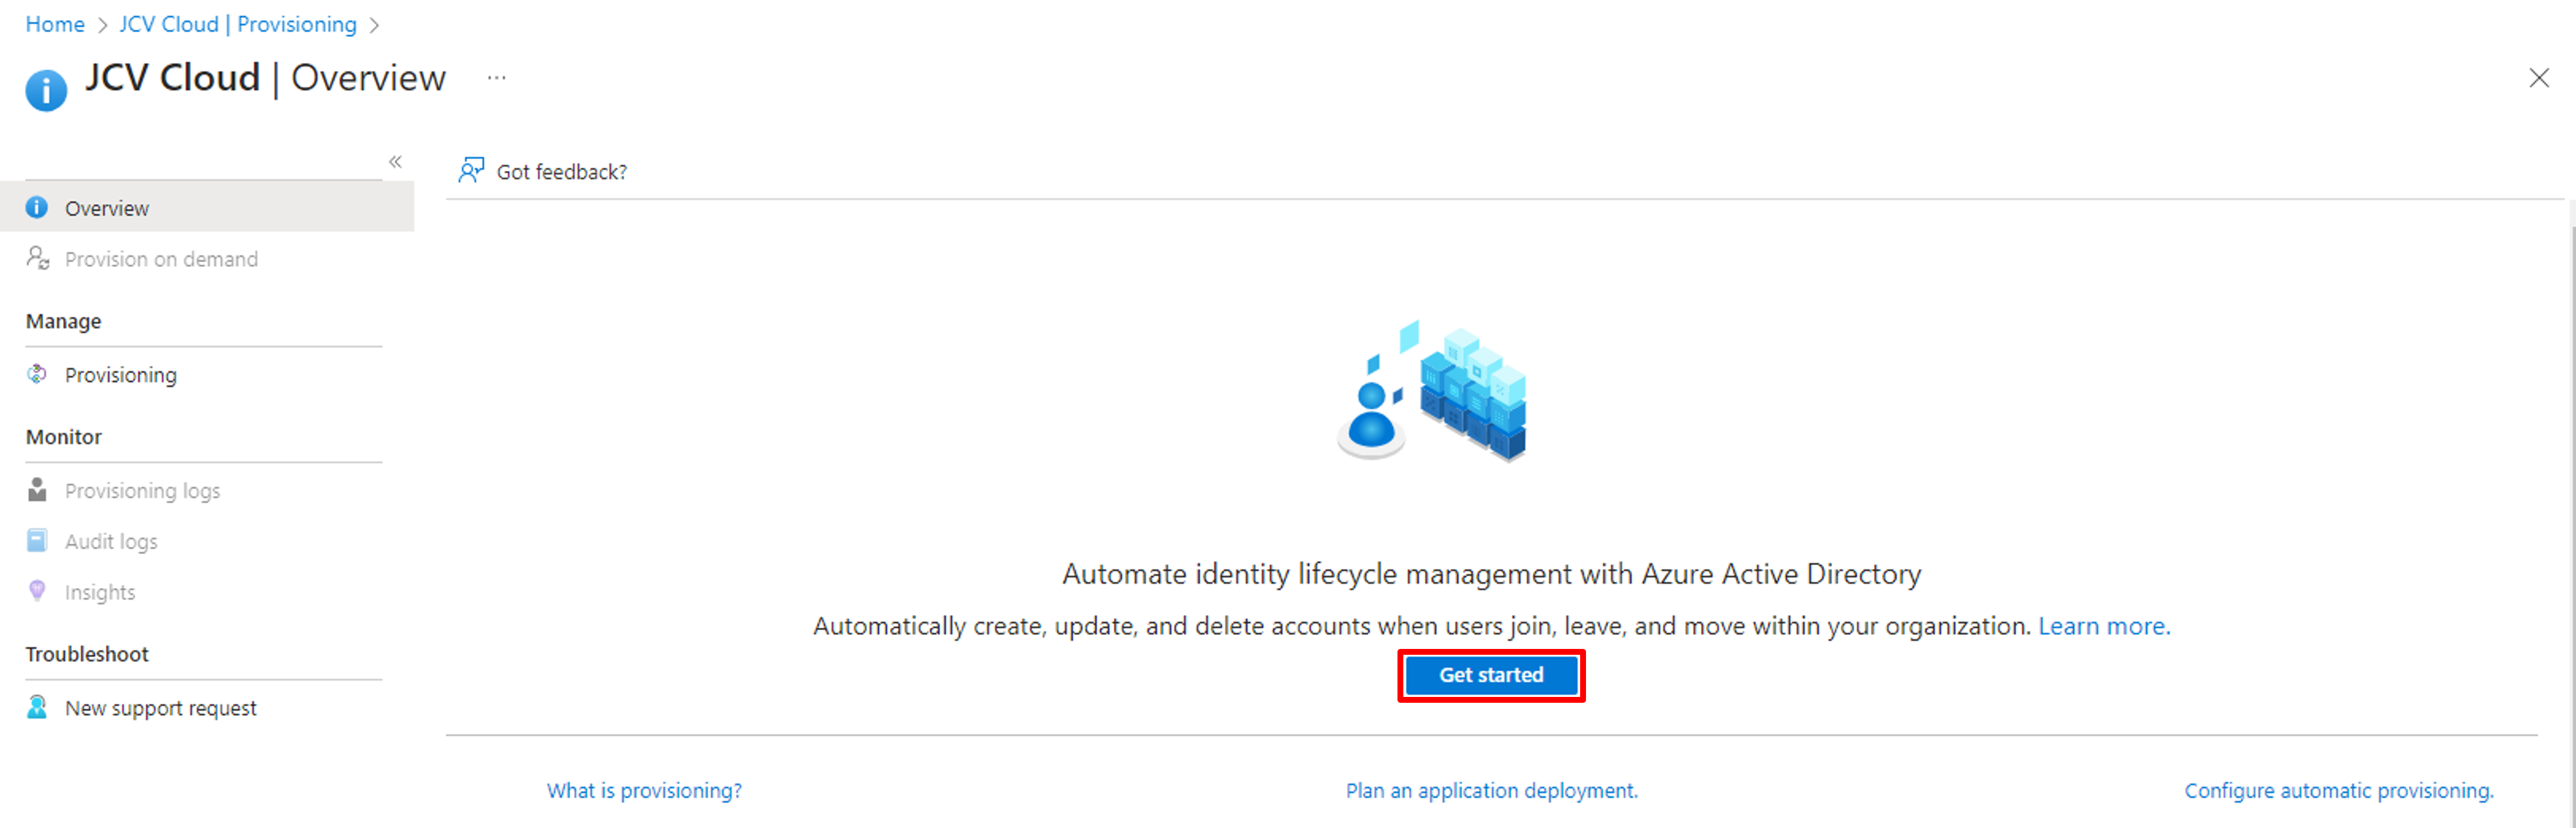
Click Provisioning on the left side of the menu or the Get started button in 3. Provision User Accounts under Getting Started.
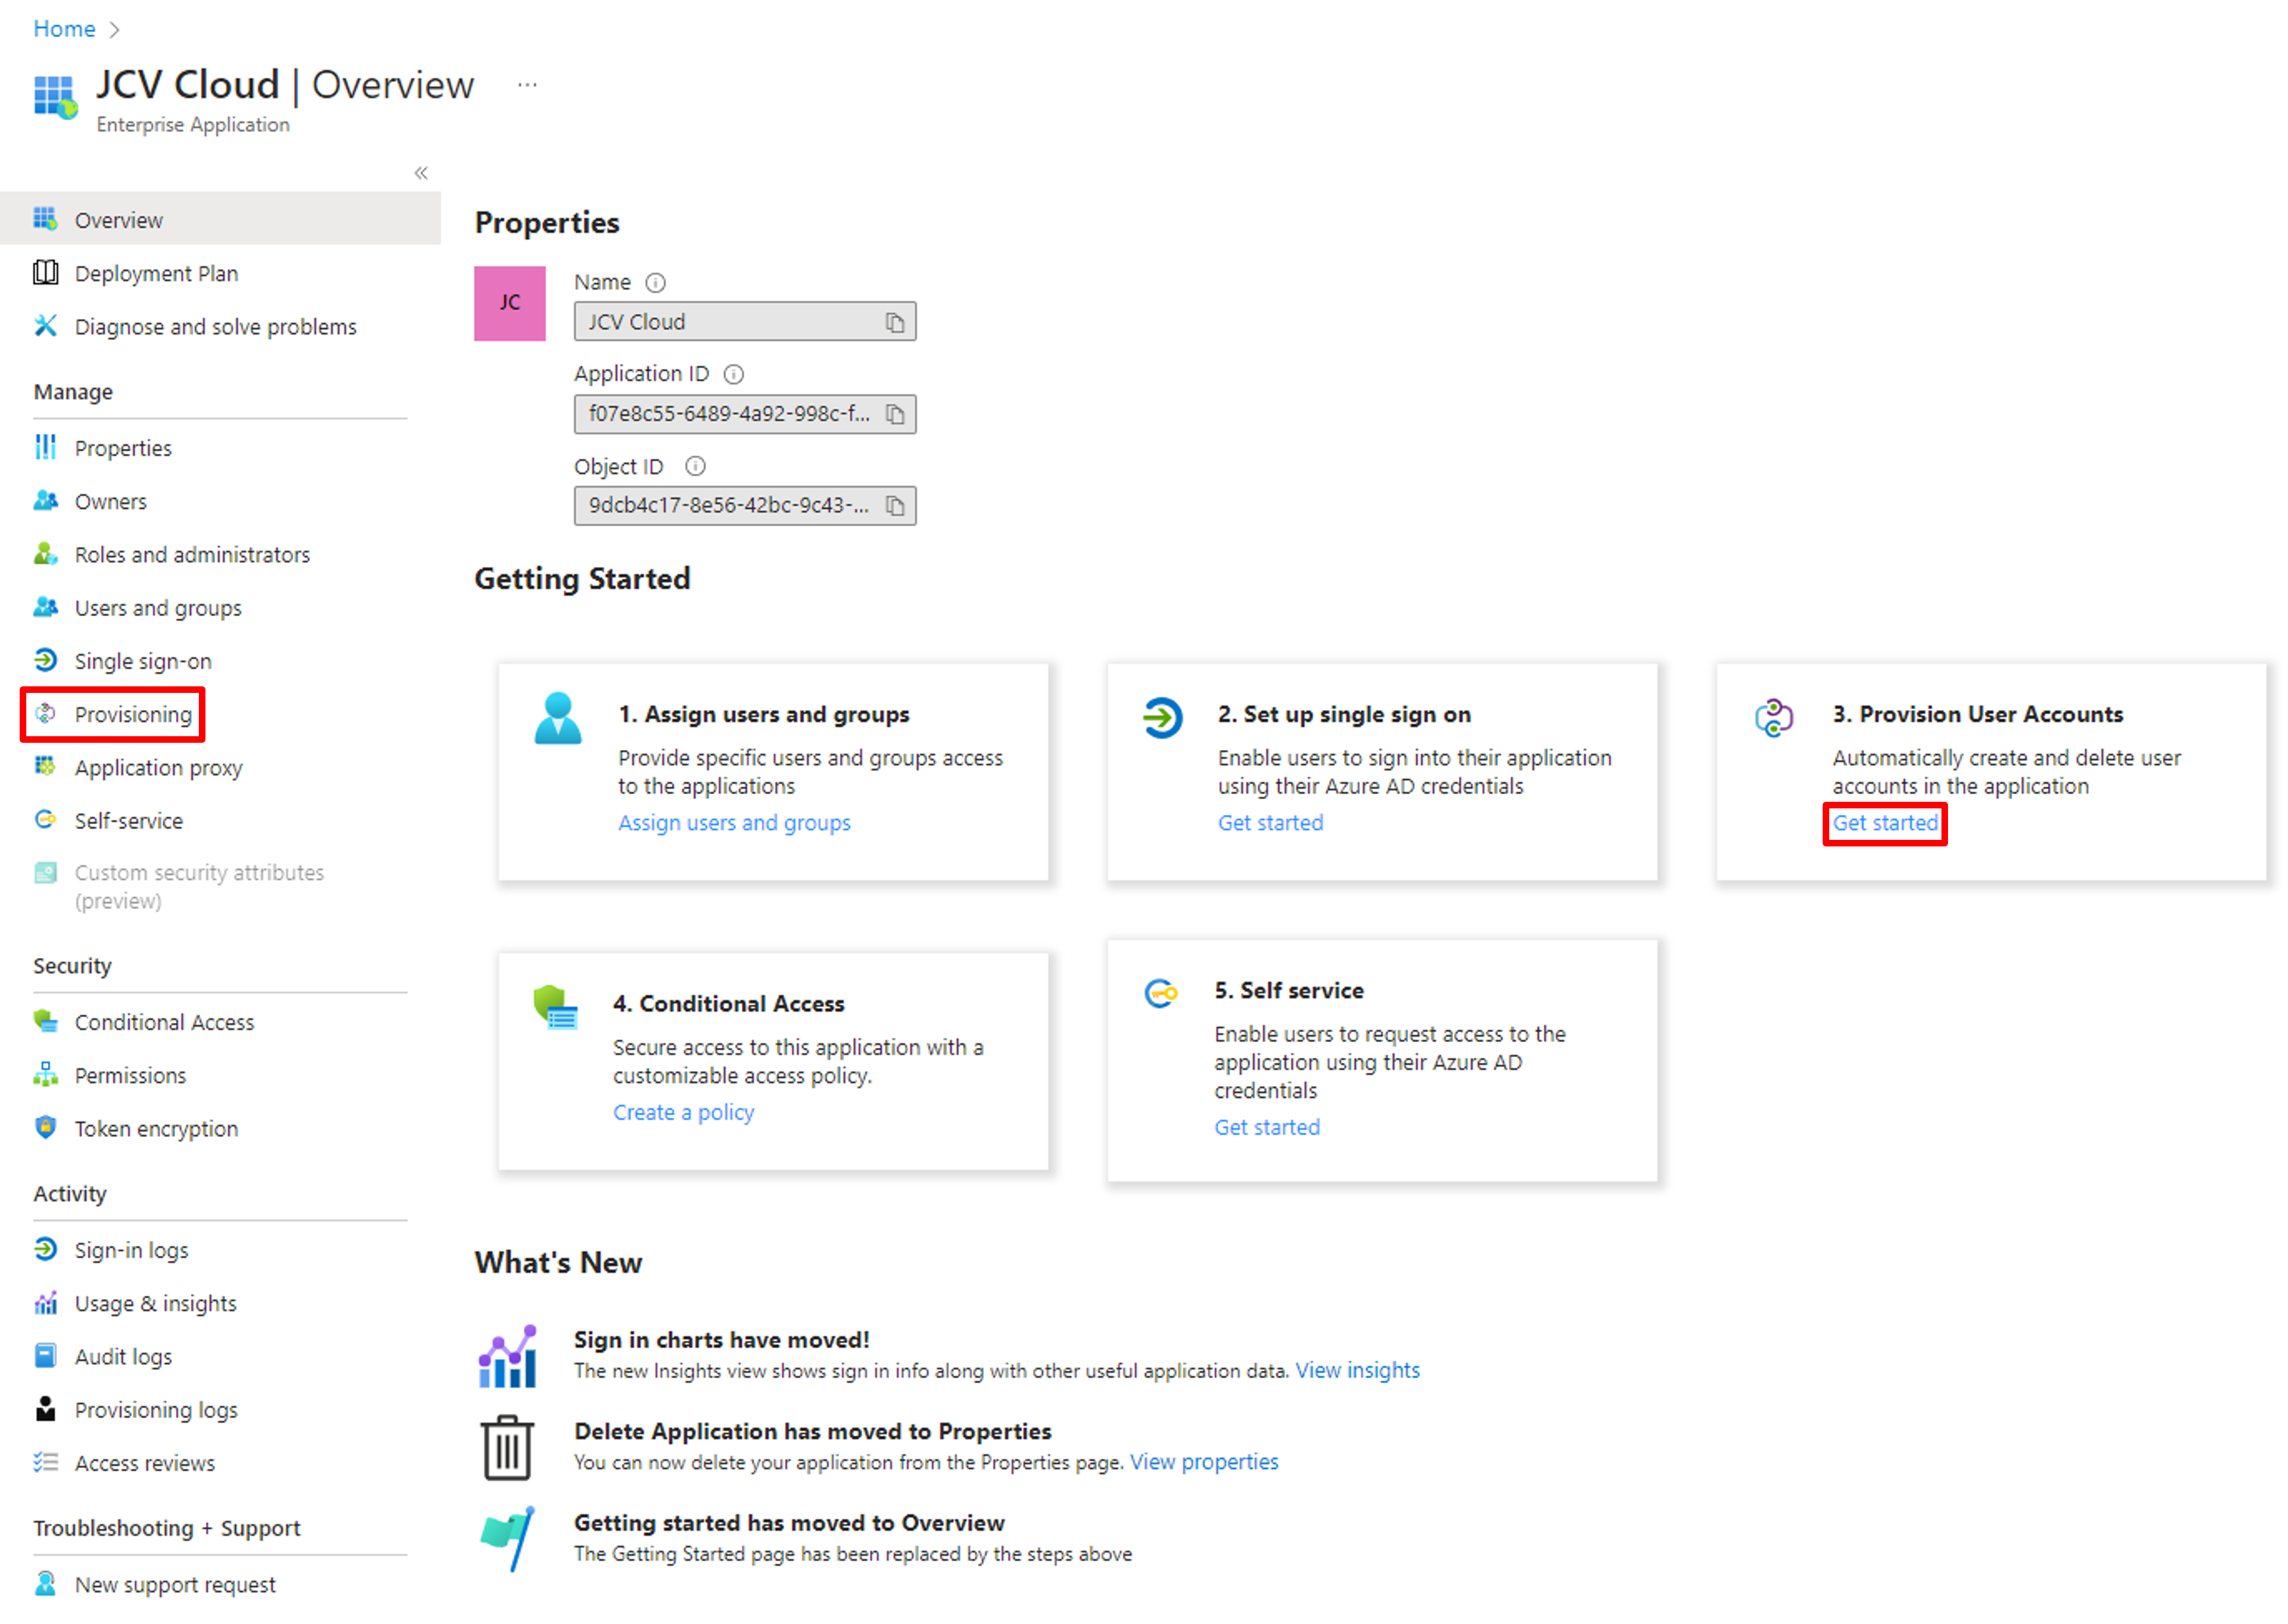
Get started with Provisioning
Click Get started again in the Overview screen of Provisioning.
Go to the Provisioning setting
Switch the provisioning mode to Automatic in the dropdown box.
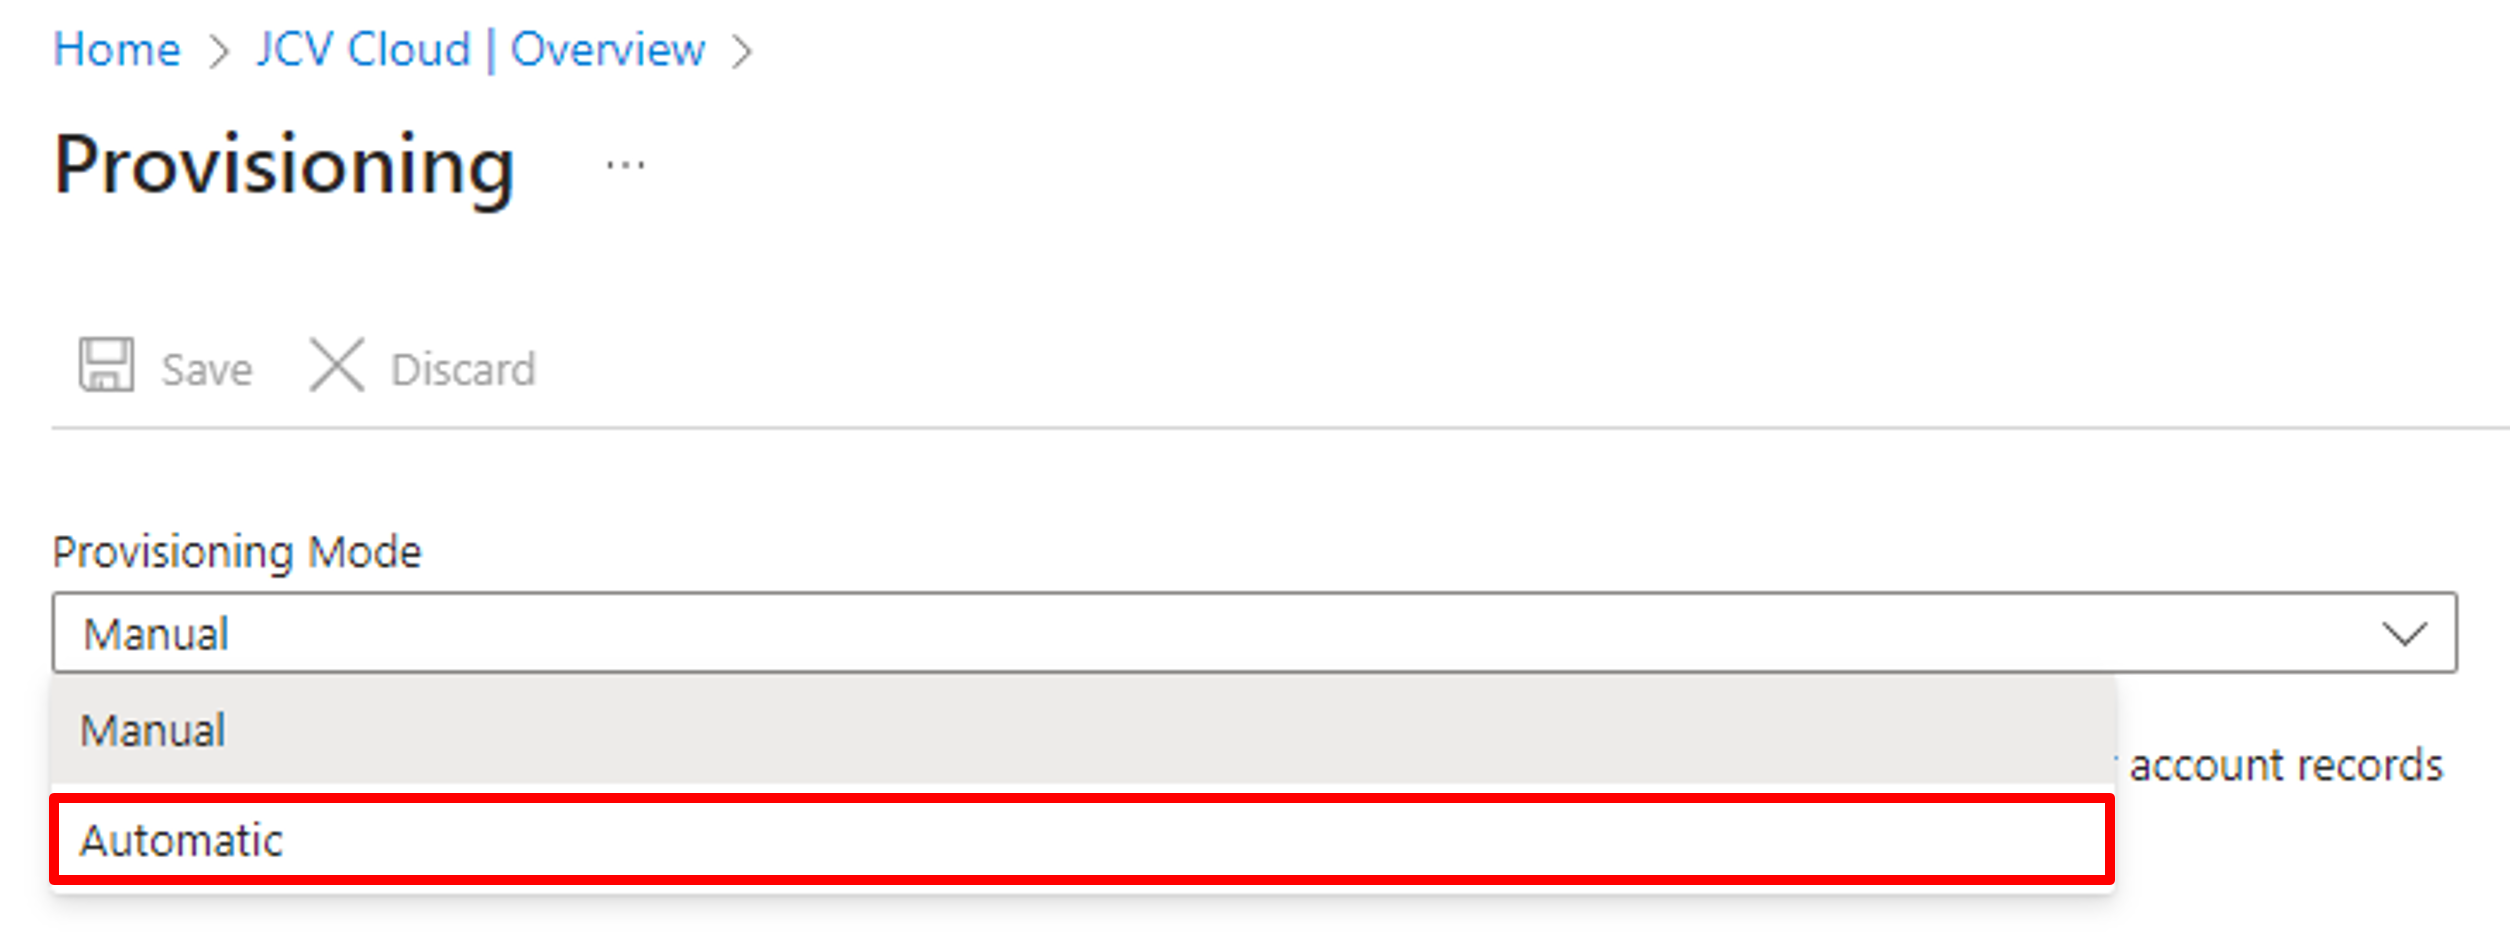
Switch provisioning mode
Click Admin Credentials to expand its setting items.
Go to the SCIM server page created in Step 1 on JCV Cloud. Copy the Server endpoint URL from JCV Cloud page and paste it into the Tenant URL textbox on the Azure AD page.
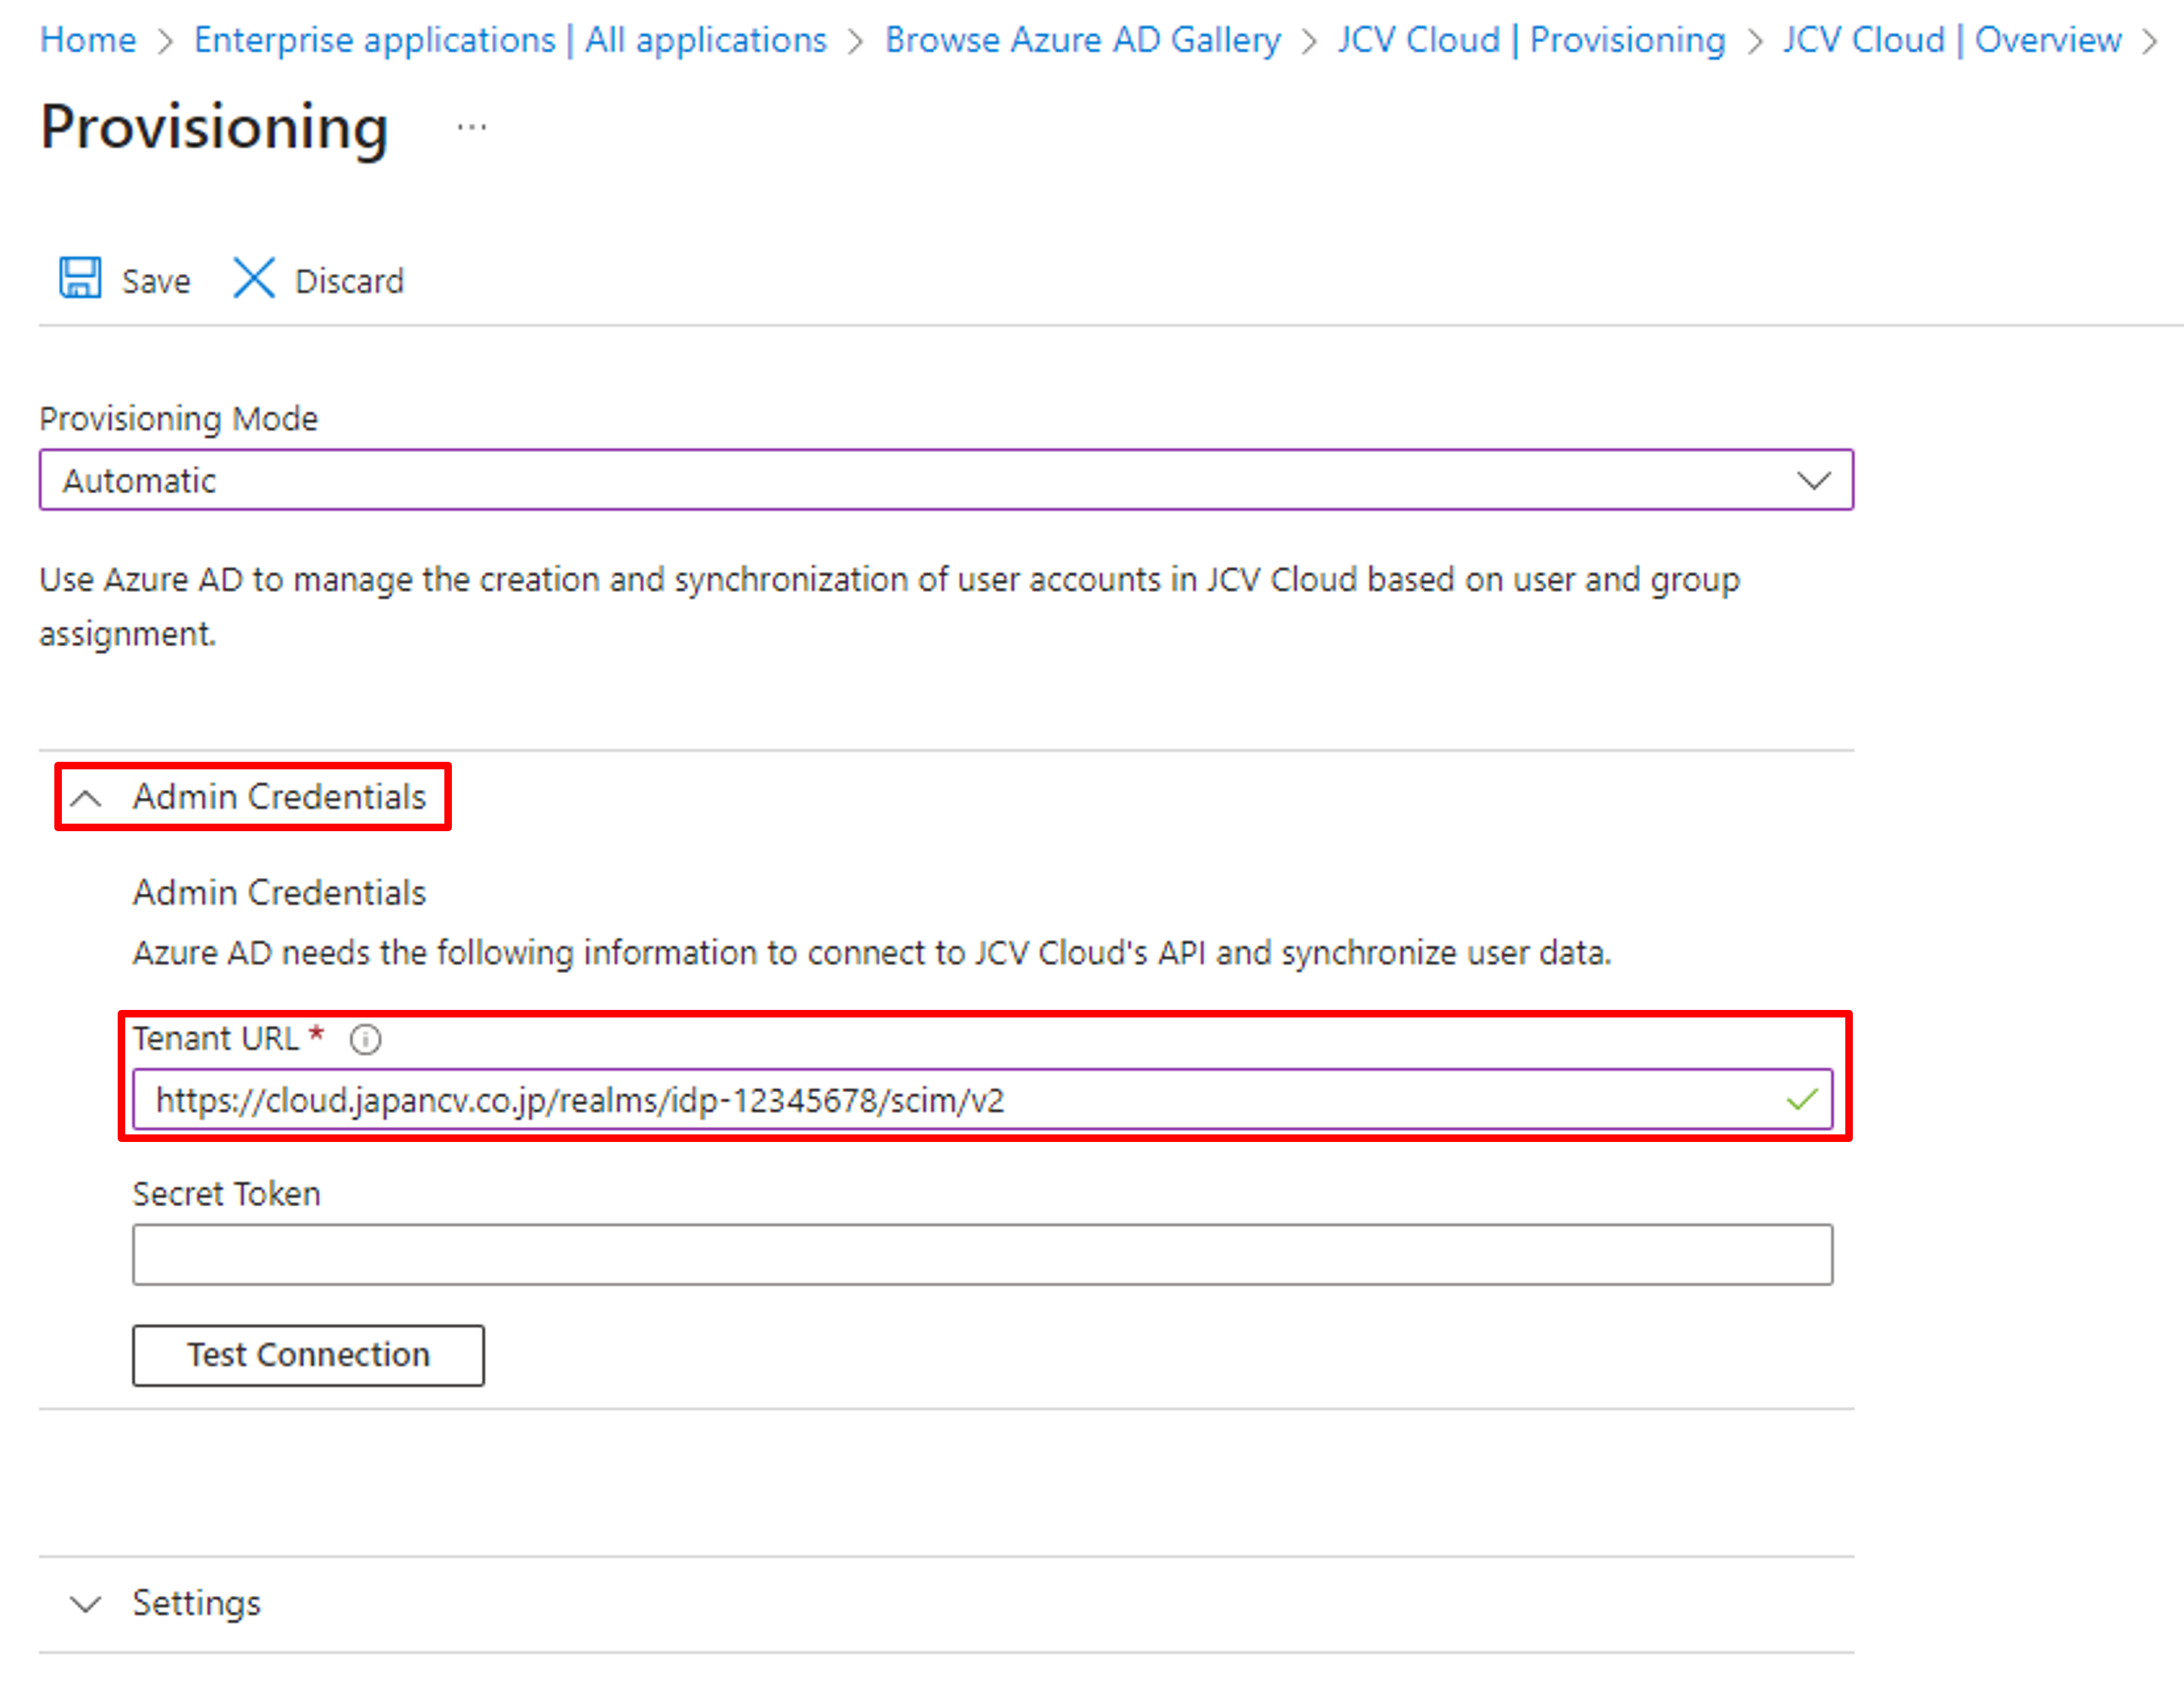
Tenant URL setting
Go to the SCIM server page created in Step 1 on JCV Cloud again. Click the Generate button above Server access token.
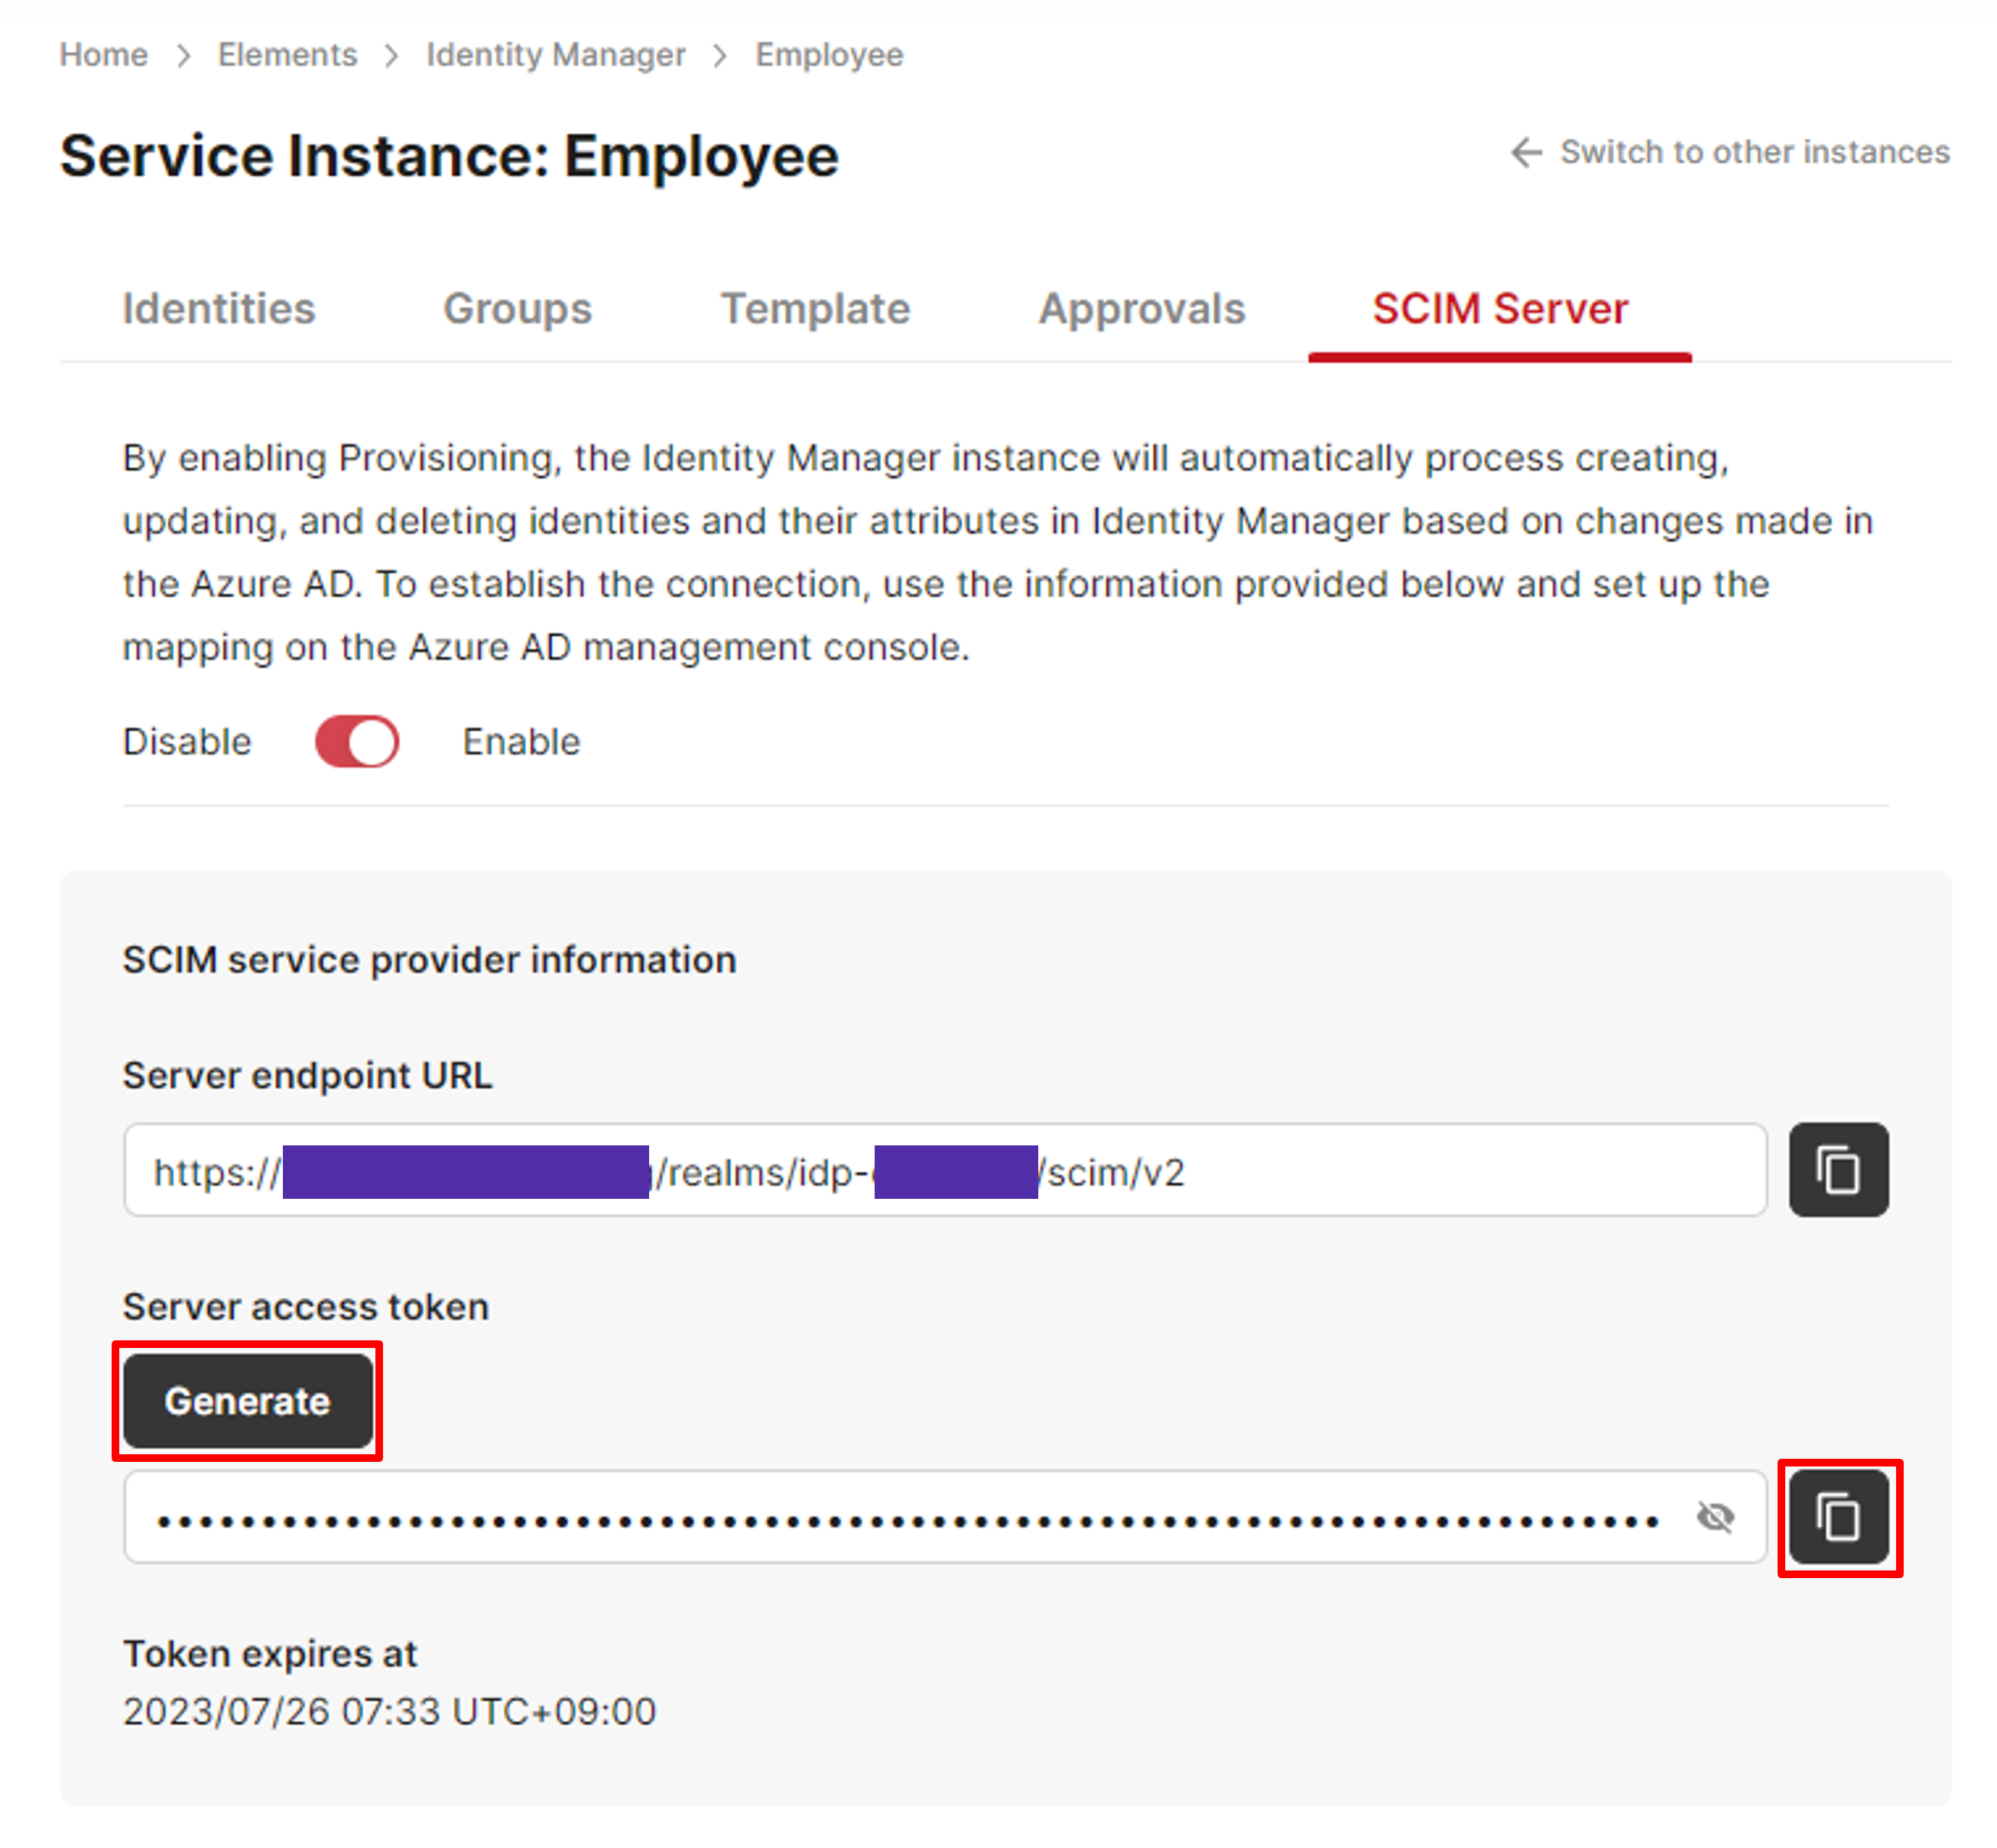
Generate server access token
About the token expiration timeDue to the technical limitation of the system, the token for provisioning is only available for 10 hours.
To continously generate new available tokens, consider using the OpenAPI endpoint POST /provisioning/token.
Copy and paste the token into the Azure AD page's Secret Token textbox.
To test the connection, click Test Connection. A successful message box will be displayed in the top right area if successful.
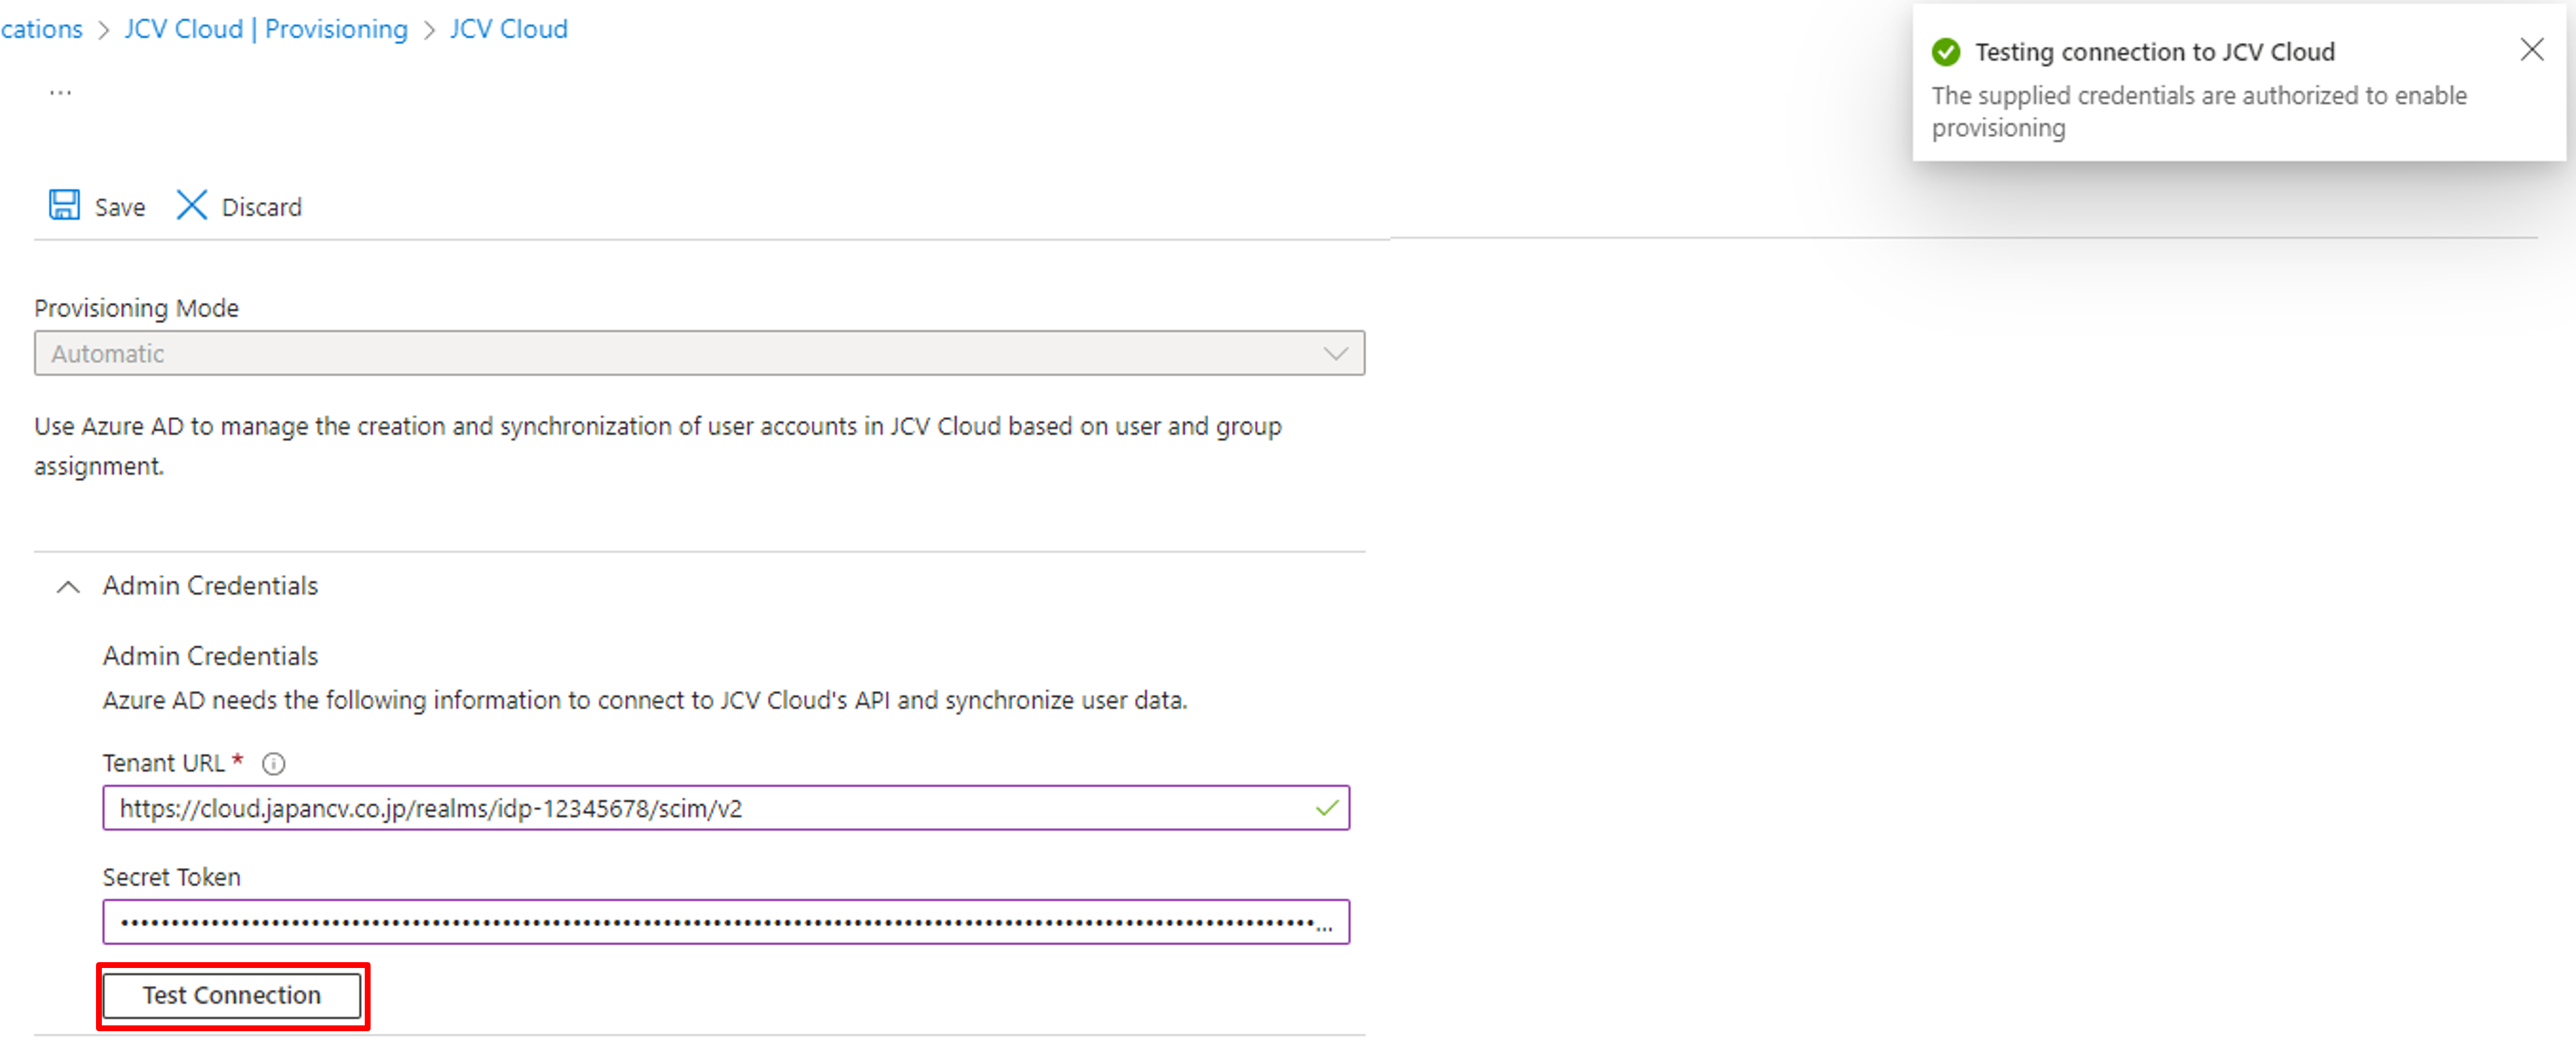
Test Connection
Click Save on the top area to finish the Admin Credentials setting.
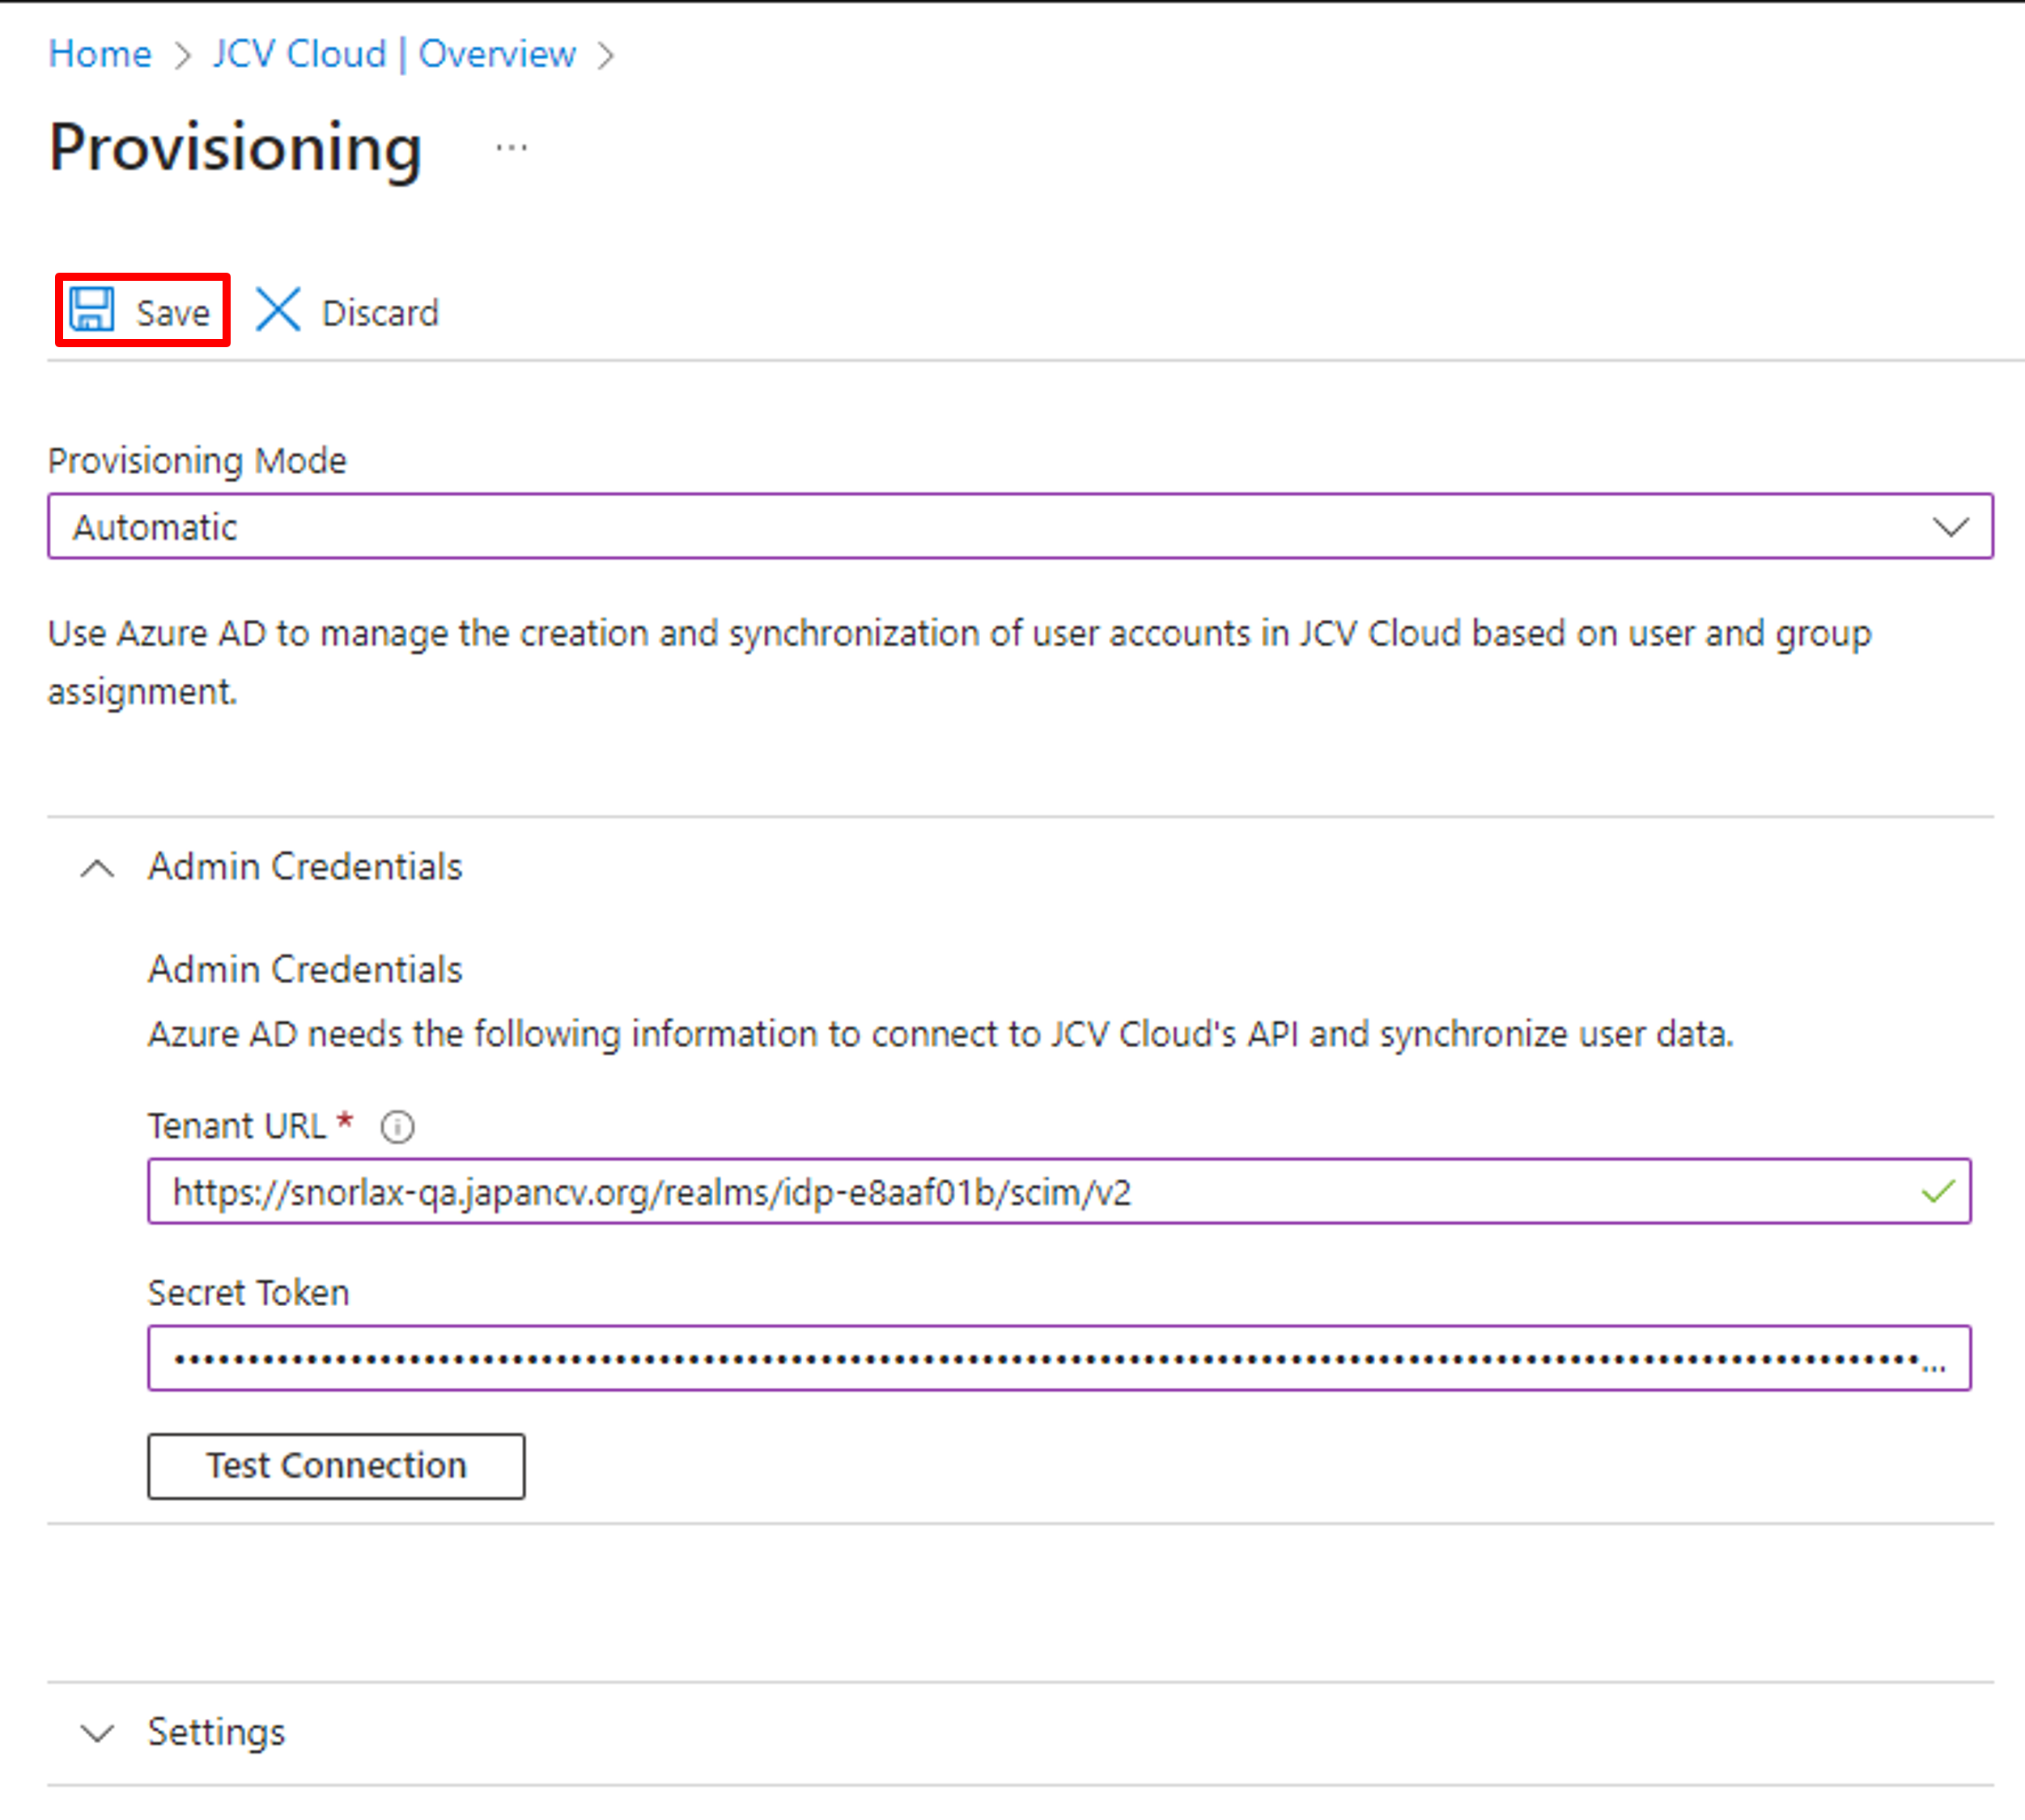
Save Admin Credentials setting
Step 6. Set Identity Mappings
After the Admin Credentials setting is saved, an extra setting item, "Mappings", will appear on the provisioning setting. This is an essential step, as any incorrect settings will lead to the failure of provisioning the identity data.
Click the tab to expand the setting. There are two auto-generated mappings, Groups and Users. The Groups mapping is ready to use, but the Users mapping needs further settings. Click the Provision Azure Active Directory Users.
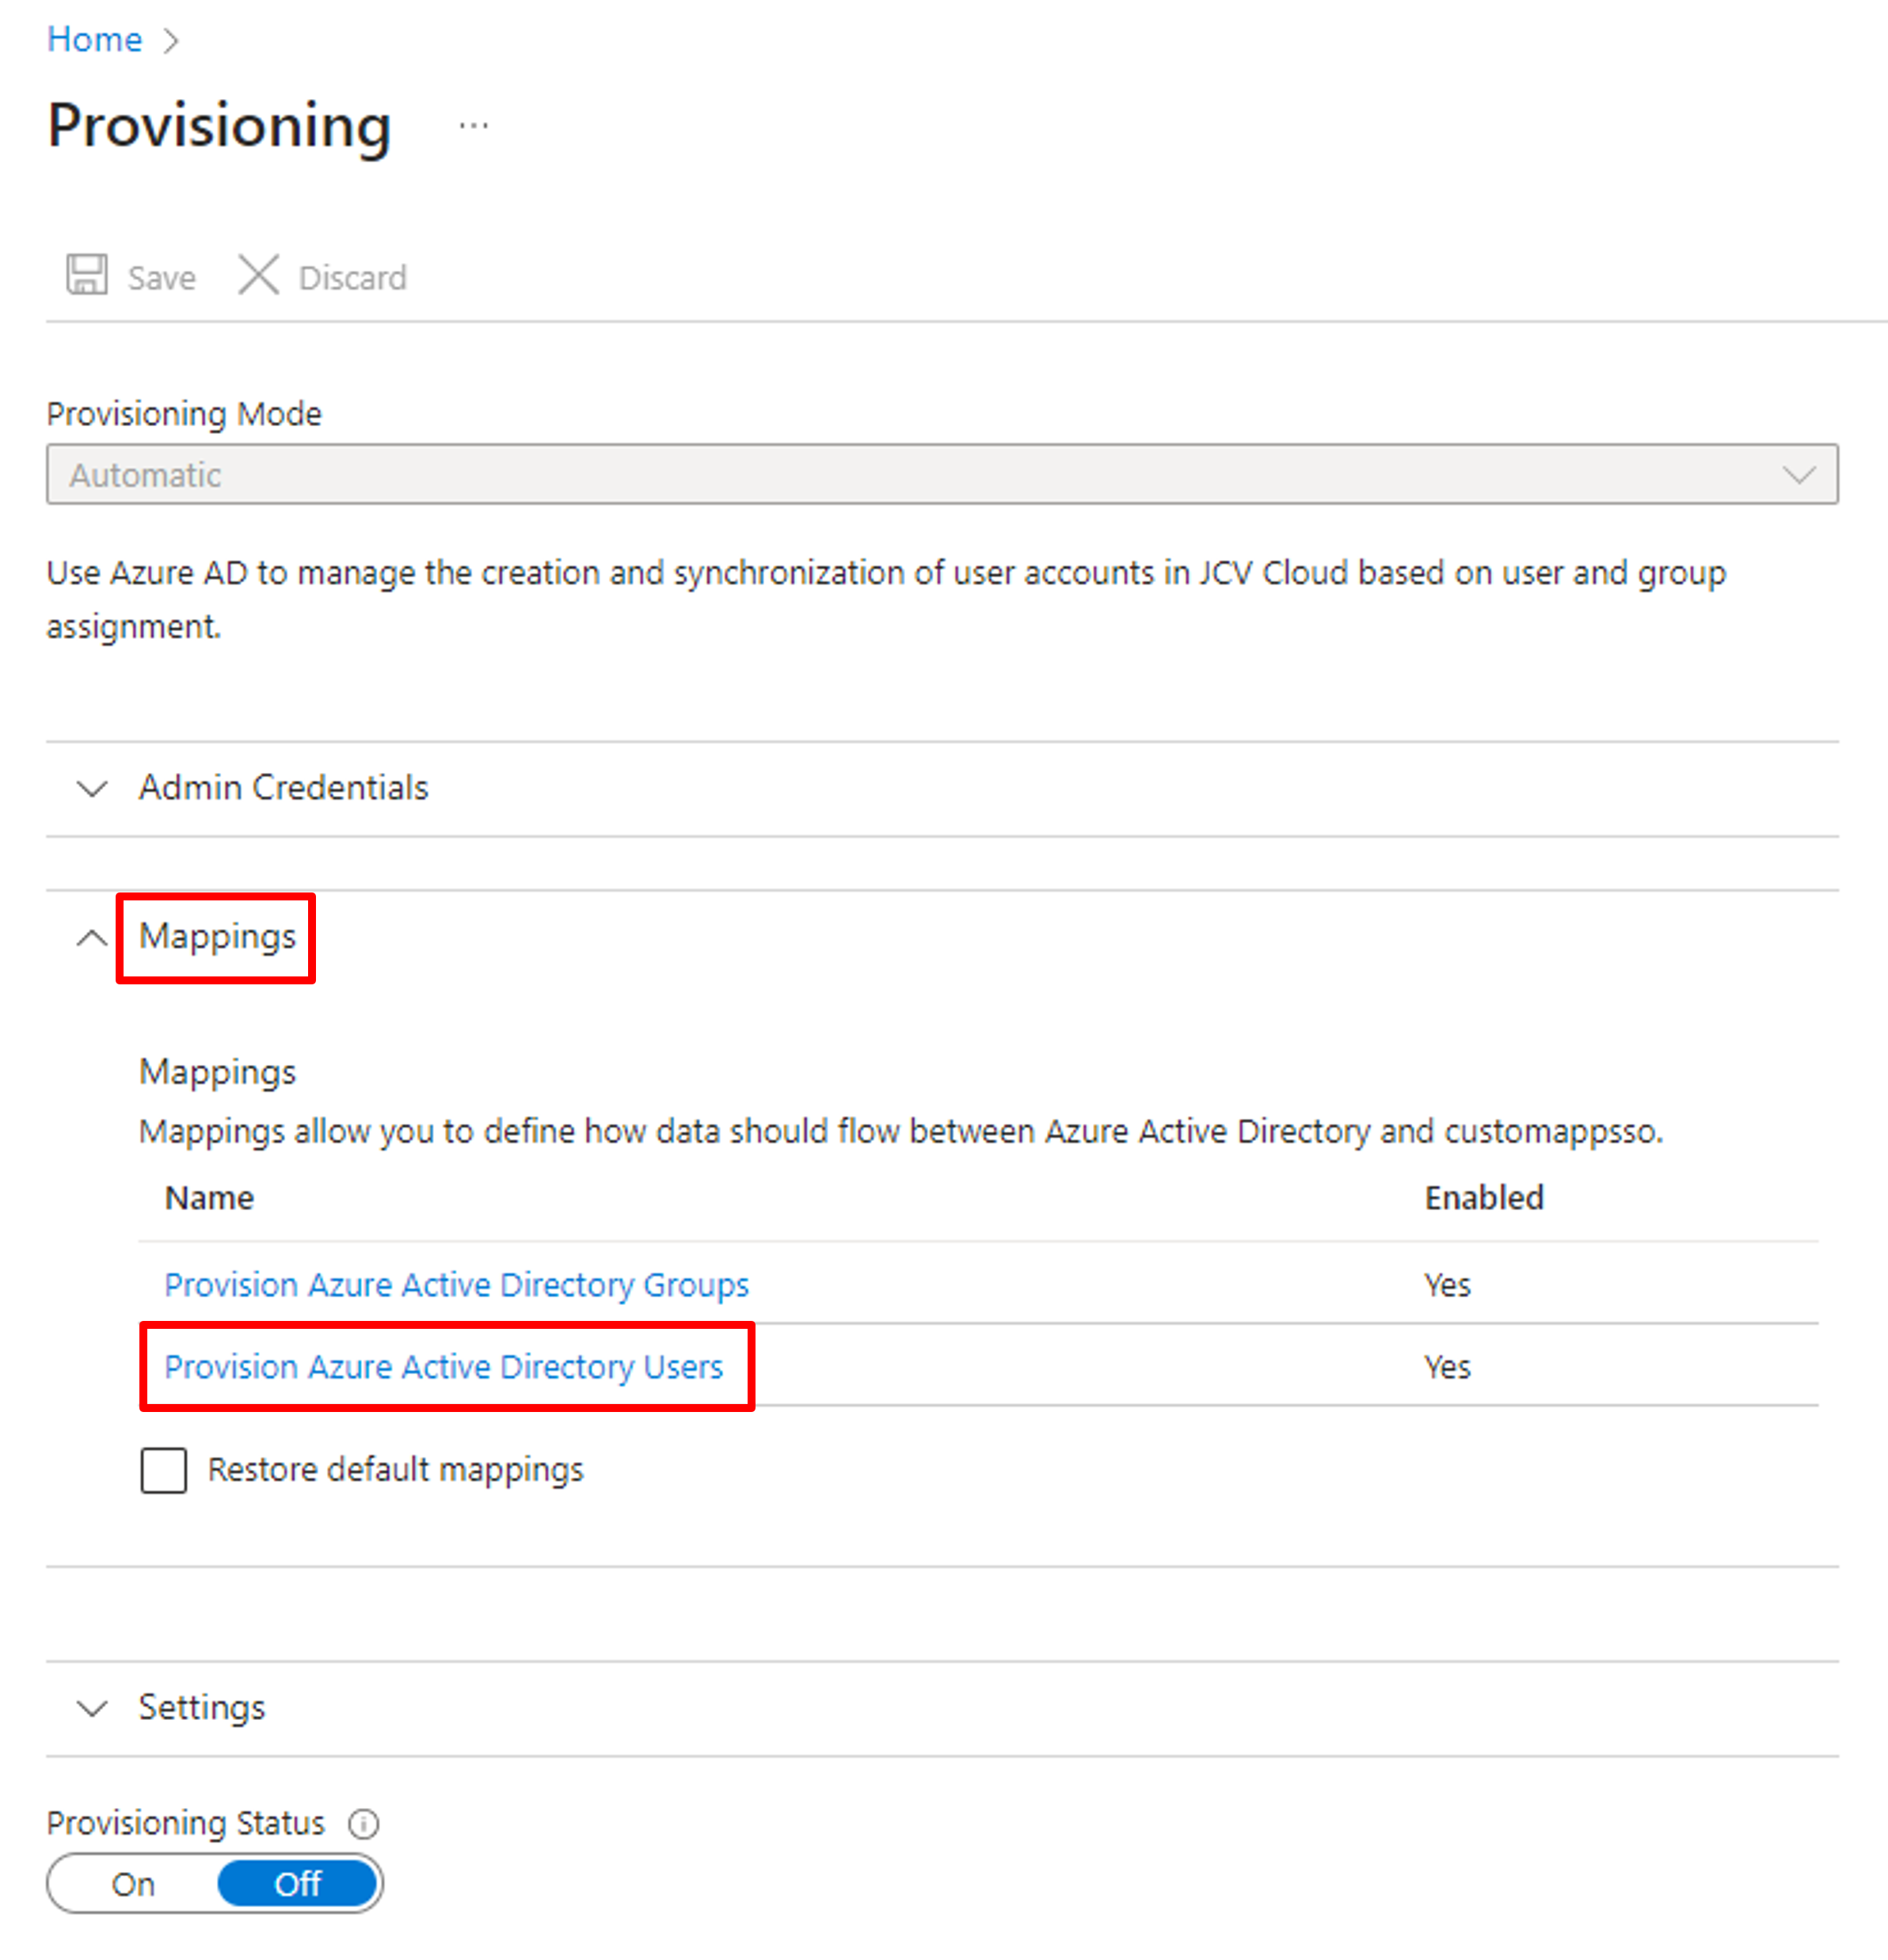
Go to Users Mappings setting
Start with the primary key provisioning. In JCV Cloud Identity Manager, user ID, usually the employee ID, is used as the unique identifier of identities. While in Azure AD, email is set as the userPrincipalName and the primary key. To proceed with the provisioning successfully, ensure the employee ID field is registered on your Azure AD. Click the userPrincipalName line to enter the setting page.
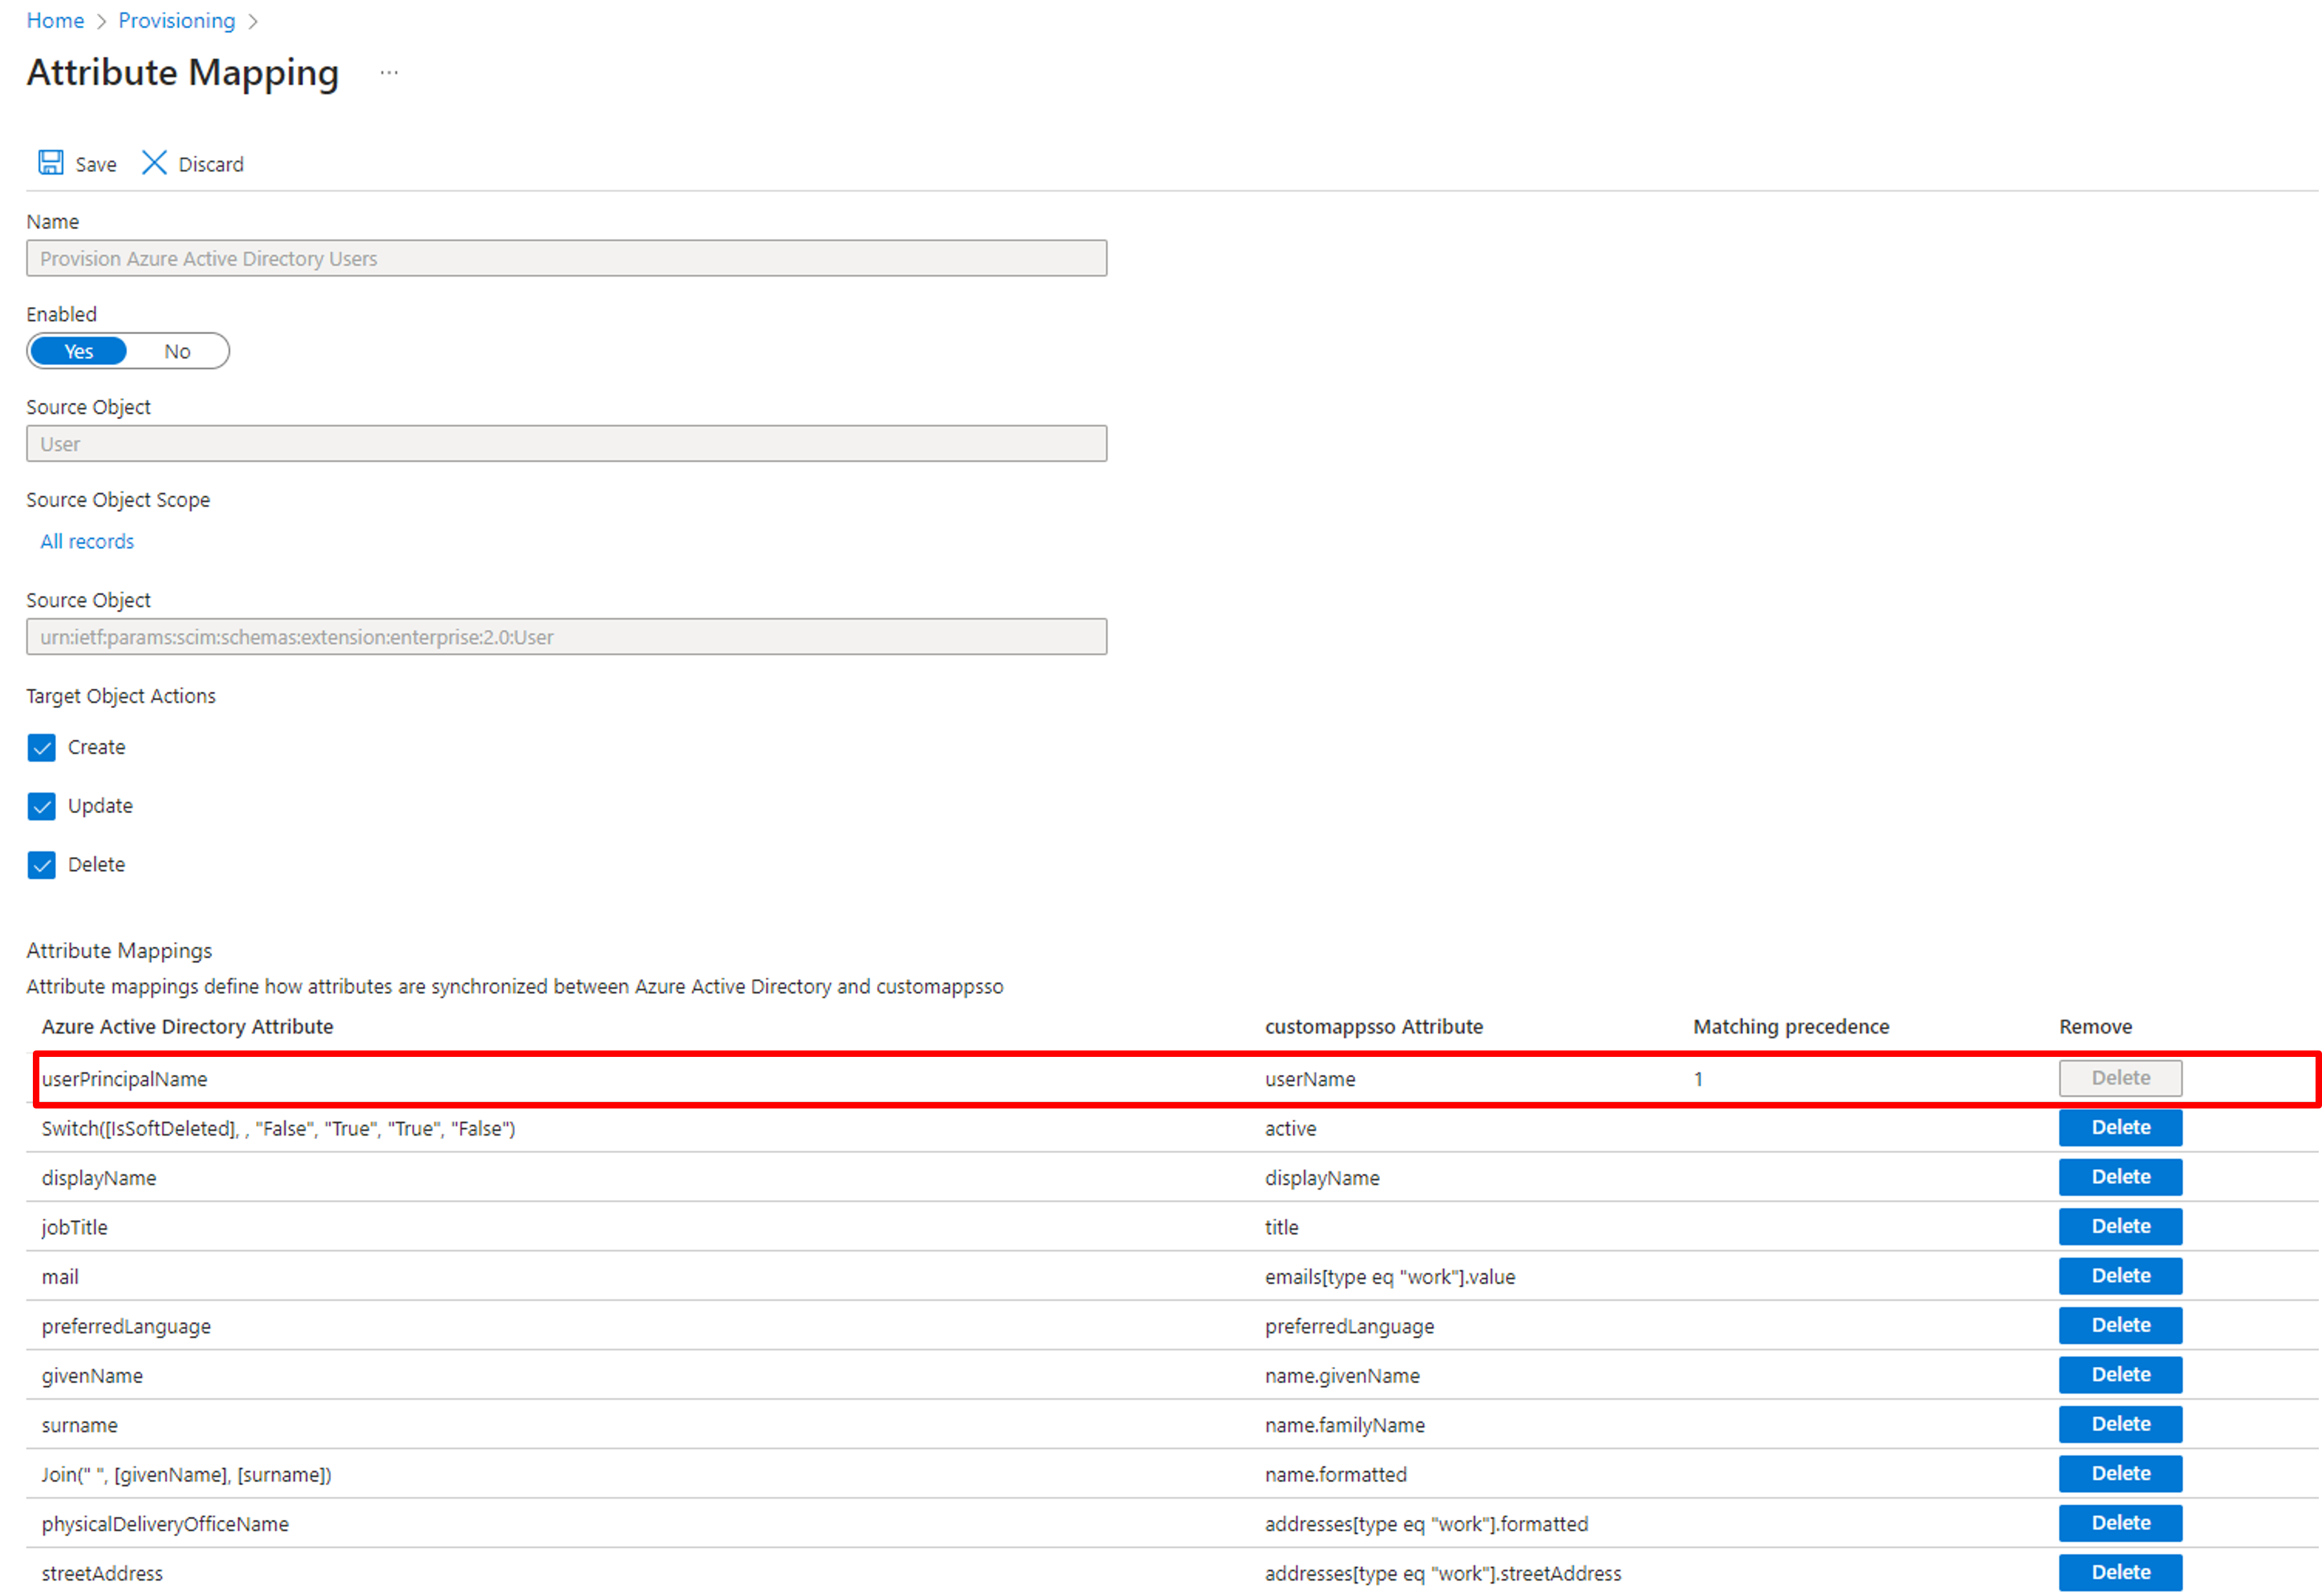
Go to userPrincipalName setting
Change the Source attribute value to employeeId and click OK.
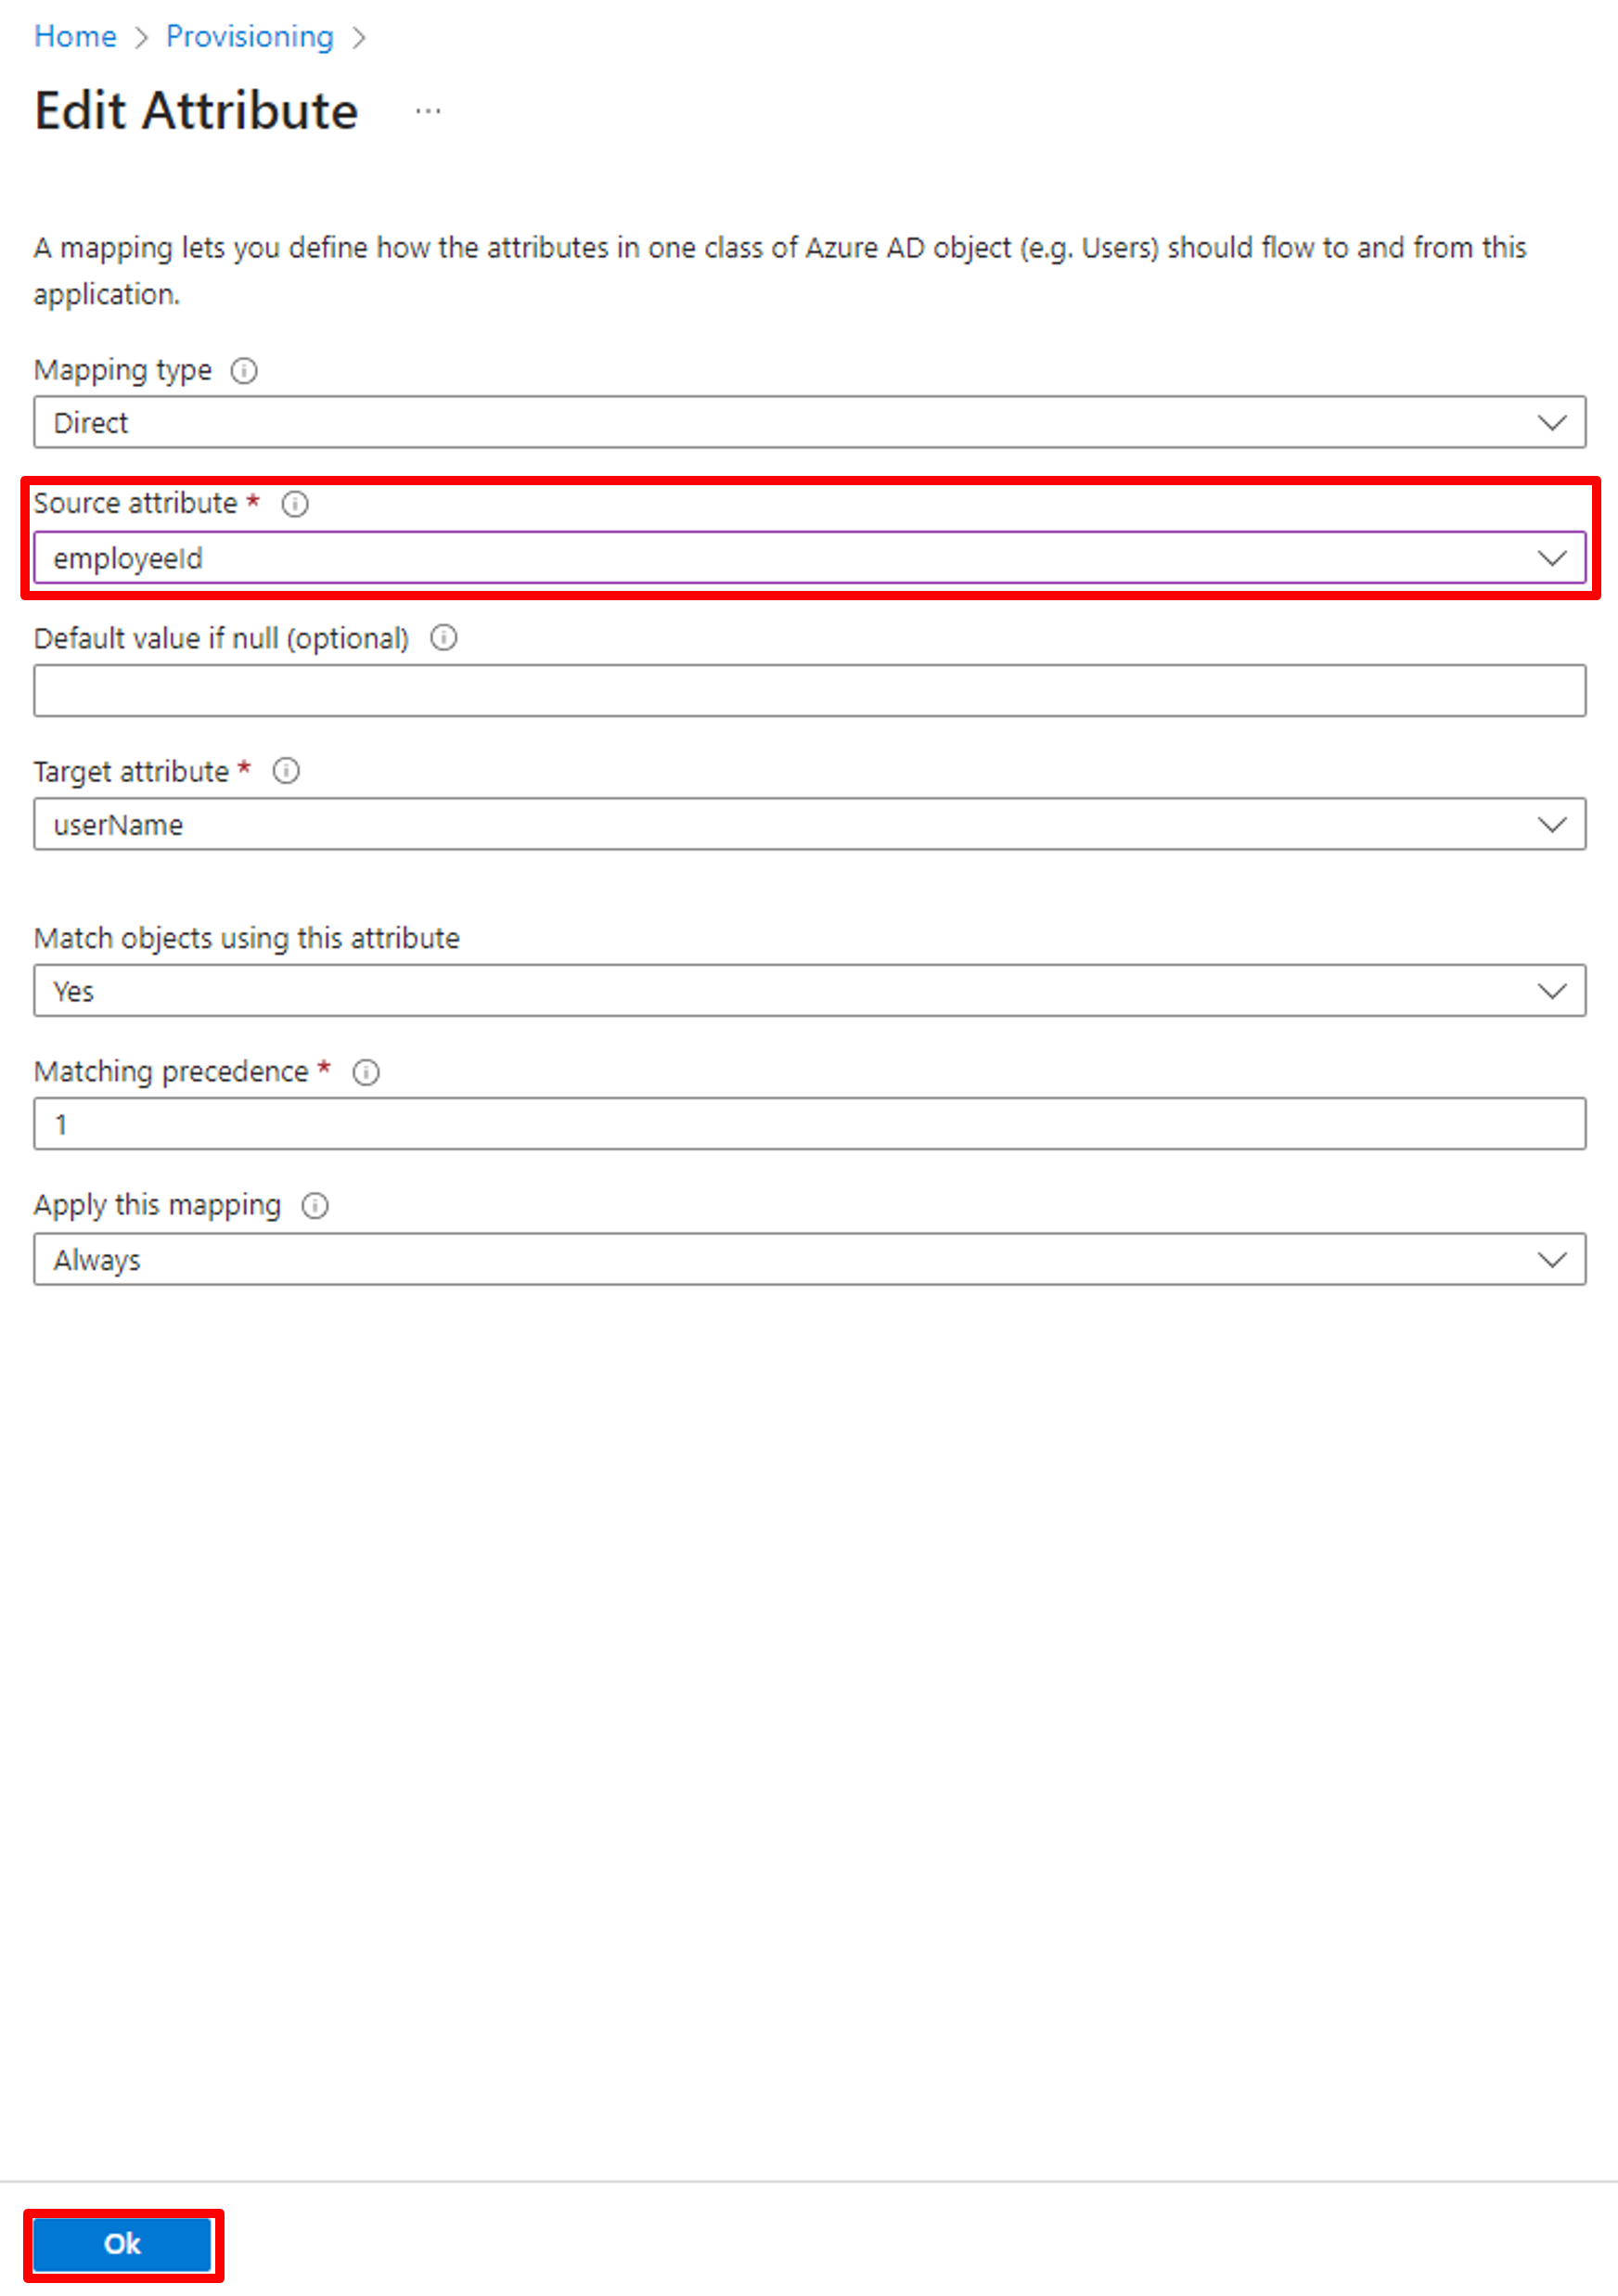
Apply employeId setting
Then, change the email mapping. Click the mail and set the Source attribute to userPrincipalName.

Apply email setting
Back to the Attribute Mapping page, delete other mapping items until it only includes the following items. Click save to finish the attribute mapping setting.
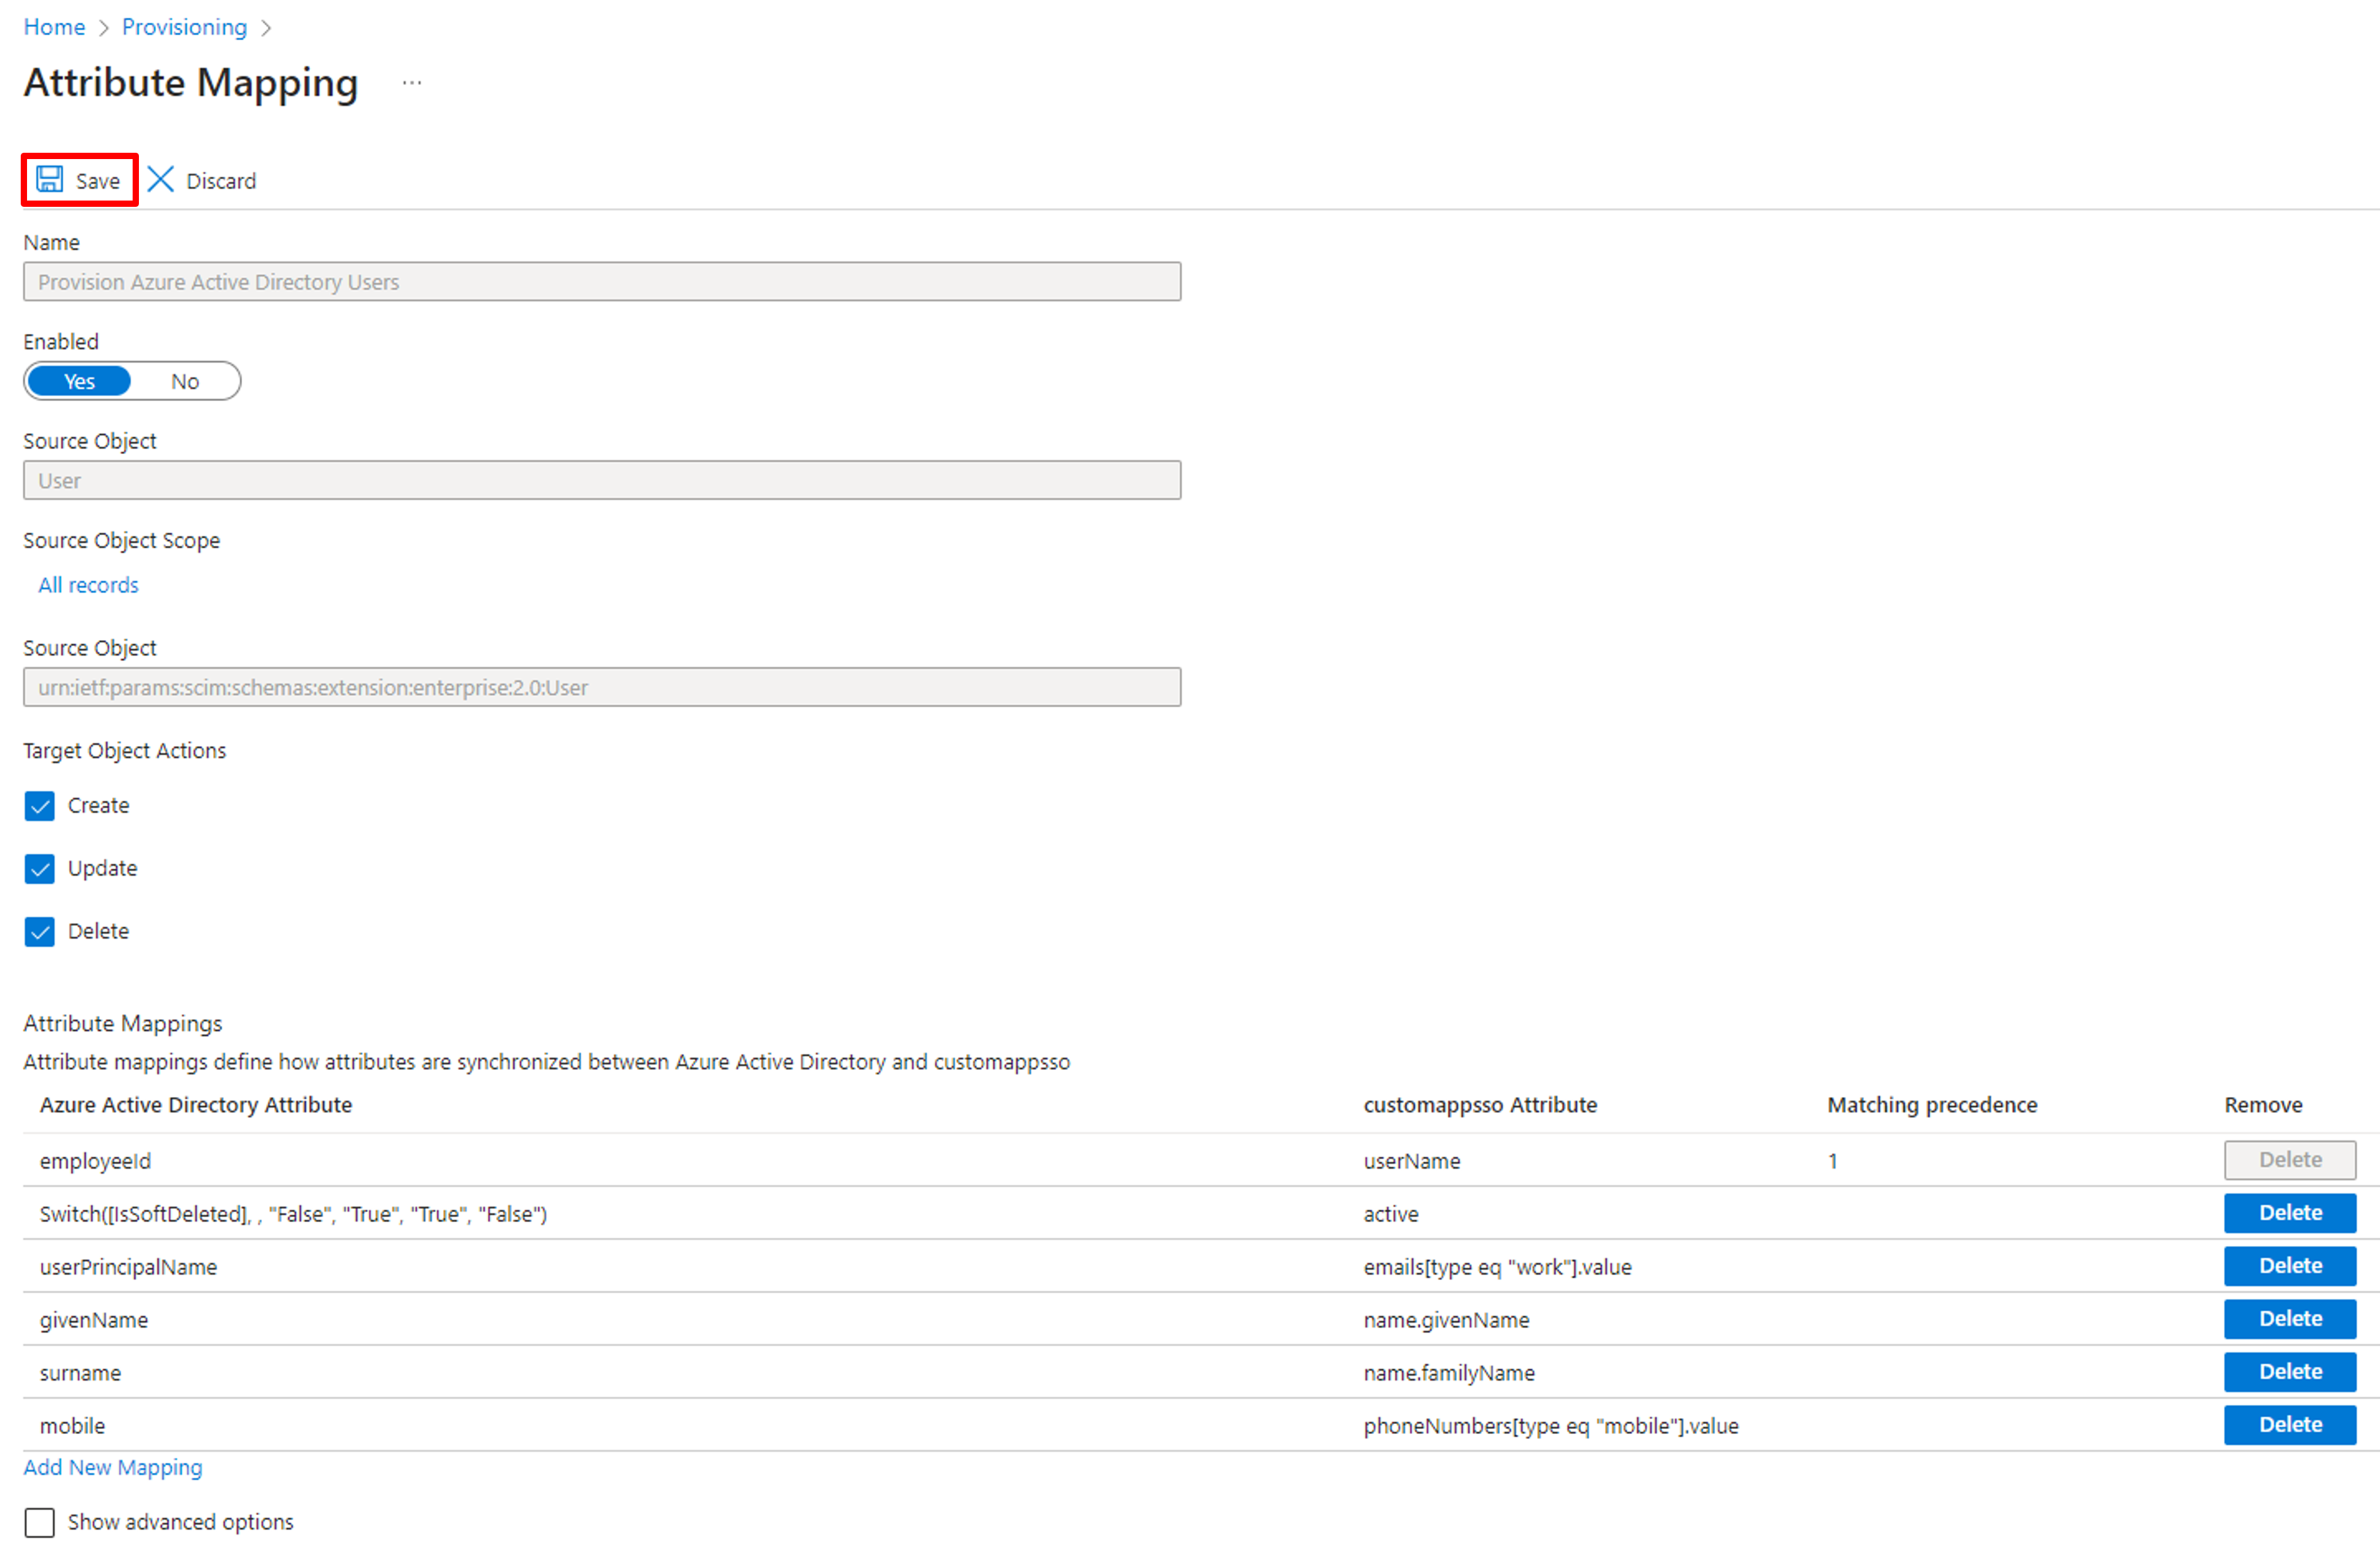
Attribute mappings
To verify the mapping setting, you can try the Provision on demand feature and try with a single user in Azure AD.
Step 7. Turn on the provisioning
Back to the overview of the Provisioning of the application, click Start provisioning, and the provisioning will start.
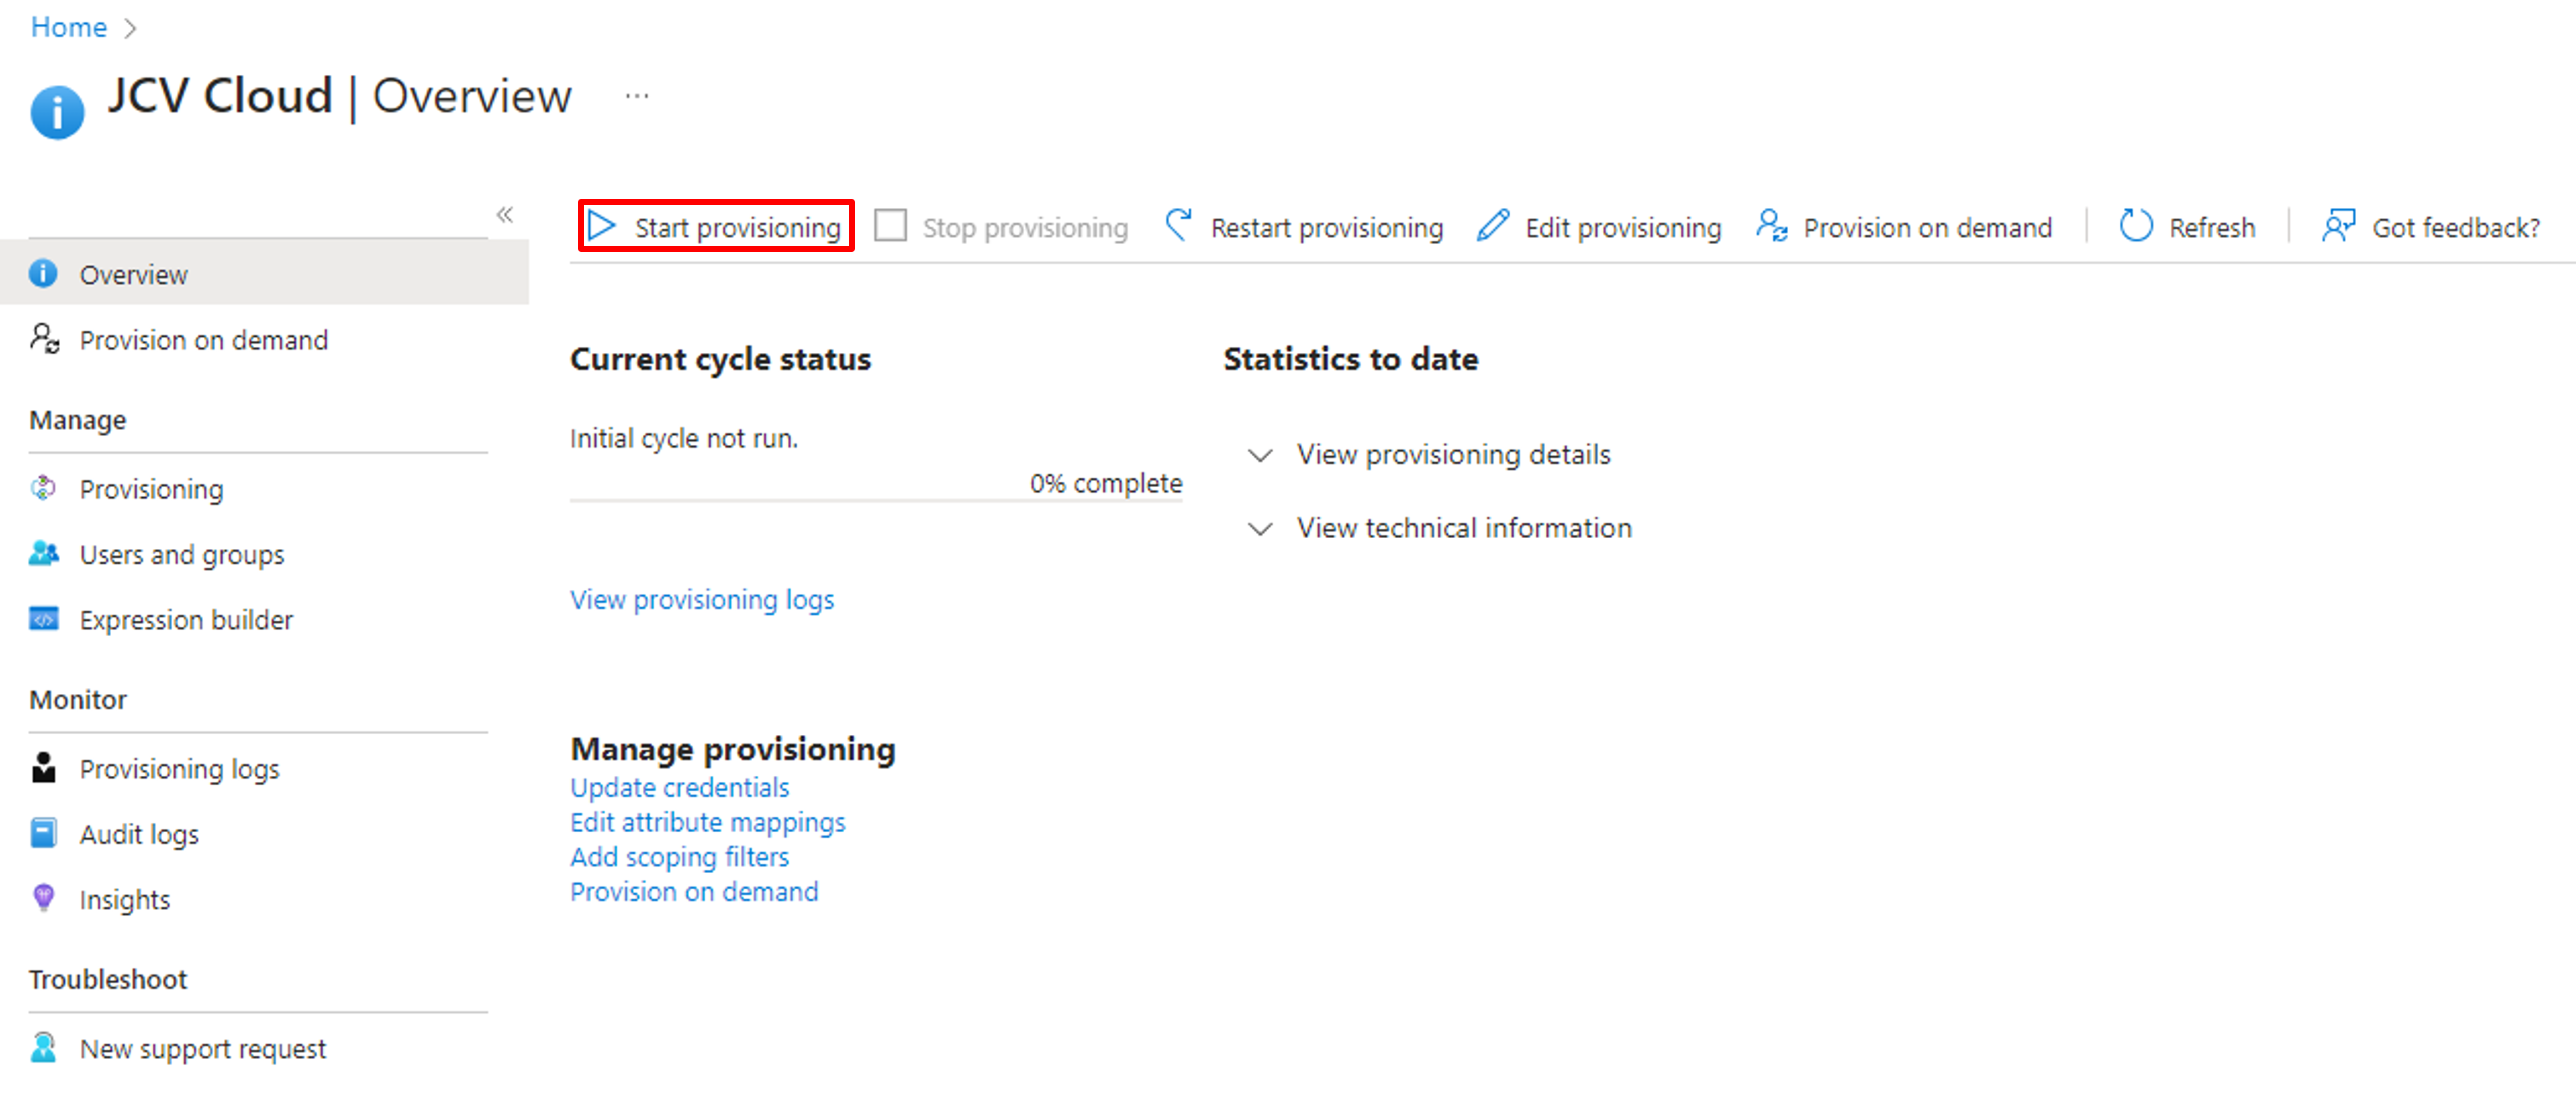
Start Provisioning
Updated 10 months ago