
Microsoft 365
This page provides detailed steps to integrate Face Login with Microsoft 365.
Preparation
Please ensure you have cleared the following items before setting up a Microsoft 365 (Azure Active Directory) connection.
Check the domain status
Open the Microsoft 365 admin center, and confirm a non-default domain has been successfully enabled.
Install the Azure AD module
NoticeSkip this section if you have already installed Azure AD module.
Open the PowerShell as Administrator, and run the following command.
Install-Module MSOnlineStep 1. Retrieve the SP metadata file
Download the SP metadata file from here.
Step 2. Set up a client on JCV Cloud Face Login
Refer to the clients section to set up a client.
You can use the SP metadata file to make the process more efficient.
For Name ID Format, select Restricted - Email.
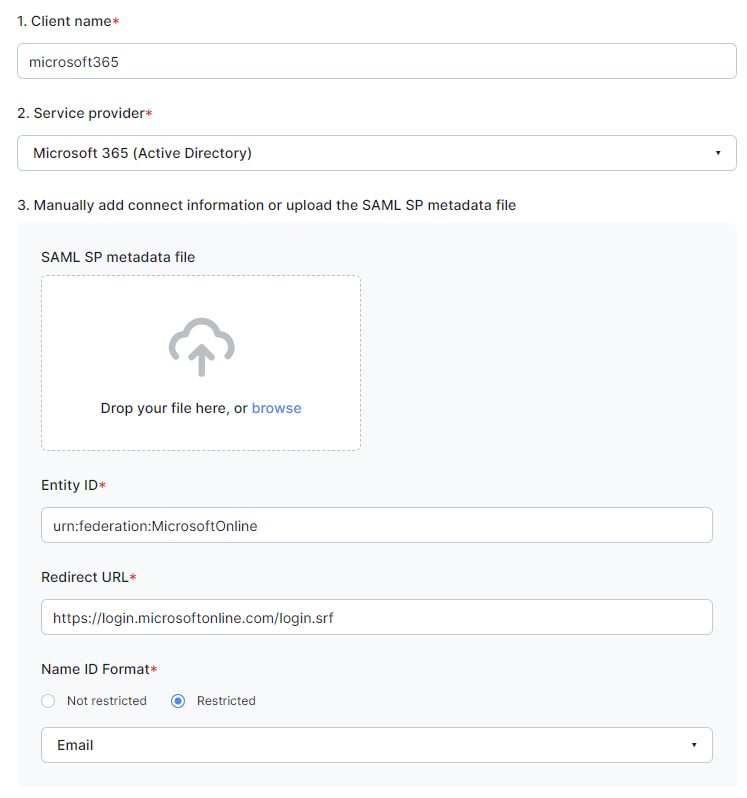
Microsoft 365 client example
Step 3. Download the IDP metadata file
Go to the settings page of JCV Cloud Face Login, and download the XML file. Refer to IDP information section.
Step 4. Execute commands in Microsoft PowerShell
Make sure you have a Windows OS computer and open Microsoft PowerShell as Administrator.
4.1 Connect to Azure Active Directory
Run the following command in PowerShell.
Connect-MsolServiceIf successful, the sign-in page of the Microsoft account will pop up. Enter your account information and sign in to Microsoft.
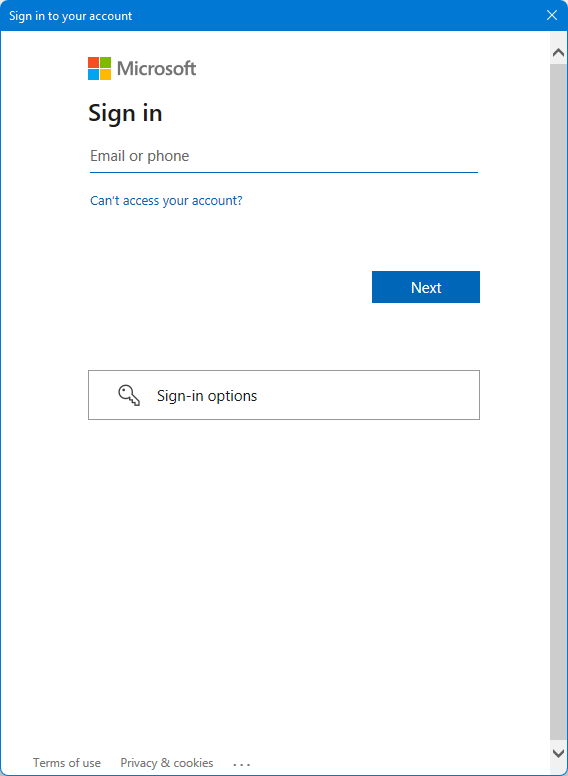
Microsoft Sign-in
4.2 Retrieve domains
Run the following command in PowerShell.
Get-MsolDomainHere is an example.
Name                            Status   Authentication
----                            ------   --------------
japancvorg.onmicrosoft.com      Verified Managed
japancv.xyz                     Verified Managed
If successful, the list of domains will return. Please confirm that the status of the target domain is Verified.
4.3 Restore the domain setting back to Managed
If the domain has already been set to Federated, change it back to Managed by running the following command in PowerShell. Replace japancv.xyz with your domain.
$domain = "japancv.xyz"
Set-MsolDomainAuthentication -Authentication Managed  -DomainName $domain
4.4 Set up the domain to federated
Open the IDP metadata file for detailed information. Here is an example.
<md:EntityDescriptor xmlns="urn:oasis:names:tc:SAML:2.0:metadata" xmlns:md="urn:oasis:names:tc:SAML:2.0:metadata" xmlns:saml="urn:oasis:names:tc:SAML:2.0:assertion" xmlns:ds="http://www.w3.org/2000/09/xmldsig#" entityID="https://facelogin.japancv.co.jp/realms/idp-abcd1234">
	<md:IDPSSODescriptor WantAuthnRequestsSigned="true" protocolSupportEnumeration="urn:oasis:names:tc:SAML:2.0:protocol">
		<md:KeyDescriptor use="signing">
			<ds:KeyInfo>
				<ds:KeyName>L7ei2fxMq7Vk1frt_0EAqT72g9cUHrzsRm1l9AFhVNk</ds:KeyName>
				<ds:X509Data>
					<ds:X509Certificate>MIICpzCCAY8CBgGE6nnjjjANBgkqhkiG...qnInjWrg=
           </ds:X509Certificate>
				</ds:X509Data>
			</ds:KeyInfo>
		</md:KeyDescriptor>
		<md:ArtifactResolutionService Binding="urn:oasis:names:tc:SAML:2.0:bindings:SOAP" Location="https://facelogin.japancv.co.jp/realms/idp-abcd1234/protocol/saml/resolve" index="0"/>
		<md:SingleLogoutService Binding="urn:oasis:names:tc:SAML:2.0:bindings:HTTP-POST" Location="https://facelogin.japancv.co.jp/realms/idp-abcd1234/protocol/saml"/>
		<md:SingleLogoutService Binding="urn:oasis:names:tc:SAML:2.0:bindings:HTTP-Redirect" Location="https://facelogin.japancv.co.jp/realms/idp-abcd1234/protocol/saml"/>
		<md:SingleLogoutService Binding="urn:oasis:names:tc:SAML:2.0:bindings:HTTP-Artifact" Location="https://facelogin.japancv.co.jp/realms/idp-abcd1234/protocol/saml"/>
		<md:NameIDFormat>urn:oasis:names:tc:SAML:2.0:nameid-format:persistent</md:NameIDFormat>
		<md:NameIDFormat>urn:oasis:names:tc:SAML:2.0:nameid-format:transient</md:NameIDFormat>
		<md:NameIDFormat>urn:oasis:names:tc:SAML:1.1:nameid-format:unspecified</md:NameIDFormat>
		<md:NameIDFormat>urn:oasis:names:tc:SAML:1.1:nameid-format:emailAddress</md:NameIDFormat>
		<md:SingleSignOnService Binding="urn:oasis:names:tc:SAML:2.0:bindings:HTTP-POST" Location="https://facelogin.japancv.co.jp/realms/idp-abcd1234/protocol/saml"/>
		<md:SingleSignOnService Binding="urn:oasis:names:tc:SAML:2.0:bindings:HTTP-Redirect" Location="https://facelogin.japancv.co.jp/realms/idp-abcd1234/protocol/saml"/>
		<md:SingleSignOnService Binding="urn:oasis:names:tc:SAML:2.0:bindings:SOAP" Location="https://facelogin.japancv.co.jp/realms/idp-abcd1234/protocol/saml"/>
		<md:SingleSignOnService Binding="urn:oasis:names:tc:SAML:2.0:bindings:HTTP-Artifact" Location="https://facelogin.japancv.co.jp/realms/idp-abcd1234/protocol/saml"/>
	</md:IDPSSODescriptor>
</md:EntityDescriptor>
Search for the field names.
- SAML:2.0:bindings:HTTP-POST, e.g.
https://facelogin.japancv.co.jp/realms/idp-abcd1234/protocol/saml - entityID, e.g.
https://facelogin.japancv.co.jp/realms/idp-abcd1234 - X509Certificate, e.g.
MIICpzCCAY8CBgGE6nnjjjANBgkqhkiG...qnInjWrg=
Replace the following variables with the values in your XML file and run the following commands.
$ssoUrl = "https://facelogin.japancv.co.jp/realms/idp-abcd1234/protocol/saml"
$entity = "https://facelogin.japancv.co.jp/realms/idp-abcd1234"
$cert = "MIICpzCCAY8CBgGE6nnjjjANBgkqhkiG...qnInjWrg="
Set-MsolDomainAuthentication -Authentication Federated  -DomainName $domain -ActiveLogOnUri $ssoUrl -PassiveLogOnUri $ssoUrl -IssuerUri $entity -LogOffUri $ssoUrl -SigningCertificate $cert -PreferredAuthenticationProtocol SAMLP
If successful, there will be no error messages.
4.5 Set users to use the immutable ID
Run the following command in PowerShell. Replace japancv.xyz with your domain.
Get-MsolUser | ?{ $_.UserPrincipalName.EndsWith("japancv.xyz") } | %{ Set-MsolUser -UserPrincipalName $_.UserPrincipalName -ImmutableId $_.UserPrincipalName }If successful, there will be no error messages.
If this setting does not work, you can also set users one by one. Replace [email protected] with your user emails.
Set-MsolUser -UserPrincipalName [email protected] -ImmutableId [email protected]This finishes the whole setup process.
Verify the setup
Open https://office.com/. You will be redirected to the face login page if the above setup is correct.
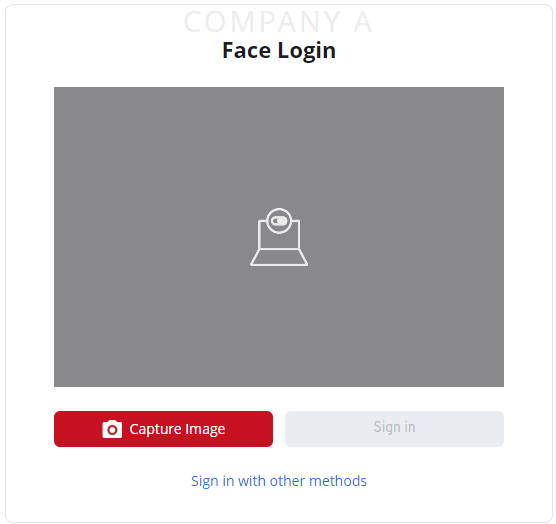
Face Login page
Disable the integration
To disable the integration, you only need to restore the Federated domain to Managed.
Ensure you have a Windows OS computer and open Microsoft PowerShell as Administrator.
Run the following command in PowerShell.
Connect-MsolServiceIf successful, the sign-in page of the Microsoft account will pop up. Enter your account information and sign in to Microsoft.
Running the following command in PowerShell. Replace japancv.xyz with your domain.
PS $domain = "japancv.xyz"
Set-MsolDomainAuthentication -Authentication Managed  -DomainName $domain
Updated 9 months ago