
Google Workspace
This page provides detailed steps to integrate Face Login with Google Workspace.
Step 1. Download the IDP metadata file
Go to the settings page of JCV Cloud Face Login, and download the XML file. Refer to IDP information section.
Step 2. Sign on to Google Admin Console
Open the URL of Google Admin Console and log in.
Step 3. Set up SSO IDP information
3.1 Open the SSO with the third-party IdP menu
On the left of the management console, click Security - Authentication - SSO with third-party IdP to bring up the setting menu.
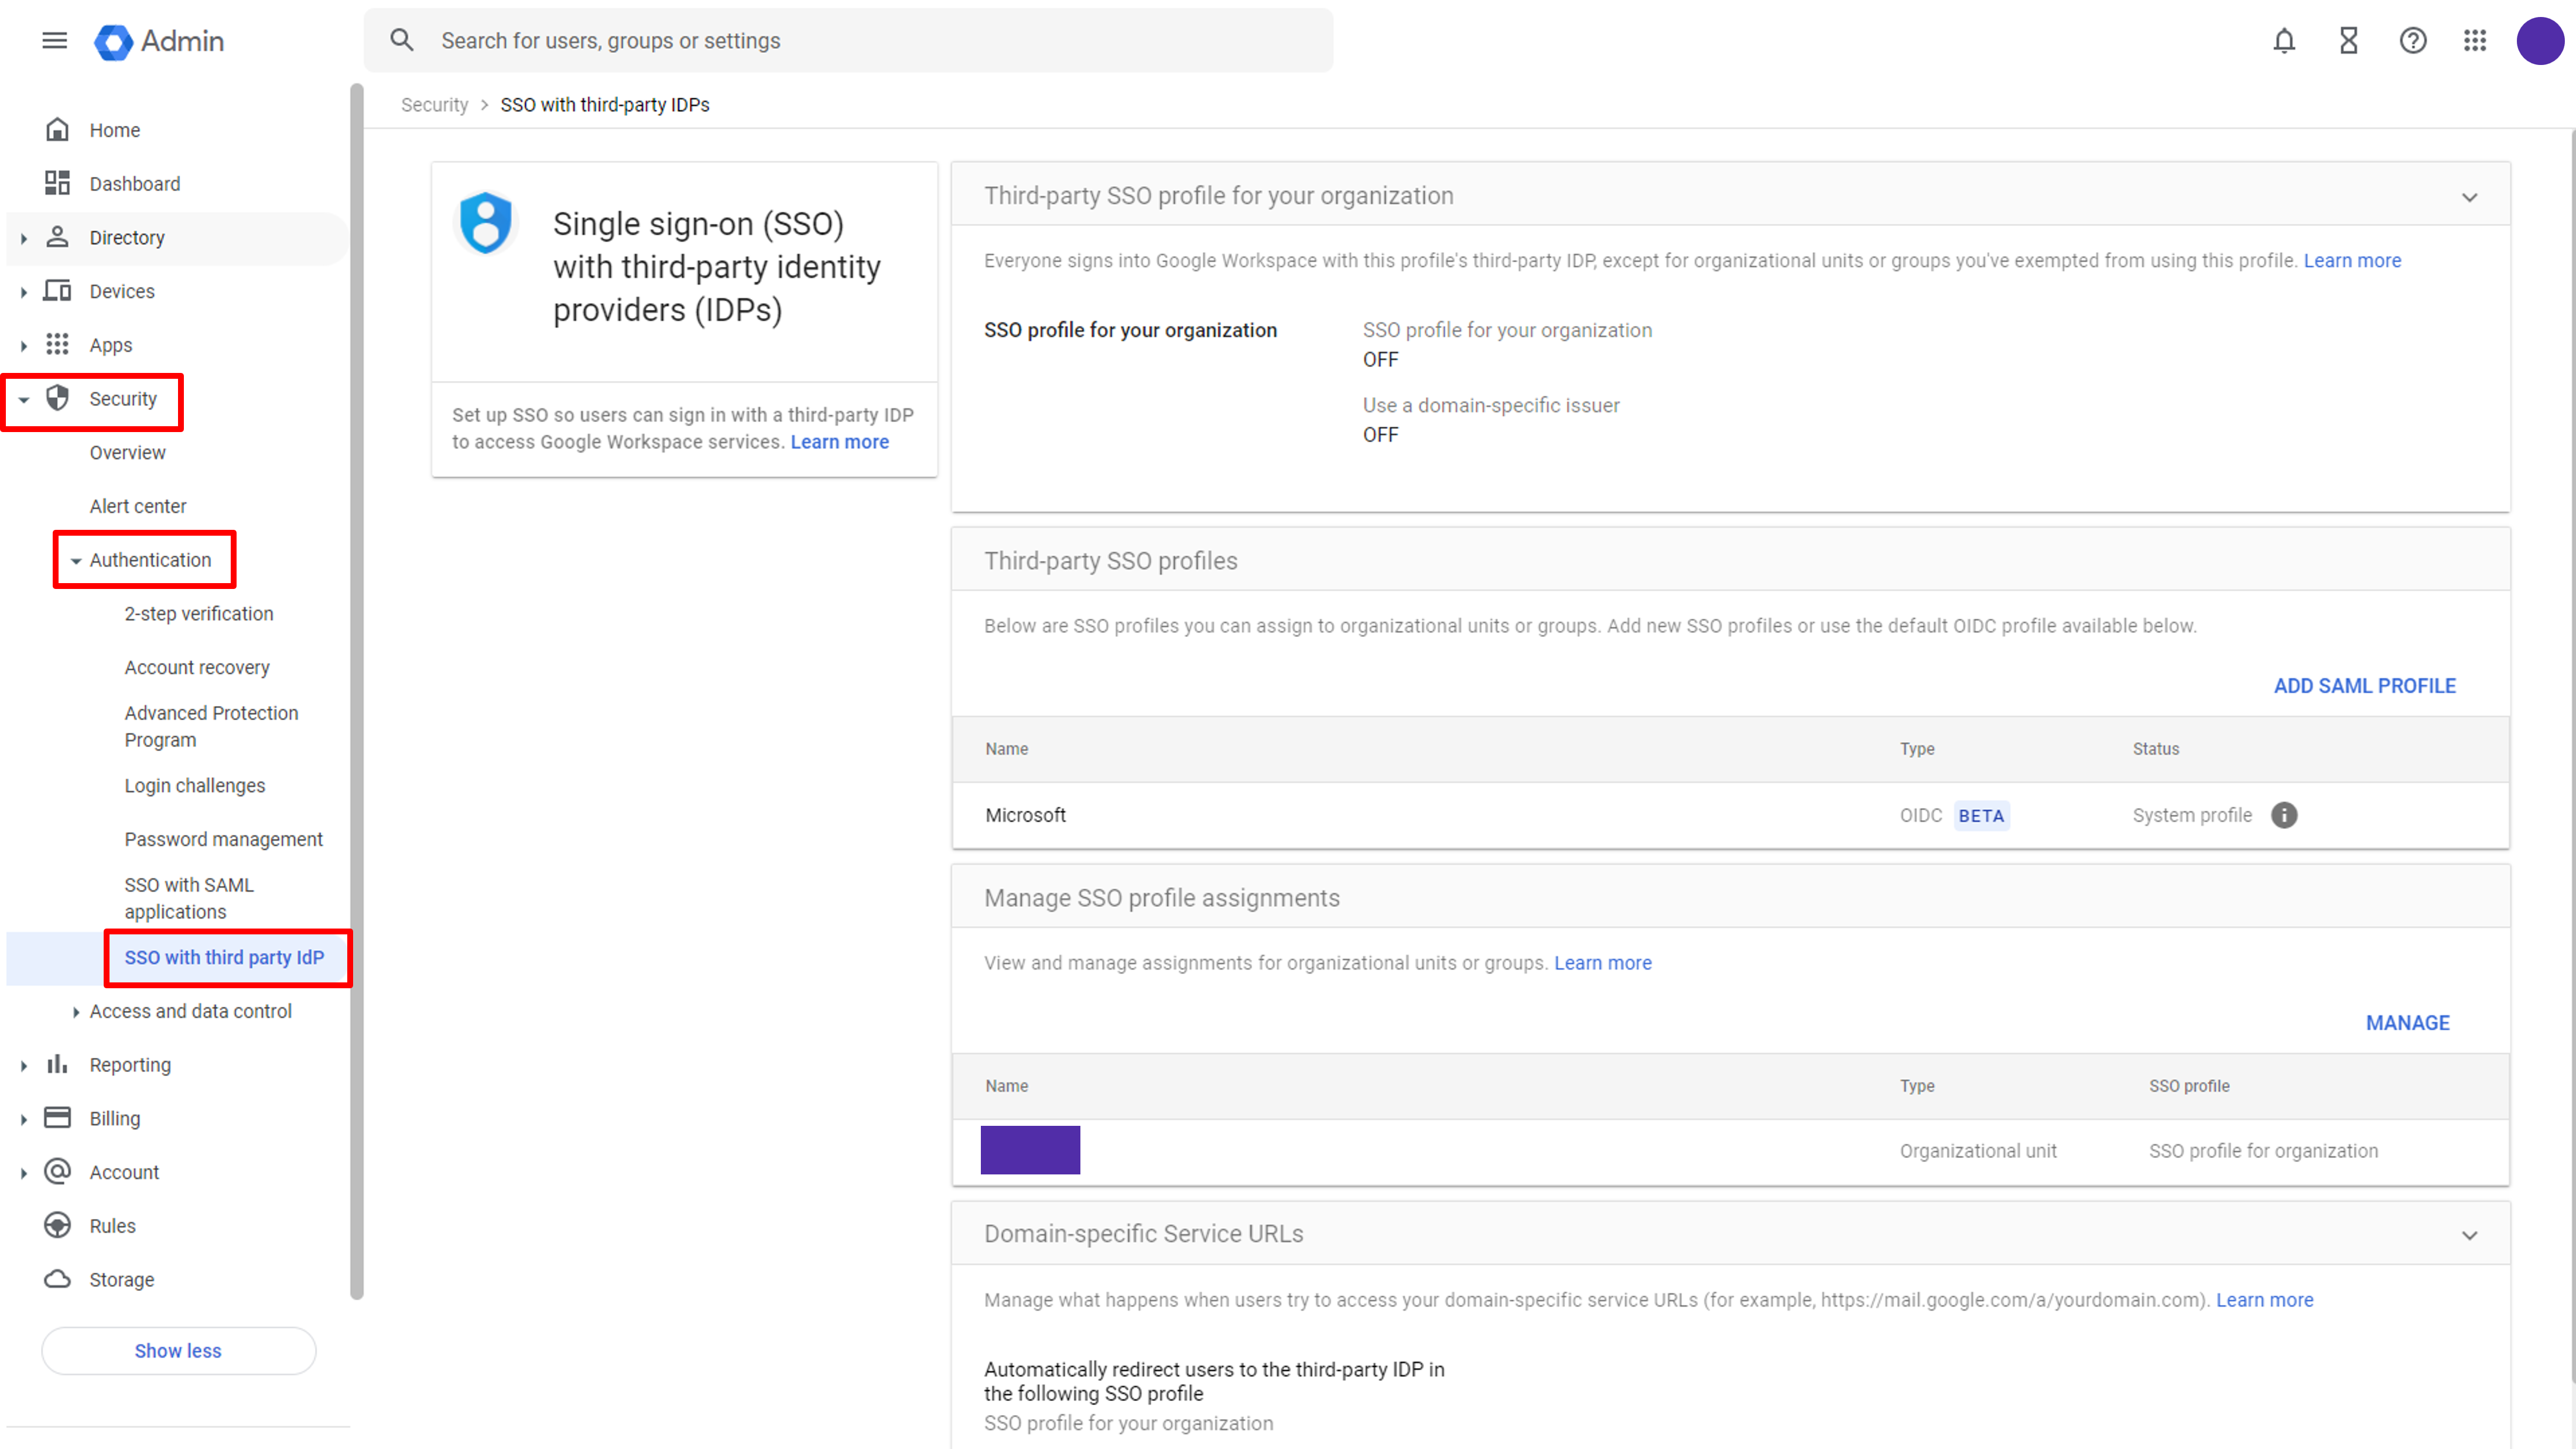
Google configuration page
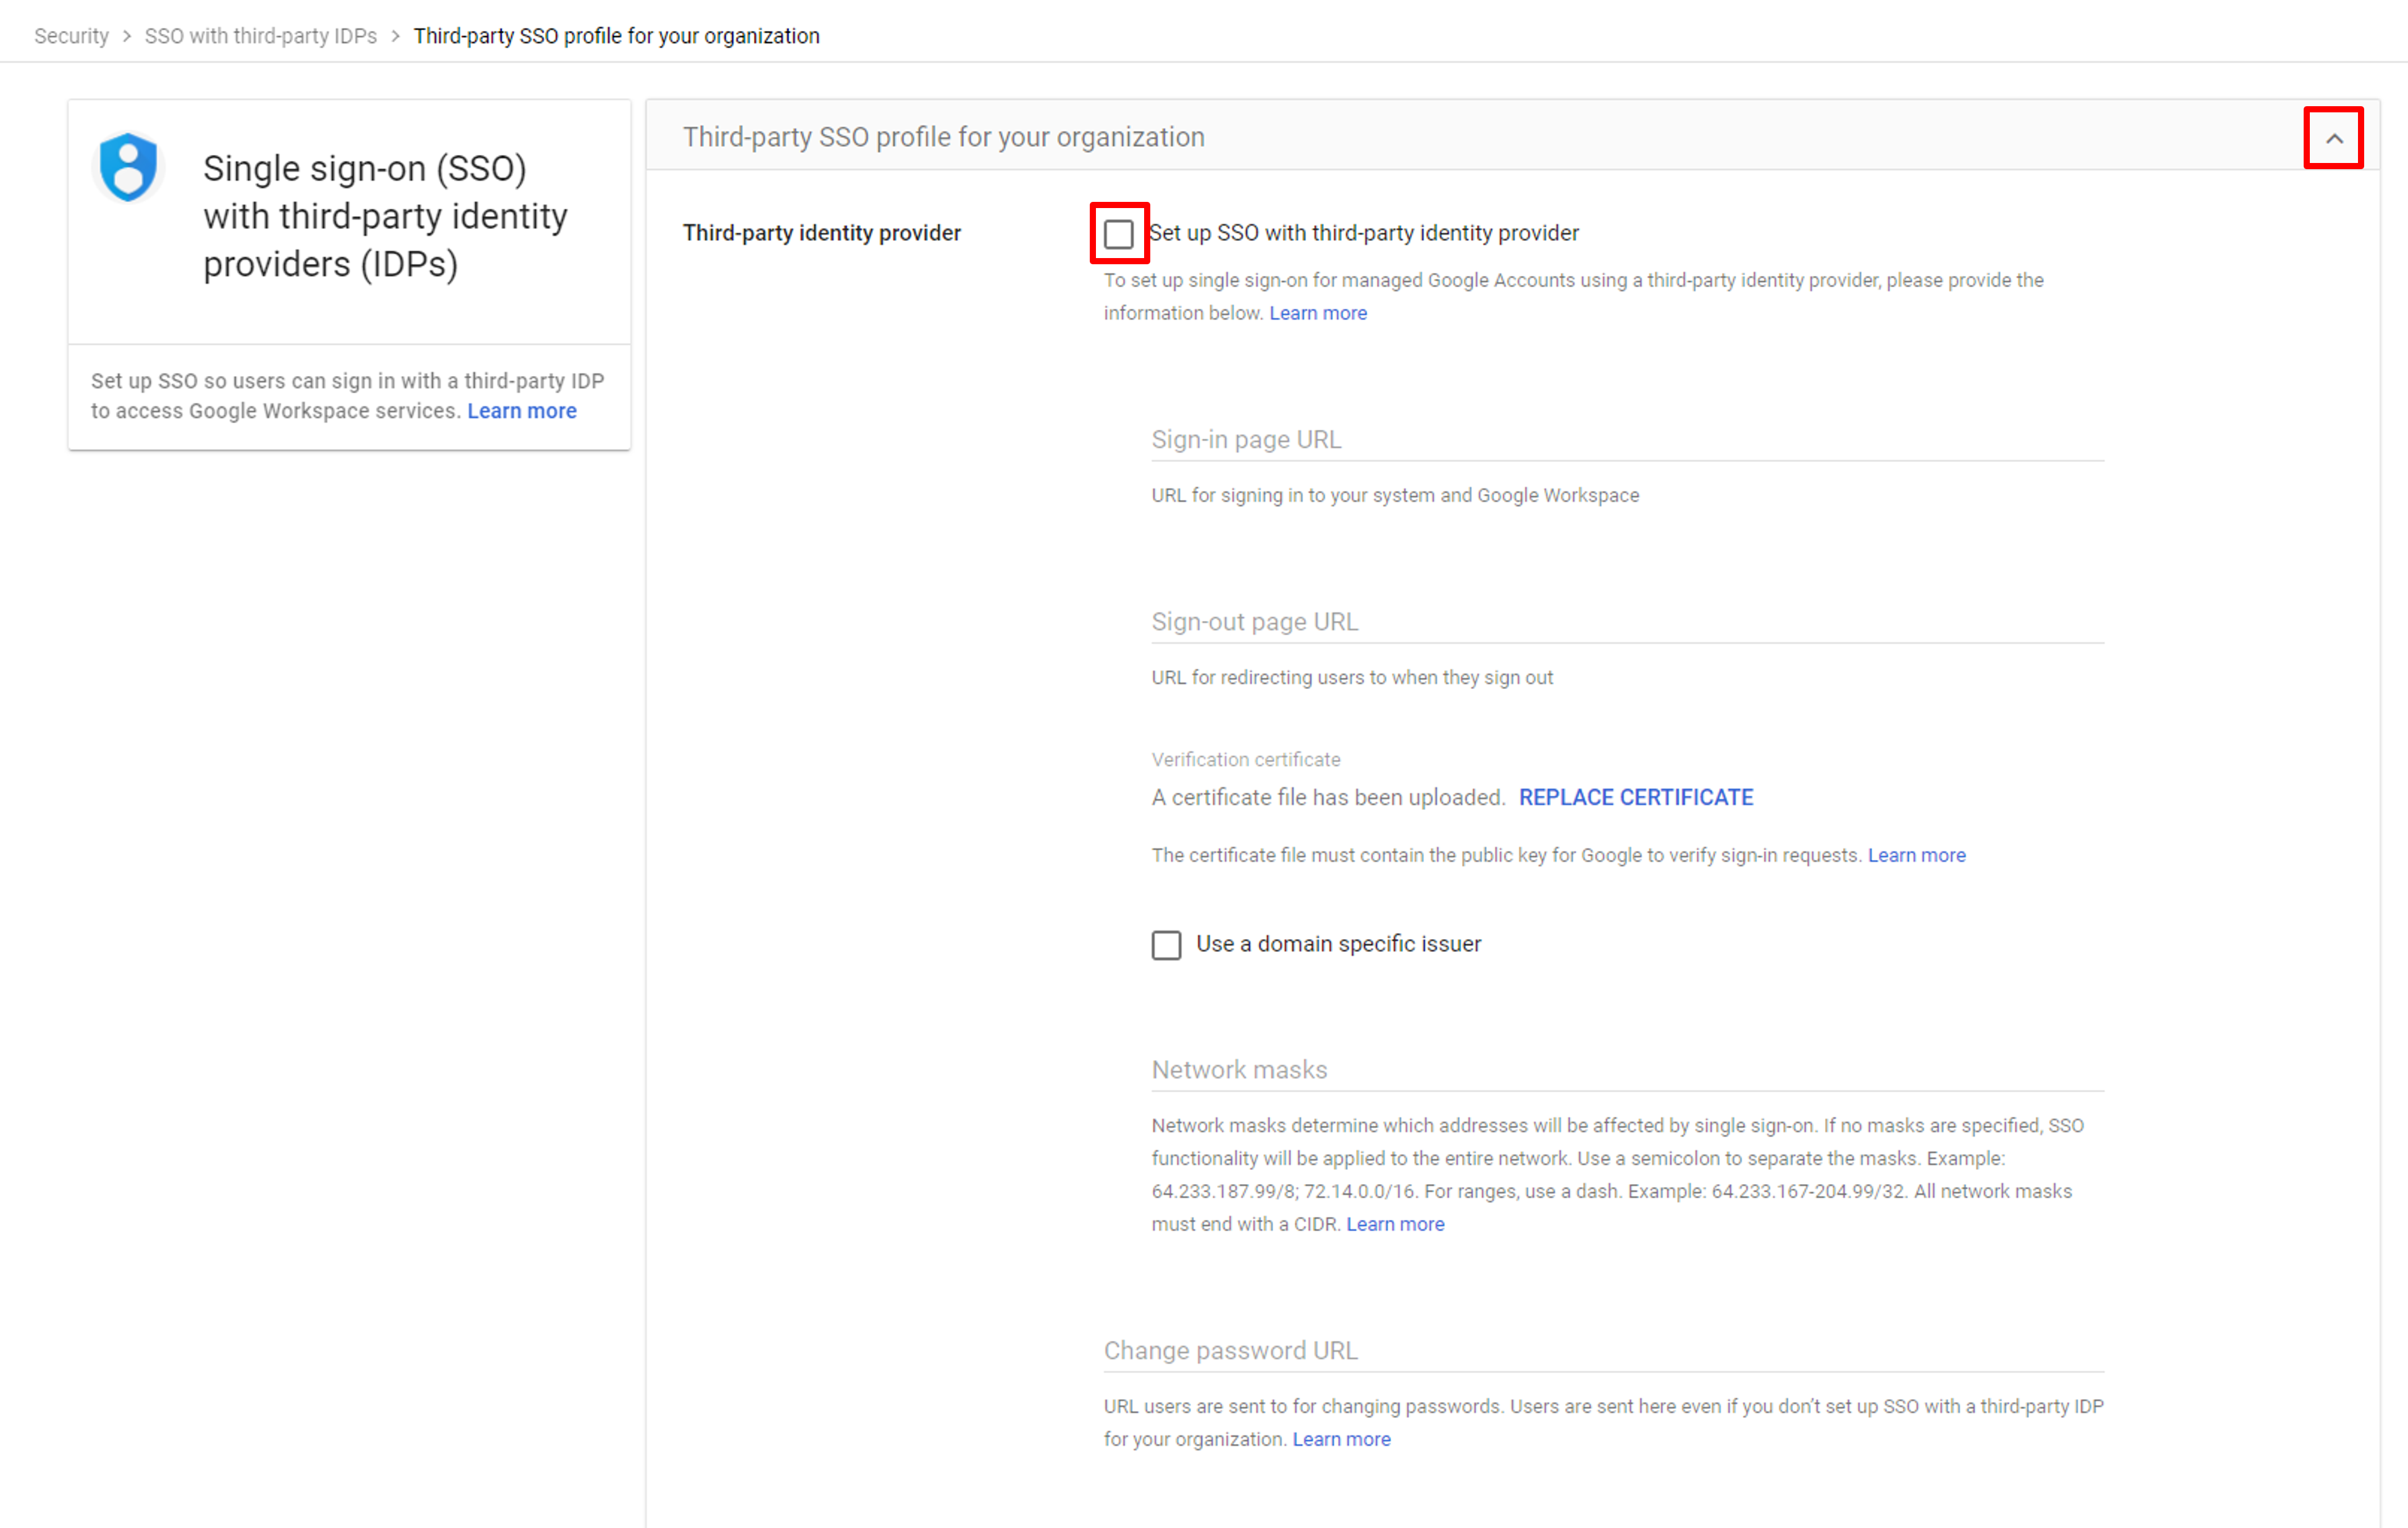
Click the dropdown button on the right of the Third-party SSO profile for your organization. The detailed setting page will be displayed. Check the Set up SSO with third-party identity provider option.
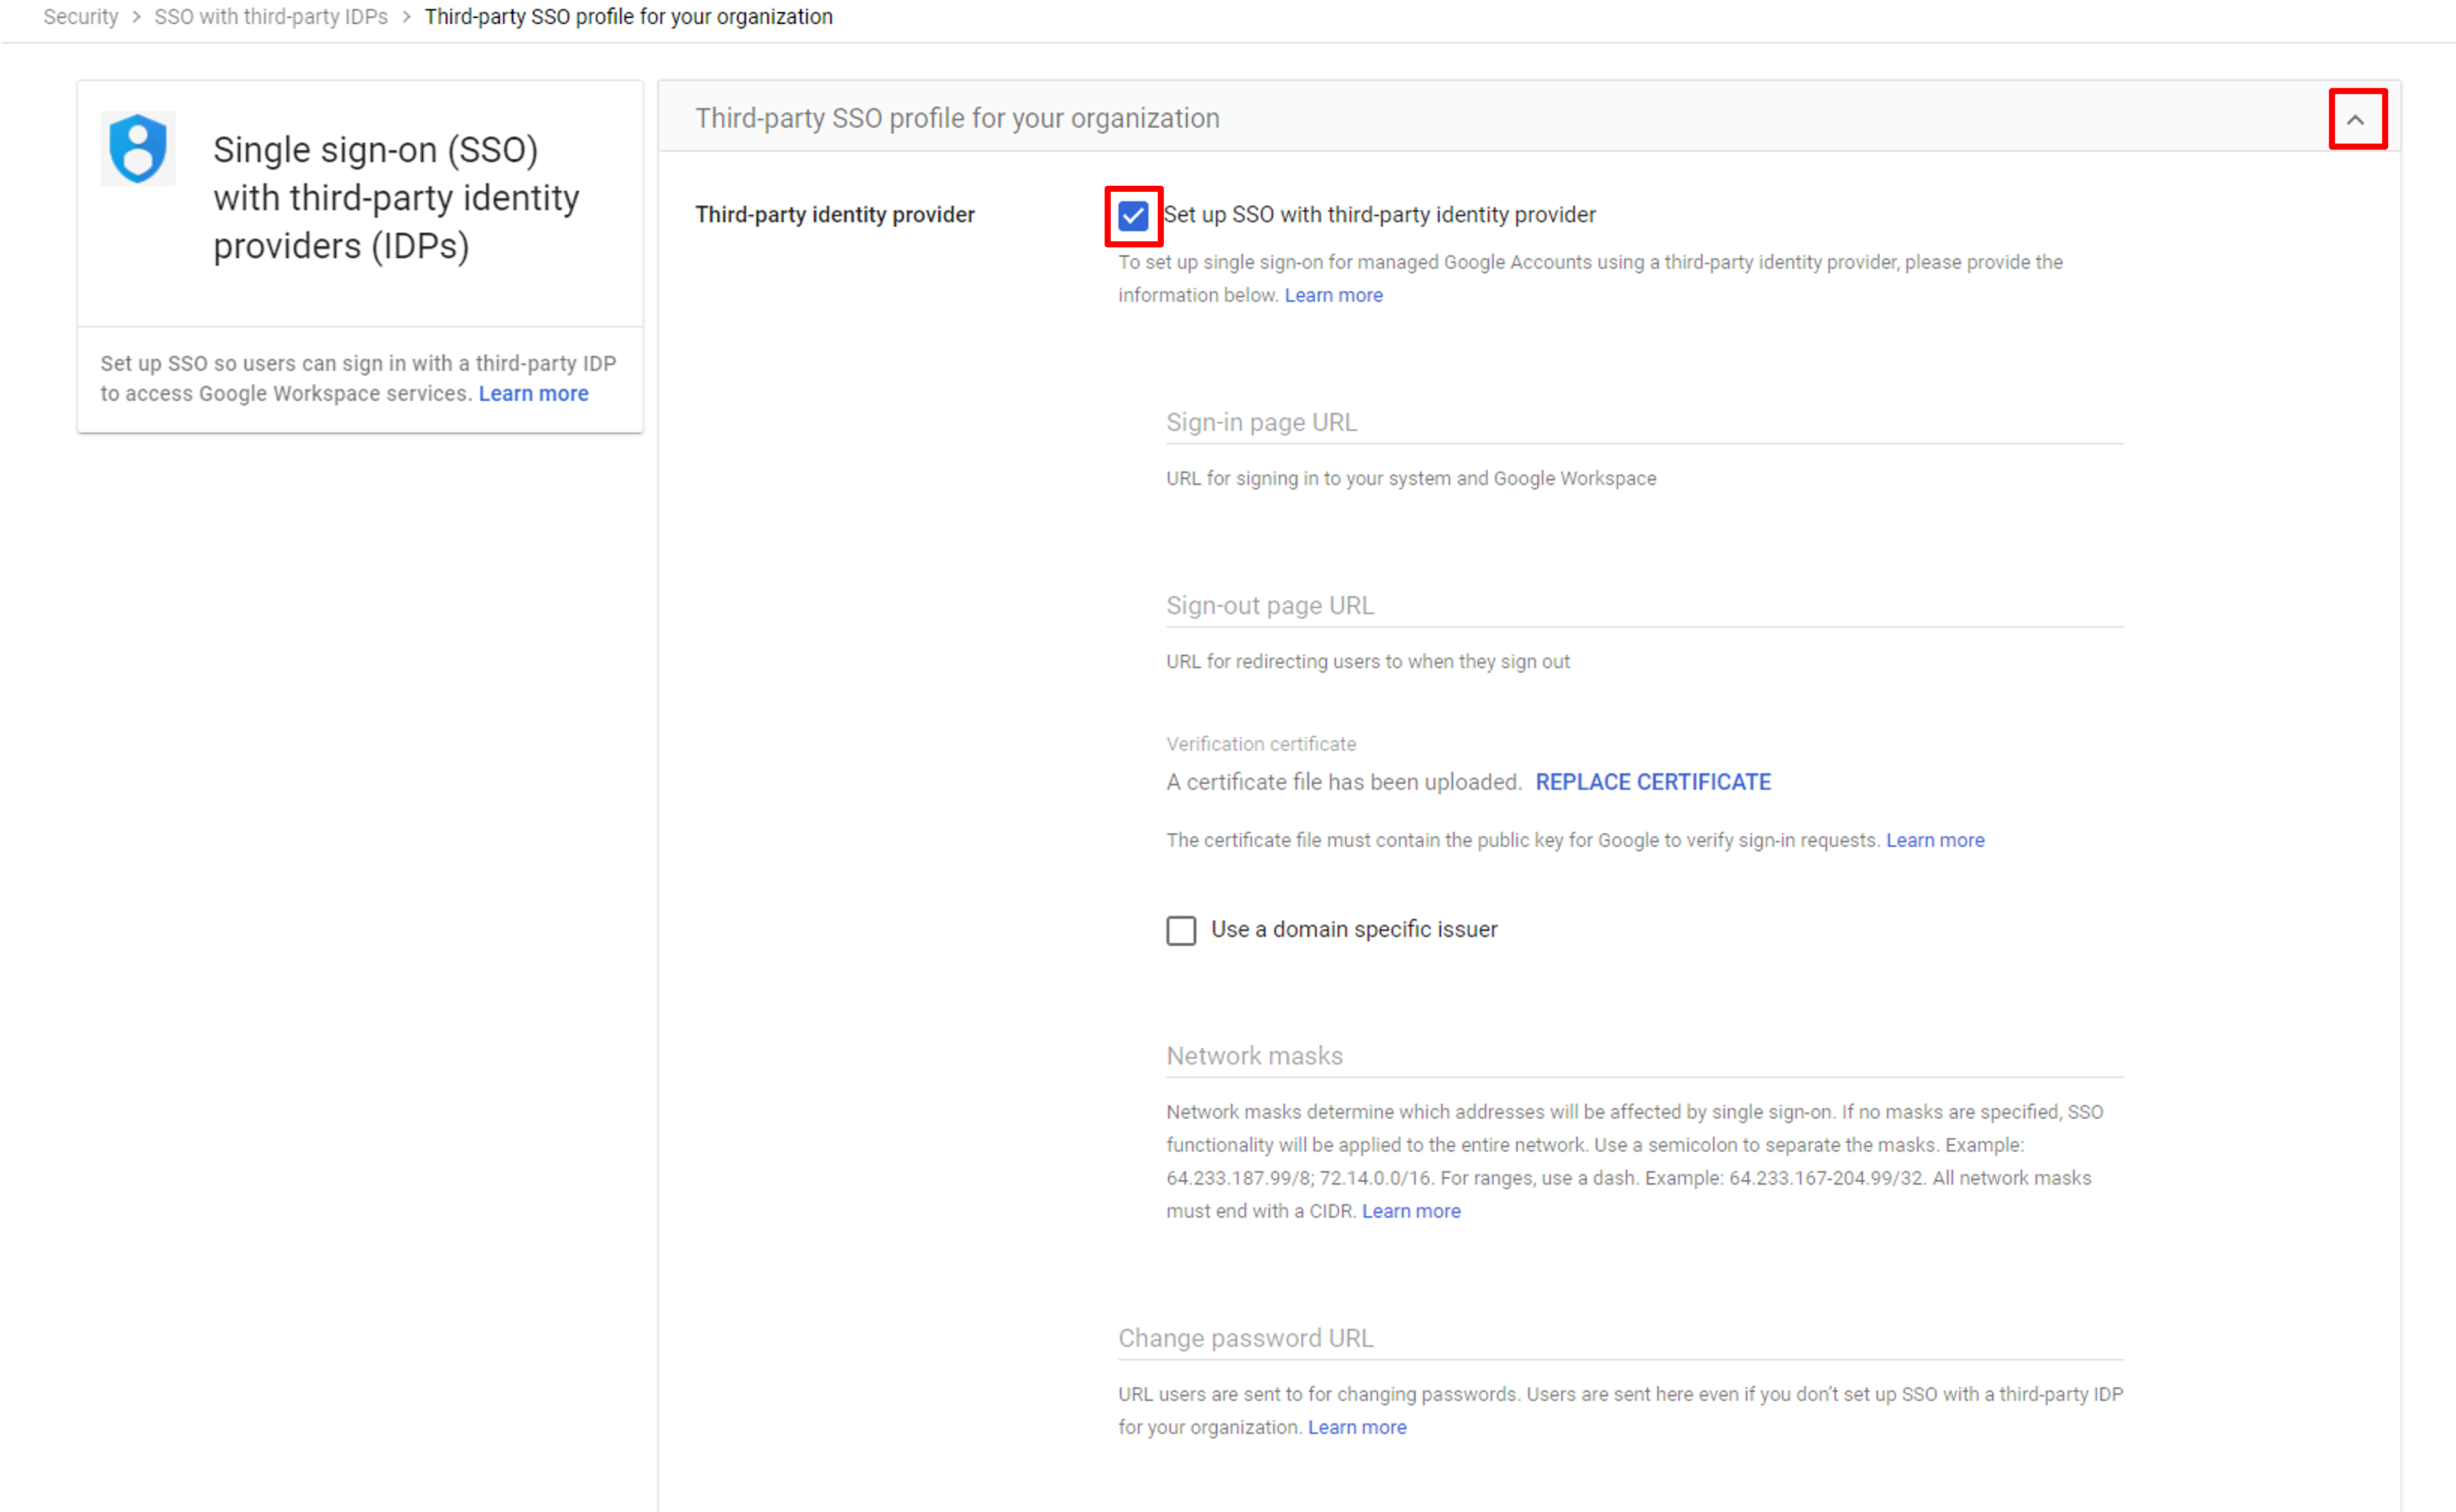
SSO profile configuration page
3.2 Fill in the SSO profile
Open the following information in the IDP metadata file. Here is an example.
<md:EntityDescriptor xmlns="urn:oasis:names:tc:SAML:2.0:metadata" xmlns:md="urn:oasis:names:tc:SAML:2.0:metadata" xmlns:saml="urn:oasis:names:tc:SAML:2.0:assertion" xmlns:ds="http://www.w3.org/2000/09/xmldsig#" entityID="https://facelogin.japancv.co.jp/realms/idp-abcd1234">
	<md:IDPSSODescriptor WantAuthnRequestsSigned="true" protocolSupportEnumeration="urn:oasis:names:tc:SAML:2.0:protocol">
		<md:KeyDescriptor use="signing">
			<ds:KeyInfo>
				<ds:KeyName>L7ei2fxMq7Vk1frt_0EAqT72g9cUHrzsRm1l9AFhVNk</ds:KeyName>
				<ds:X509Data>
					<ds:X509Certificate>MIICpzCCAY8CBgGE6nnjjjANBgkqhkiG...qnInjWrg=
           </ds:X509Certificate>
				</ds:X509Data>
			</ds:KeyInfo>
		</md:KeyDescriptor>
		<md:ArtifactResolutionService Binding="urn:oasis:names:tc:SAML:2.0:bindings:SOAP" Location="https://facelogin.japancv.co.jp/realms/idp-abcd1234/protocol/saml/resolve" index="0"/>
		<md:SingleLogoutService Binding="urn:oasis:names:tc:SAML:2.0:bindings:HTTP-POST" Location="https://facelogin.japancv.co.jp/realms/idp-abcd1234/protocol/saml"/>
		<md:SingleLogoutService Binding="urn:oasis:names:tc:SAML:2.0:bindings:HTTP-Redirect" Location="https://facelogin.japancv.co.jp/realms/idp-abcd1234/protocol/saml"/>
		<md:SingleLogoutService Binding="urn:oasis:names:tc:SAML:2.0:bindings:HTTP-Artifact" Location="https://facelogin.japancv.co.jp/realms/idp-abcd1234/protocol/saml"/>
		<md:NameIDFormat>urn:oasis:names:tc:SAML:2.0:nameid-format:persistent</md:NameIDFormat>
		<md:NameIDFormat>urn:oasis:names:tc:SAML:2.0:nameid-format:transient</md:NameIDFormat>
		<md:NameIDFormat>urn:oasis:names:tc:SAML:1.1:nameid-format:unspecified</md:NameIDFormat>
		<md:NameIDFormat>urn:oasis:names:tc:SAML:1.1:nameid-format:emailAddress</md:NameIDFormat>
		<md:SingleSignOnService Binding="urn:oasis:names:tc:SAML:2.0:bindings:HTTP-POST" Location="https://facelogin.japancv.co.jp/realms/idp-abcd1234/protocol/saml"/>
		<md:SingleSignOnService Binding="urn:oasis:names:tc:SAML:2.0:bindings:HTTP-Redirect" Location="https://facelogin.japancv.co.jp/realms/idp-abcd1234/protocol/saml"/>
		<md:SingleSignOnService Binding="urn:oasis:names:tc:SAML:2.0:bindings:SOAP" Location="https://facelogin.japancv.co.jp/realms/idp-abcd1234/protocol/saml"/>
		<md:SingleSignOnService Binding="urn:oasis:names:tc:SAML:2.0:bindings:HTTP-Artifact" Location="https://facelogin.japancv.co.jp/realms/idp-abcd1234/protocol/saml"/>
	</md:IDPSSODescriptor>
</md:EntityDescriptor>
Search for the field name.
- SAML:2.0:bindings:HTTP-POST, e.g.
https://facelogin.japancv.co.jp/realms/idp-abcd1234/protocol/saml
Back to the Google admin page, input the above field value onto the Sign-in Page URL on the Google setting page.
For Sign-out Page URL, use https://www.google.com.

SSO profile
3.3 Upload the certificate
In the IDP metadata file, search for the field name.
- X509Certificate, e.g.
MIICpzCCAY8CBgGE6nnjjjANBgkqhkiG...qnInjWrg=
Open a text editor, and create a new file with the following format. Replace the second line with the certificate value in your XML file.
-----BEGIN CERTIFICATE-----
MIICpzCCAY8CBgGE6nnjjjANBgkqhkiG...qnInjWrg=
-----END CERTIFICATE-----
Save the file as jcv_idp_pub.pem to your local PC.
Back to the Google admin page, click REPLACE CERTIFICATE to upload the jcv_idp_pub.pem file you have created.
After the upload, click Save on the bottom to finish settings on the Google Admin Console.
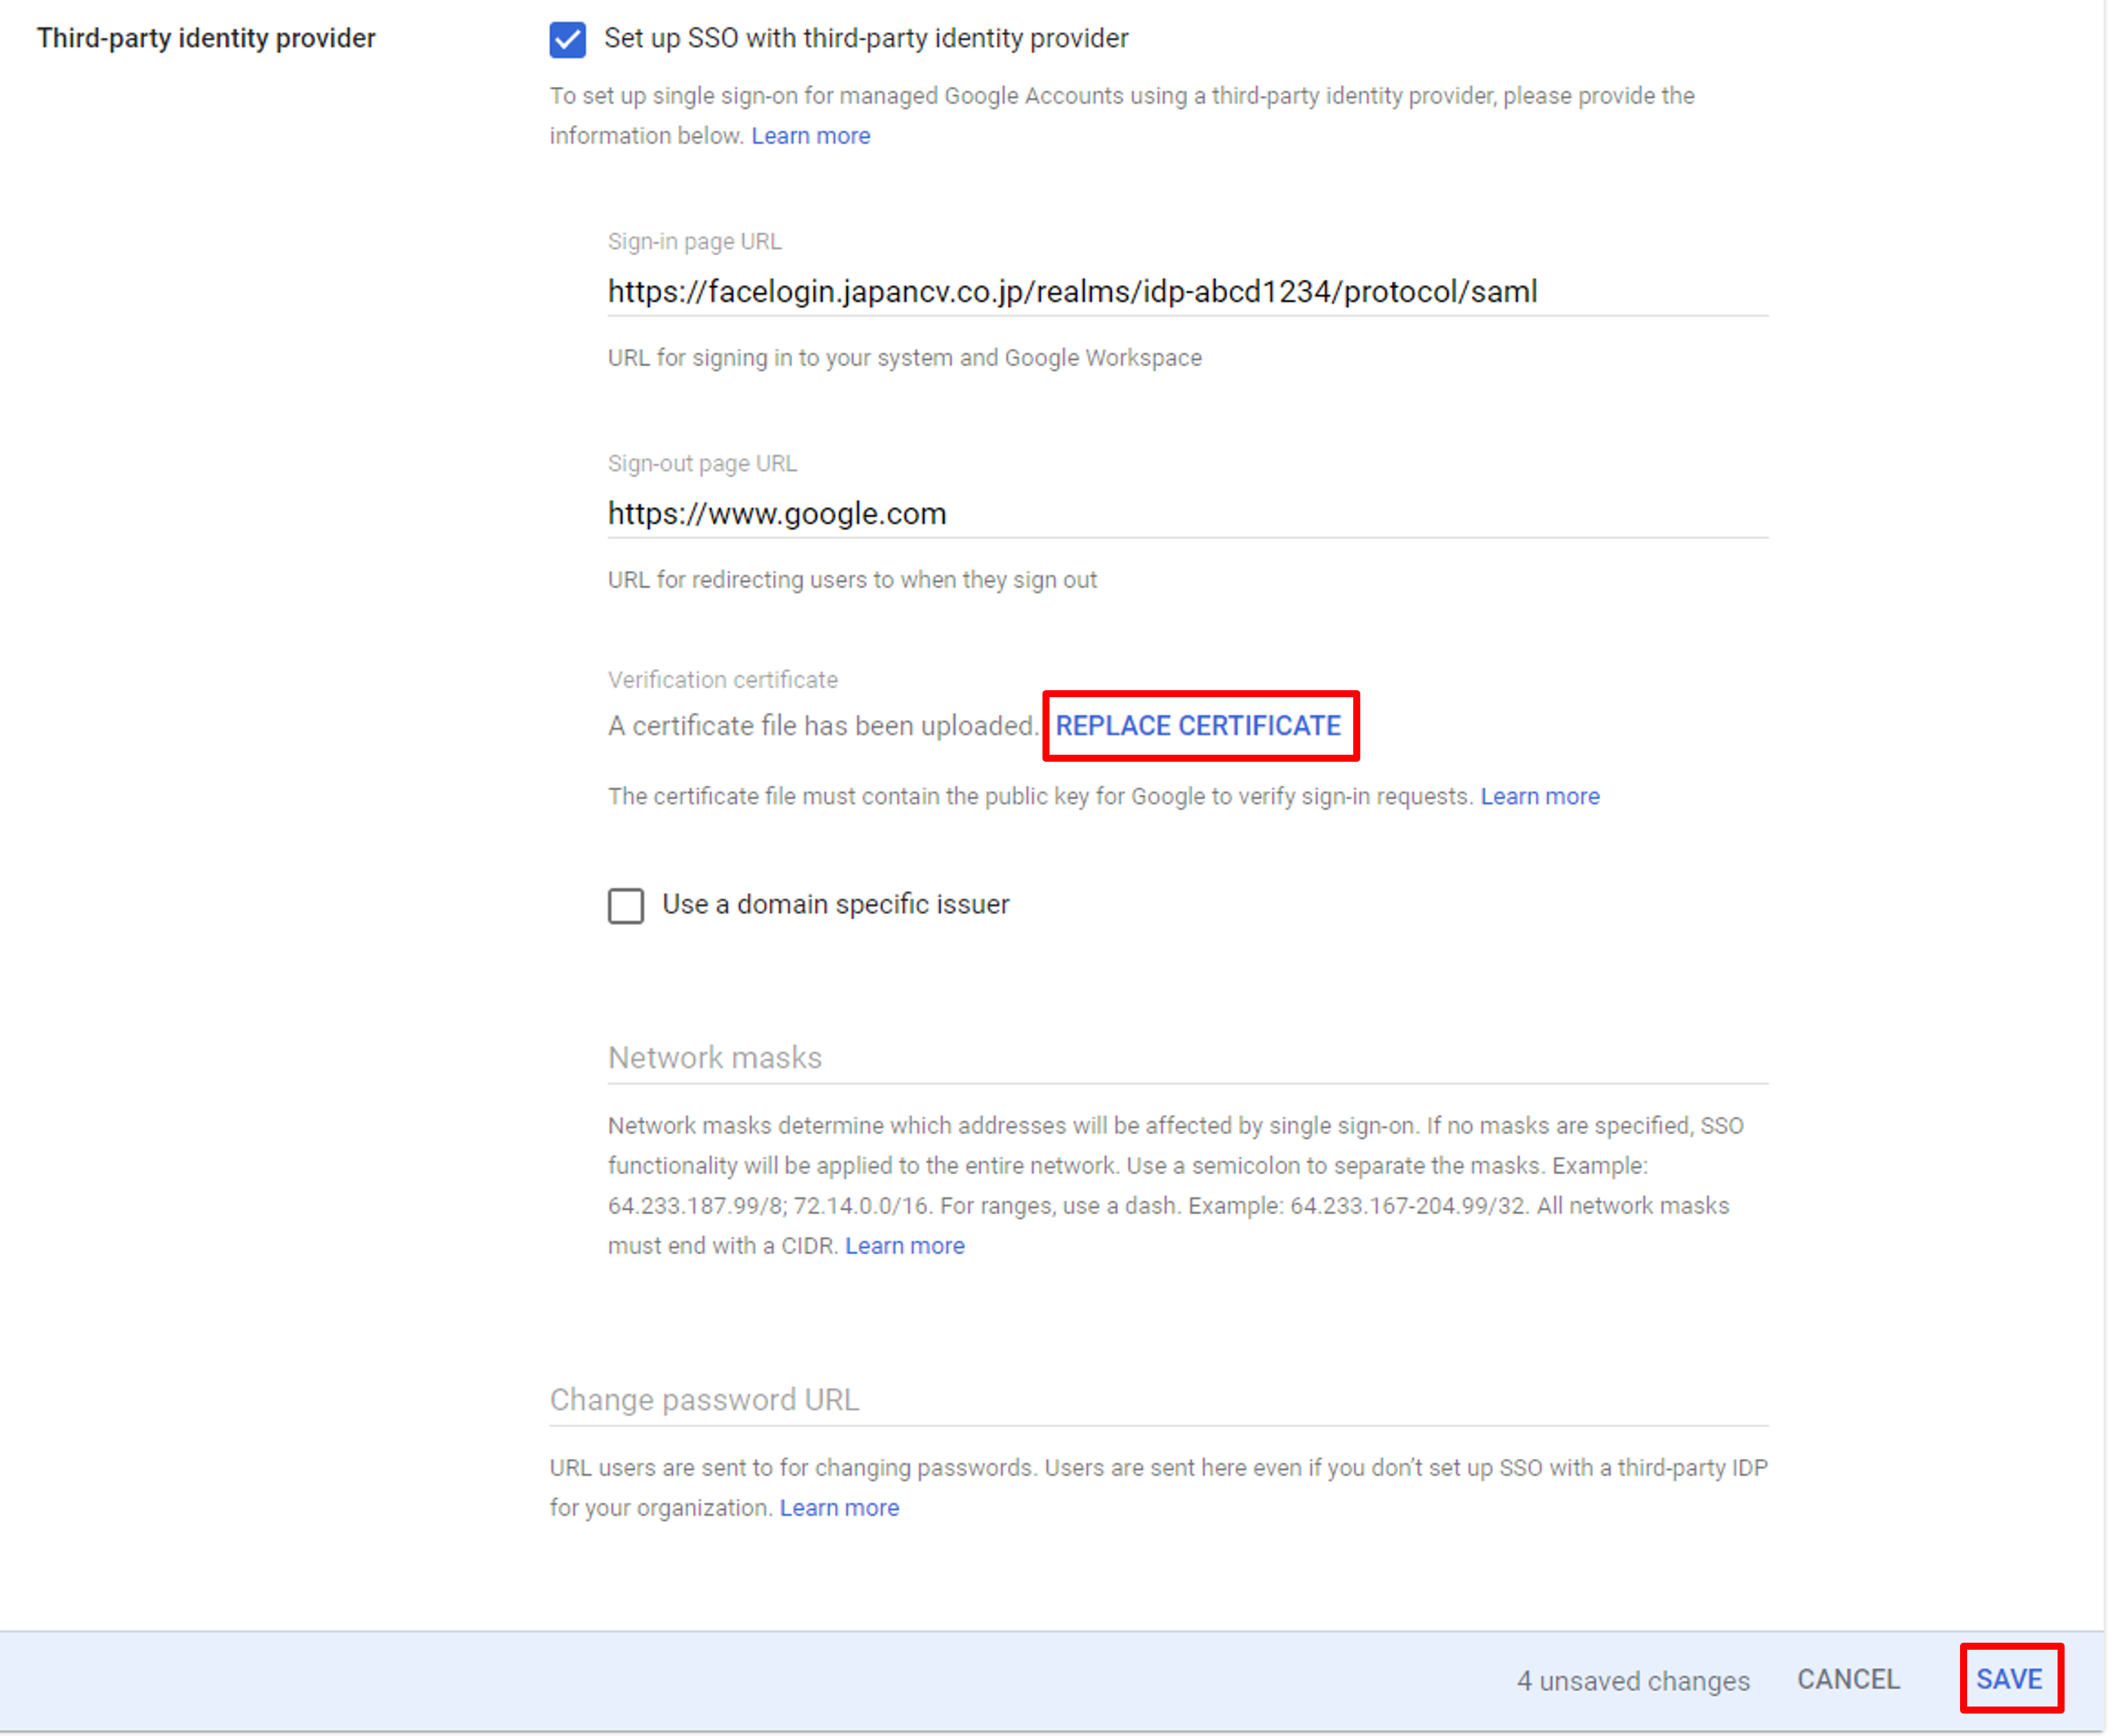
Save Google SSO settings
Step 4. Set up a client on JCV Cloud Face Login
Refer to the clients section to set up a client.
Use google.com as the Entity ID and https://www.google.com/* as the Redirect URL.
Select Restricted - Email for Name ID Format.
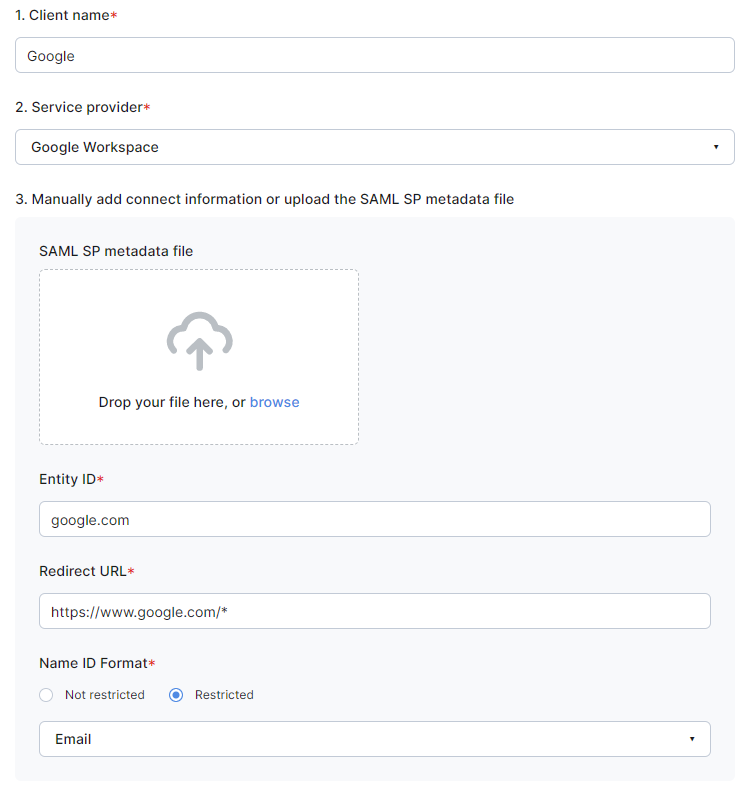
Google client example
This finishes the whole setup process.
Verify the setup
Open https://google.com/ and click the Sign in button on the top right. If the above setup is correct, you will be redirected to the face login page.
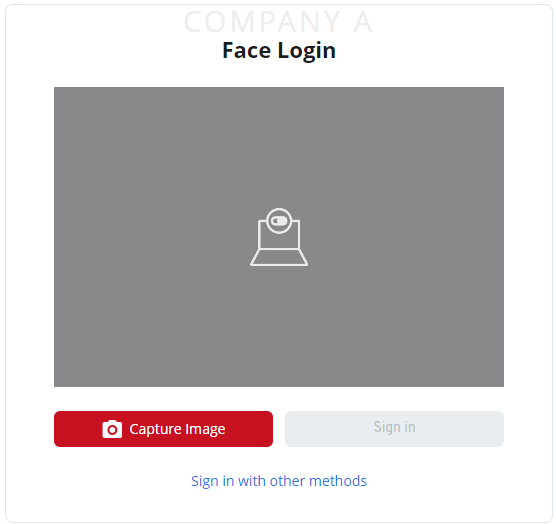
Face Login page
Disable the integration
You only need to disable the Set up SSO with third-party identity provider option to disable the integration.
Open the URL of Google Admin Console and log in. On the left of the management console, click Security - Authentication - SSO with third-party IdP to bring up the setting menu.
Click the dropdown button on the right of the Third-party SSO profile for your organization. The detailed setting page will be displayed. Uncheck the Set up SSO with third-party identity provider option to stop the integration.
Disable Google integration
Updated 10 months ago