
Single Identity Operations
This page provides detailed information on single identity operations.
List of identities
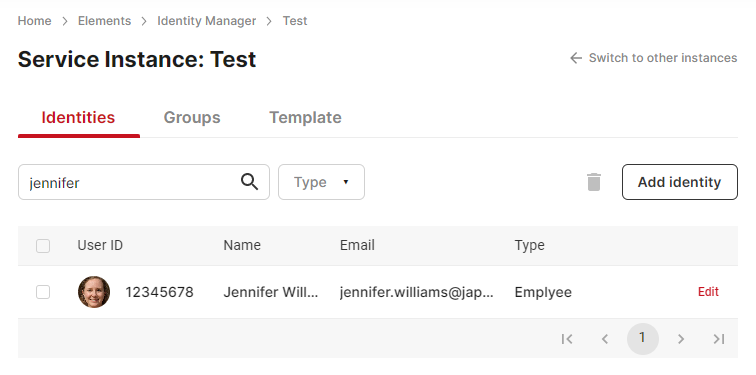
Upon entering a service instance, the list of registered identities will be displayed. All identities will be listed by their user ID, ascending by default. The name, email, and portrait of the identity are also displayed. There are up to 10 identities displayed on each page, and you can switch between different pages by clicking the pagination button at the bottom.
Identities can be quickly filtered by user ID, first name, last name, or email address. The search function is available in forward-matching, so type the keyword from its beginning. The total number at the bottom automatically updates and reflects the number of identities after filtering conditions.
Type is another possible filter. Multiple types can be selected at the same time to filter some specific identity types.
Identity list with filter
Add an identity
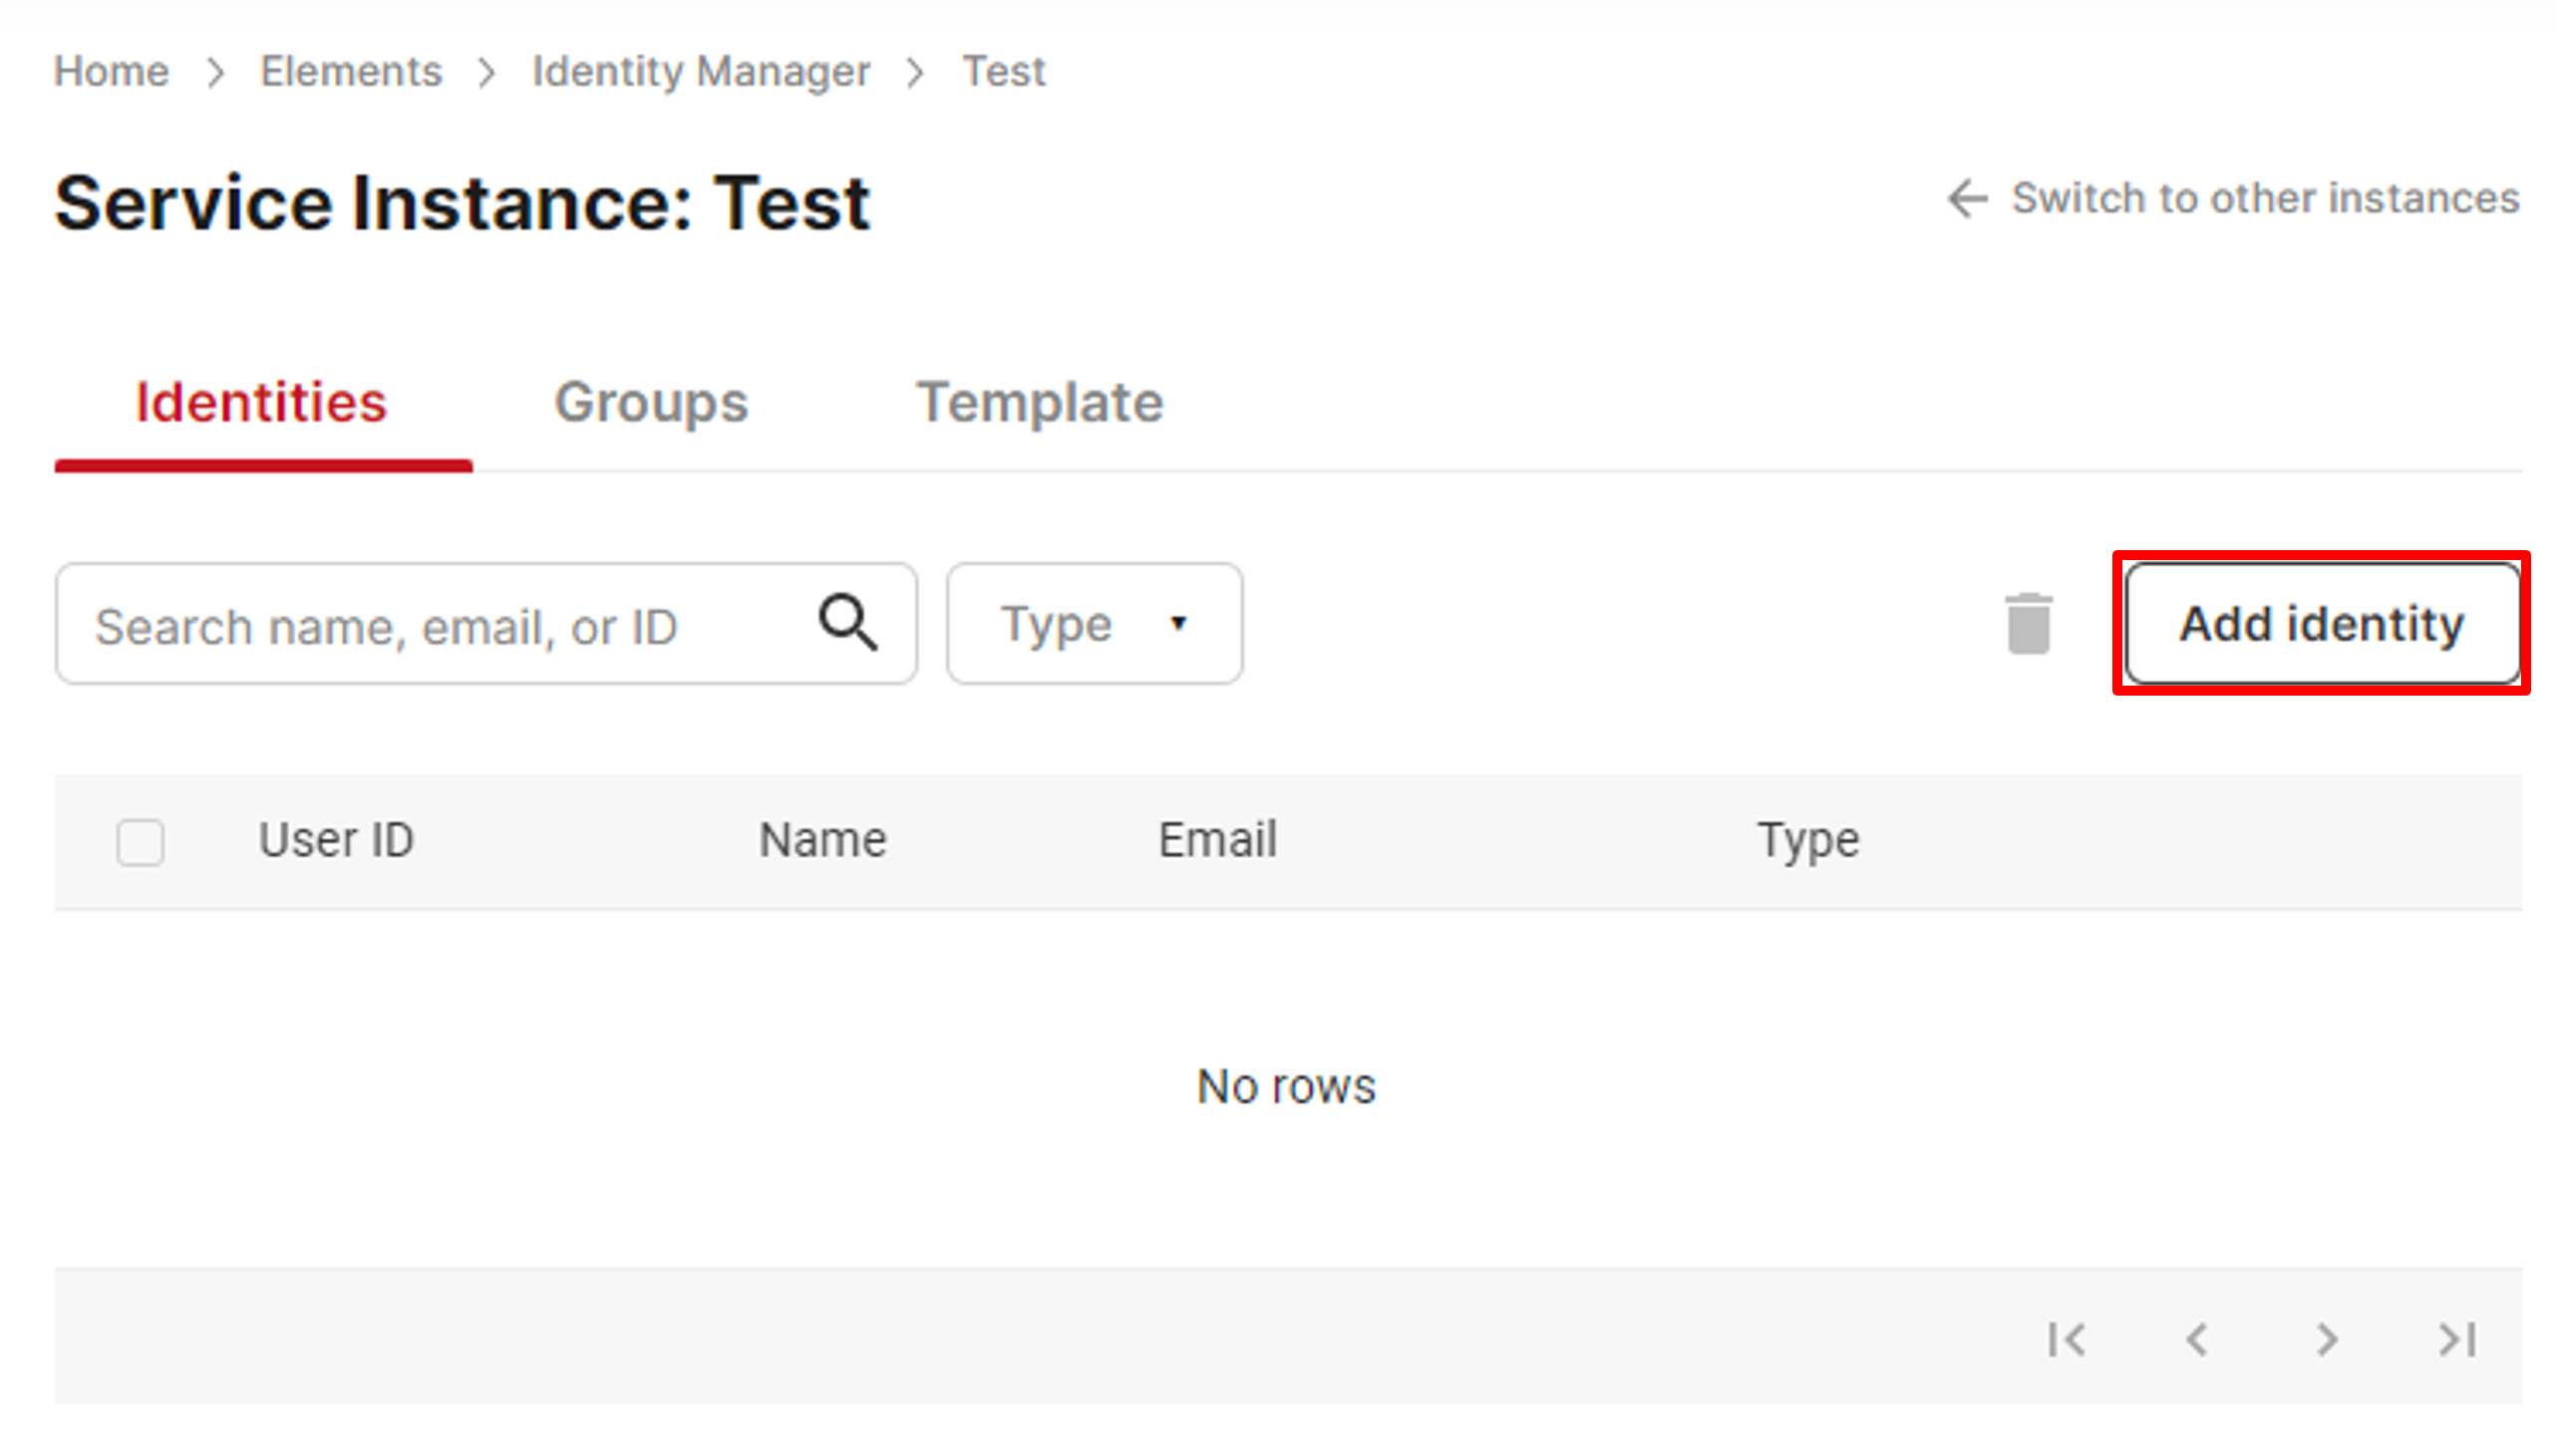
Add a single identity by clicking Add Identity at the top of the identity list.
Add an identity
On the identity entry page, you can upload a face photo and enter some identity information of the identity. To complete adding, click Add. To cancel adding, click Cancel.
Portrait
A portrait upload must use the facial recognition function based on registered identities. The upload is optional, but if no portrait is ever uploaded, the identity cannot be used in facial recognition features, like solutions or OpenAPI.
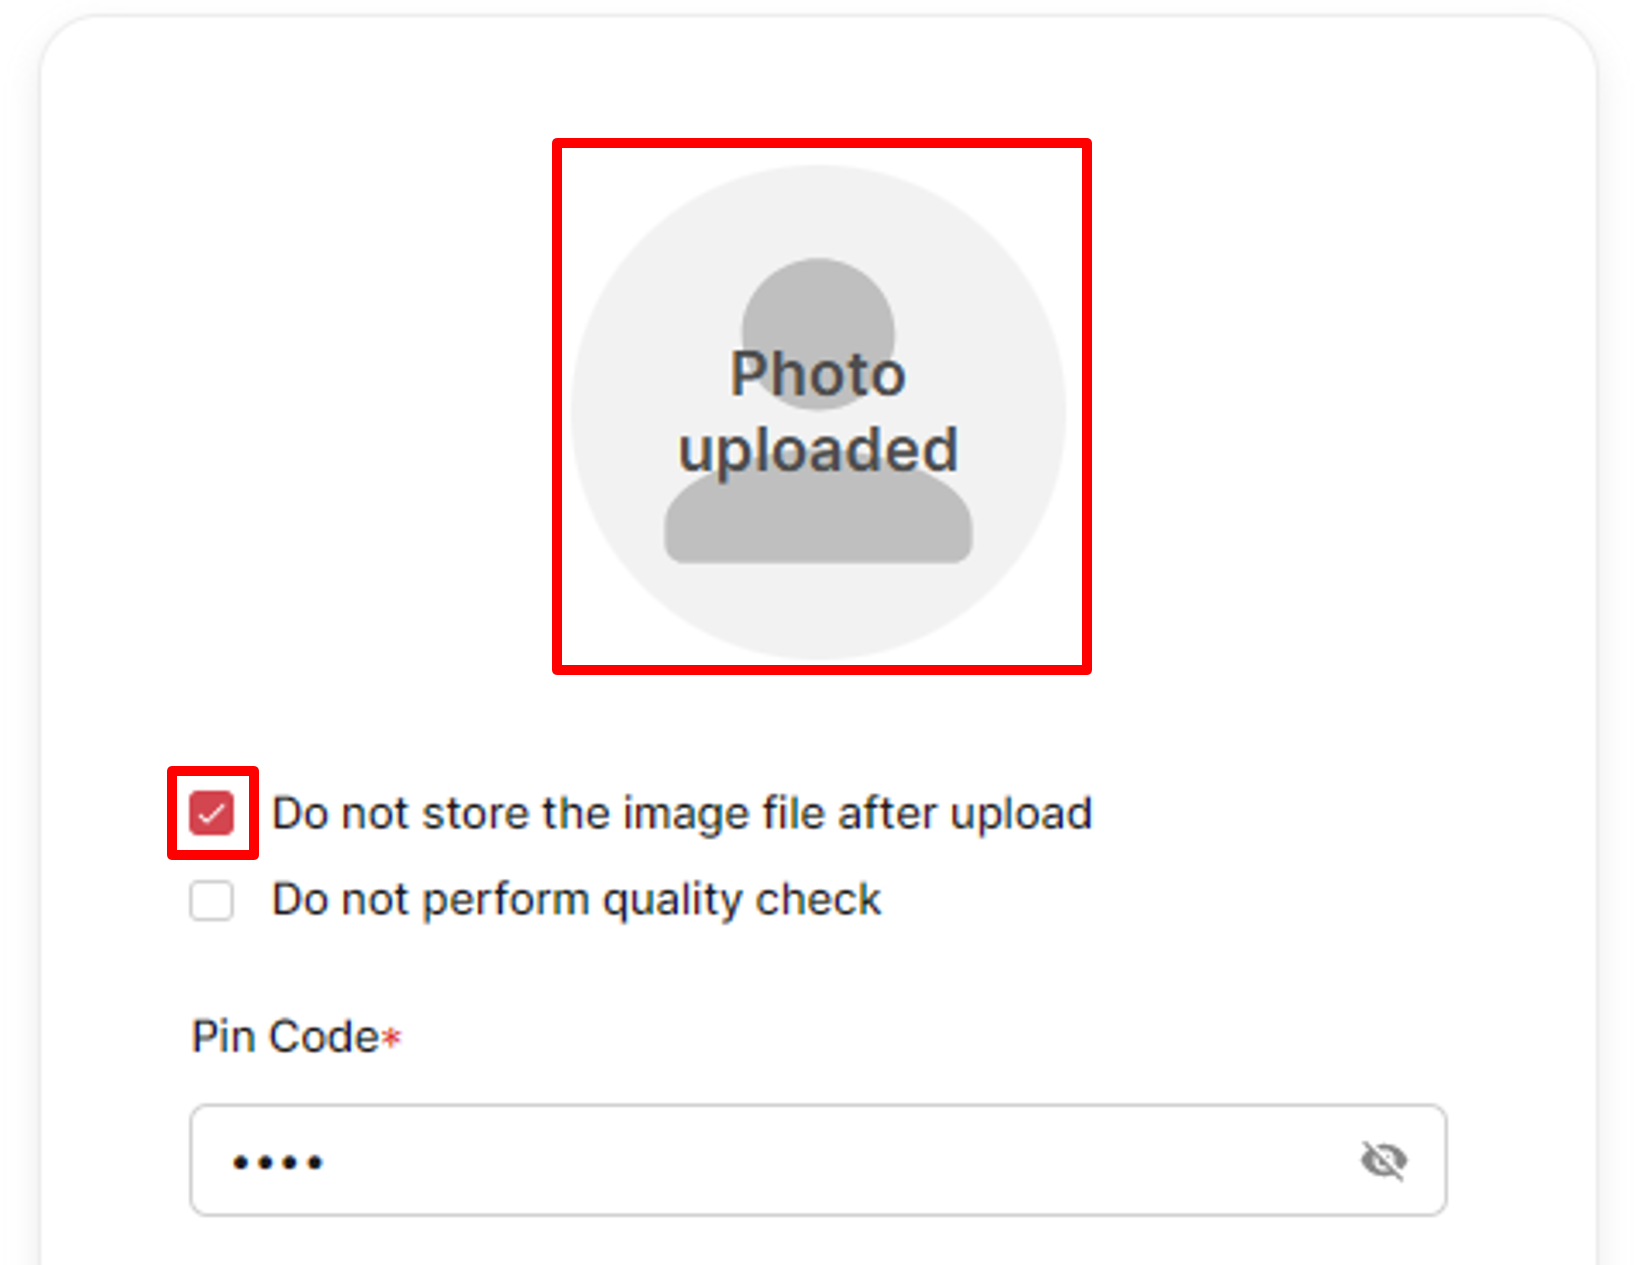
Identity Manager also offers two other options related to portraits, Do not store the image file after upload and Do not perform a quality check.
Pin Code
A Pin Code is a customizable set of numbers to separate similar faces in the same instance. It is required if you upload the portrait. If a similar portrait is uploaded with the same Pin Code, you will get an error message and get rejected. You can try changing the Pin Code or confirm whether the identity is duplicated.
Check the table below for the details of the Pin Code.
| Item | Unique | Nullable | Max Length | Regular Expression |
|---|---|---|---|---|
| Pin Code | No | No | 255 | /^[0-9]\*$/ |
File storage
Selecting Do not store the image file after upload will delete the original portrait file after the upload. This will keep the facial recognition features available but not store the file to address the need for privacy. Since the portrait file is not stored, you will only see an icon representing that portrait is selected to be not stored after its last upload.
Do not store the image file option
Quality check
Identity Manager offers a quality check option to filter out low-quality portraits to achieve better accuracy in facial recognition. Due to the highly-developed server-side facial recognition model, the quality check of registration is less critical than before. You can turn it off if you think the systemical checking standard is too strict for the registration portraits.
For requirements, details of the portrait, and the quality check, please refer to the Portrait sector.
Identity information
Identity Manager allows storing detailed information about identities. A User ID is the primary key to identity and must be uniquely set. The email field can be null but should be unique if set. All other information fields are optional, but distinguishing different identities will be more convenient if provided. The Valid from and Valid to field value will be applied to some solution services that used Identity Manager as the identity base.
Below is a table of fixed fields of an identity.
| Item | Unique | Nullable | Max Length | Regular Expression | Description |
|---|---|---|---|---|---|
| User ID | Yes | No | 255 | /^[0-9a-z][-_0-9a-z]\*$/ | The unique id to specify an identity managed by the organization |
| First Name | No | Yes | 255 | - | The first name of the identity |
| Last Name | No | Yes | 255 | - | The last name of the identity |
| Type | No | Yes | - | - | Pre-setup values and names in the template function |
| Yes | Yes | 255 | See the block below * | The email address of the identity | |
| Card Number | No | Yes | 255 | - | The IC card No of the identity to open the door |
| Mobile Phone Number (code) | No | Yes | - | Selected from a dropdown list | The country code of the mobile phone number |
| Mobile Phone Number (number) | No | Yes | 255 | - | The mobile phone number, excluding the country code |
| Valid from | No | Yes | - | - | The starting timestamp of the valid period of the identity |
| Valid to | No | Yes | - | - | The ending timestamp of the valid period of the identity |
* The regular expression of email.
/^[a-zA-Z0-9.!#$%&'*+/=?^_`{|}~-]+@[a-zA-Z0-9](?:[a-zA-Z0-9-]{0,61}[a-zA-Z0-9])?(?:\.[a-zA-Z0-9](?:[a-zA-Z0-9-]{0,61}[a-zA-Z0-9])?)*$/Additional information
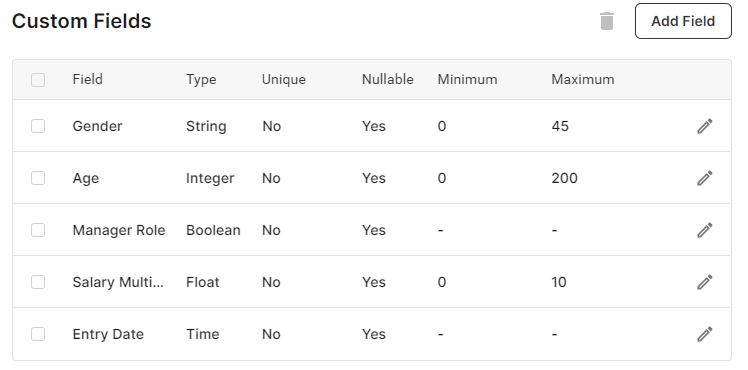
If the template has been configured for this service instance, custom fields will be displayed according to their creation order on the Identity adding page.
Suppose we have the following custom fields.
Template example
In addition to the Basic Information, there will be an "Other Information" area on the page. In this area, all custom fields are displayed with the controls corresponding to their types. All the entries are optional unless any fields are set not nullable. If the values are given, the minimum and the maximum validation will be applied. Refer to the Template section for more details.
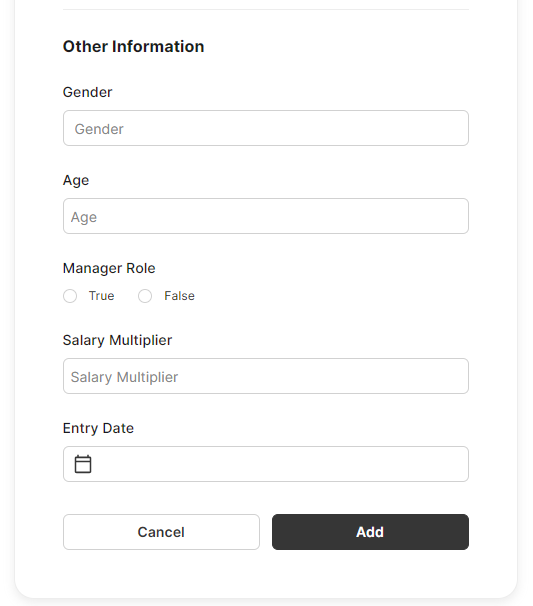
Other information
Check the details of an identity
After the identity is created, click Edit on the right side of the identity you want to proceed with, and the identity detail page will be displayed.
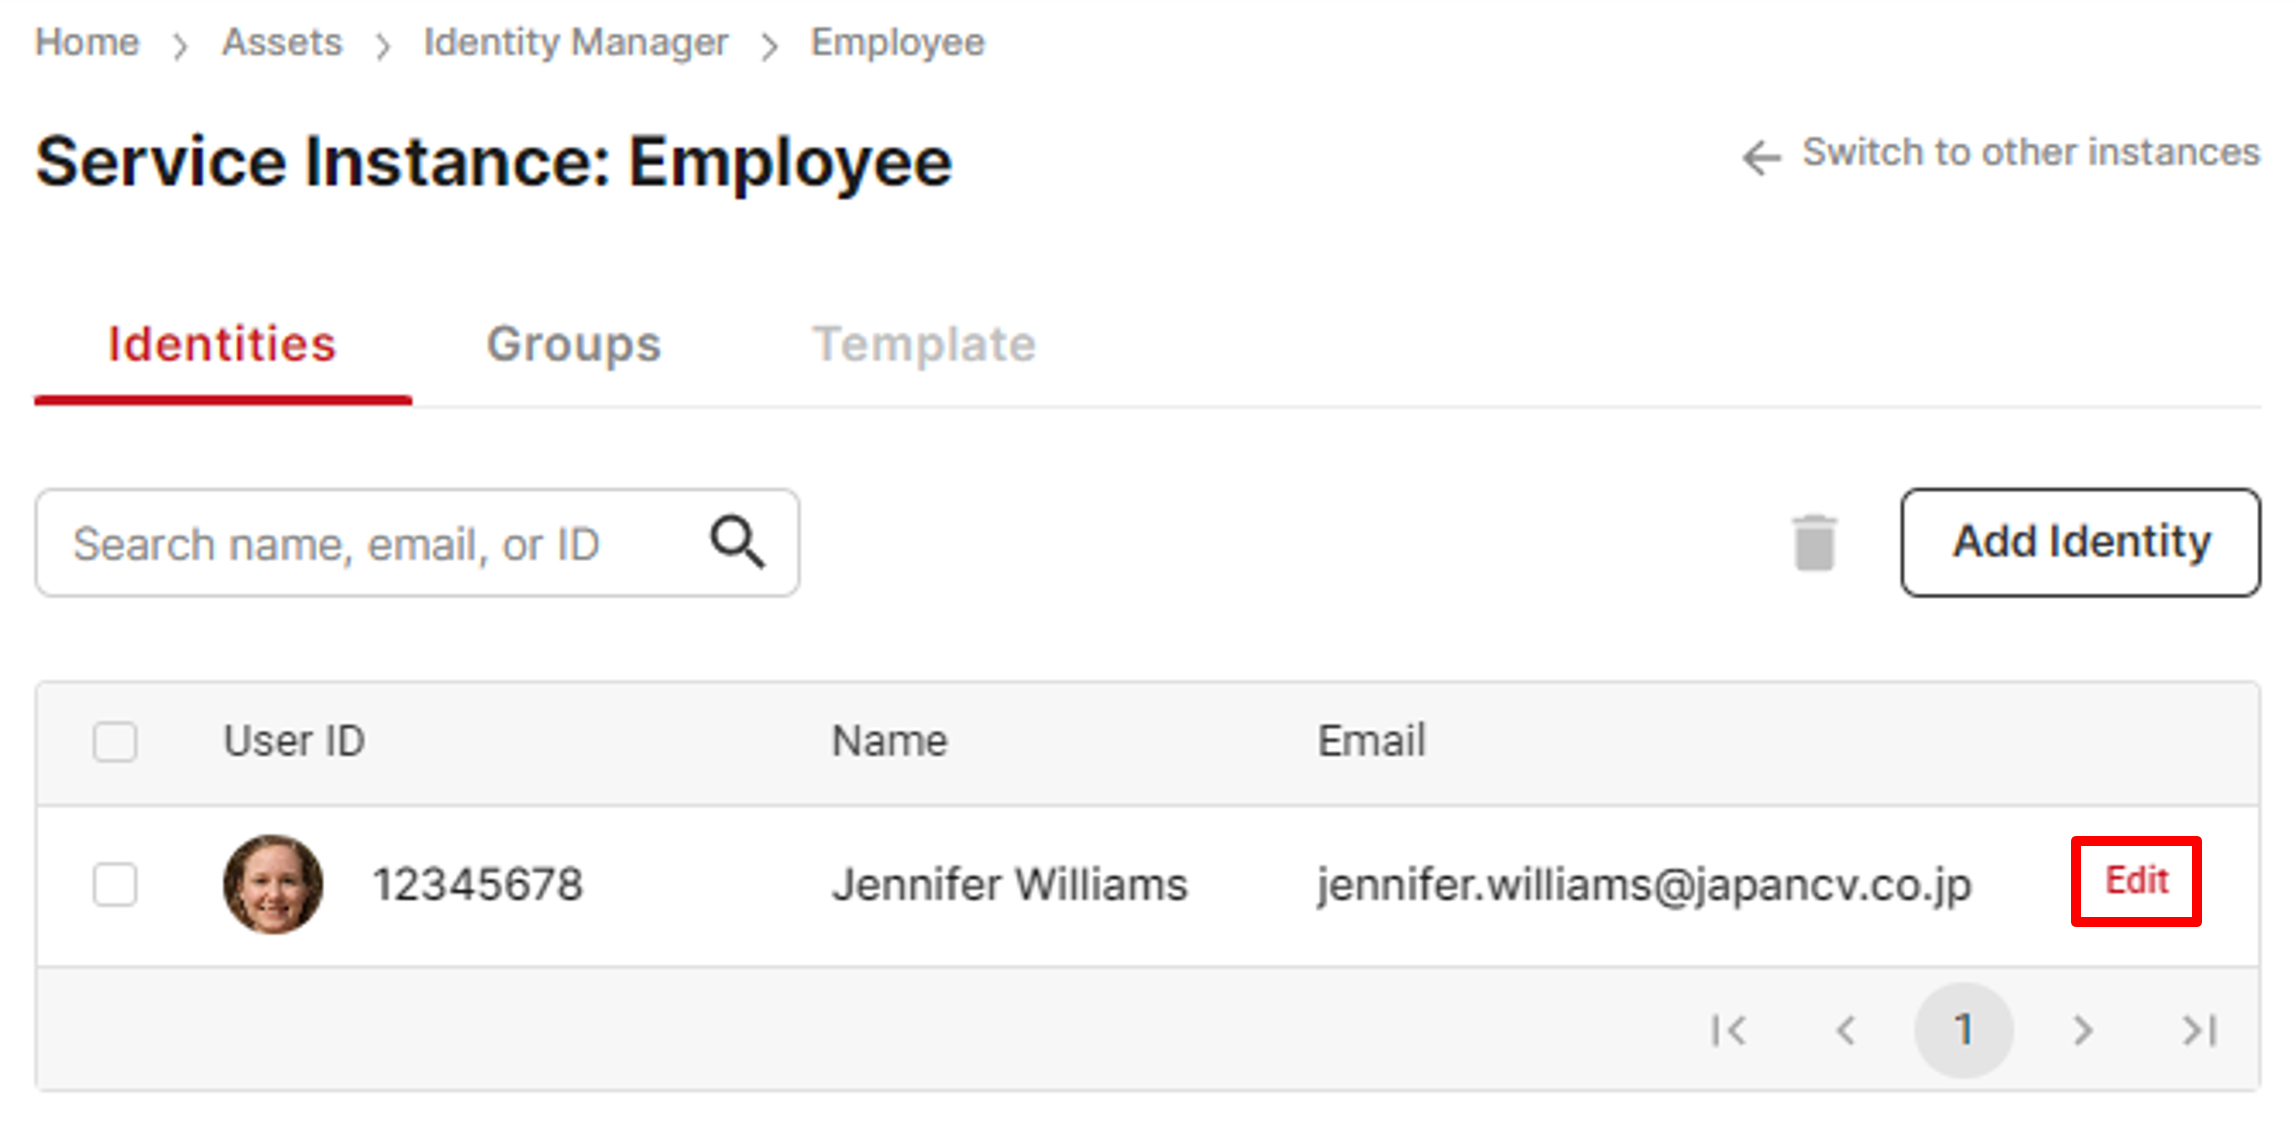
Check details
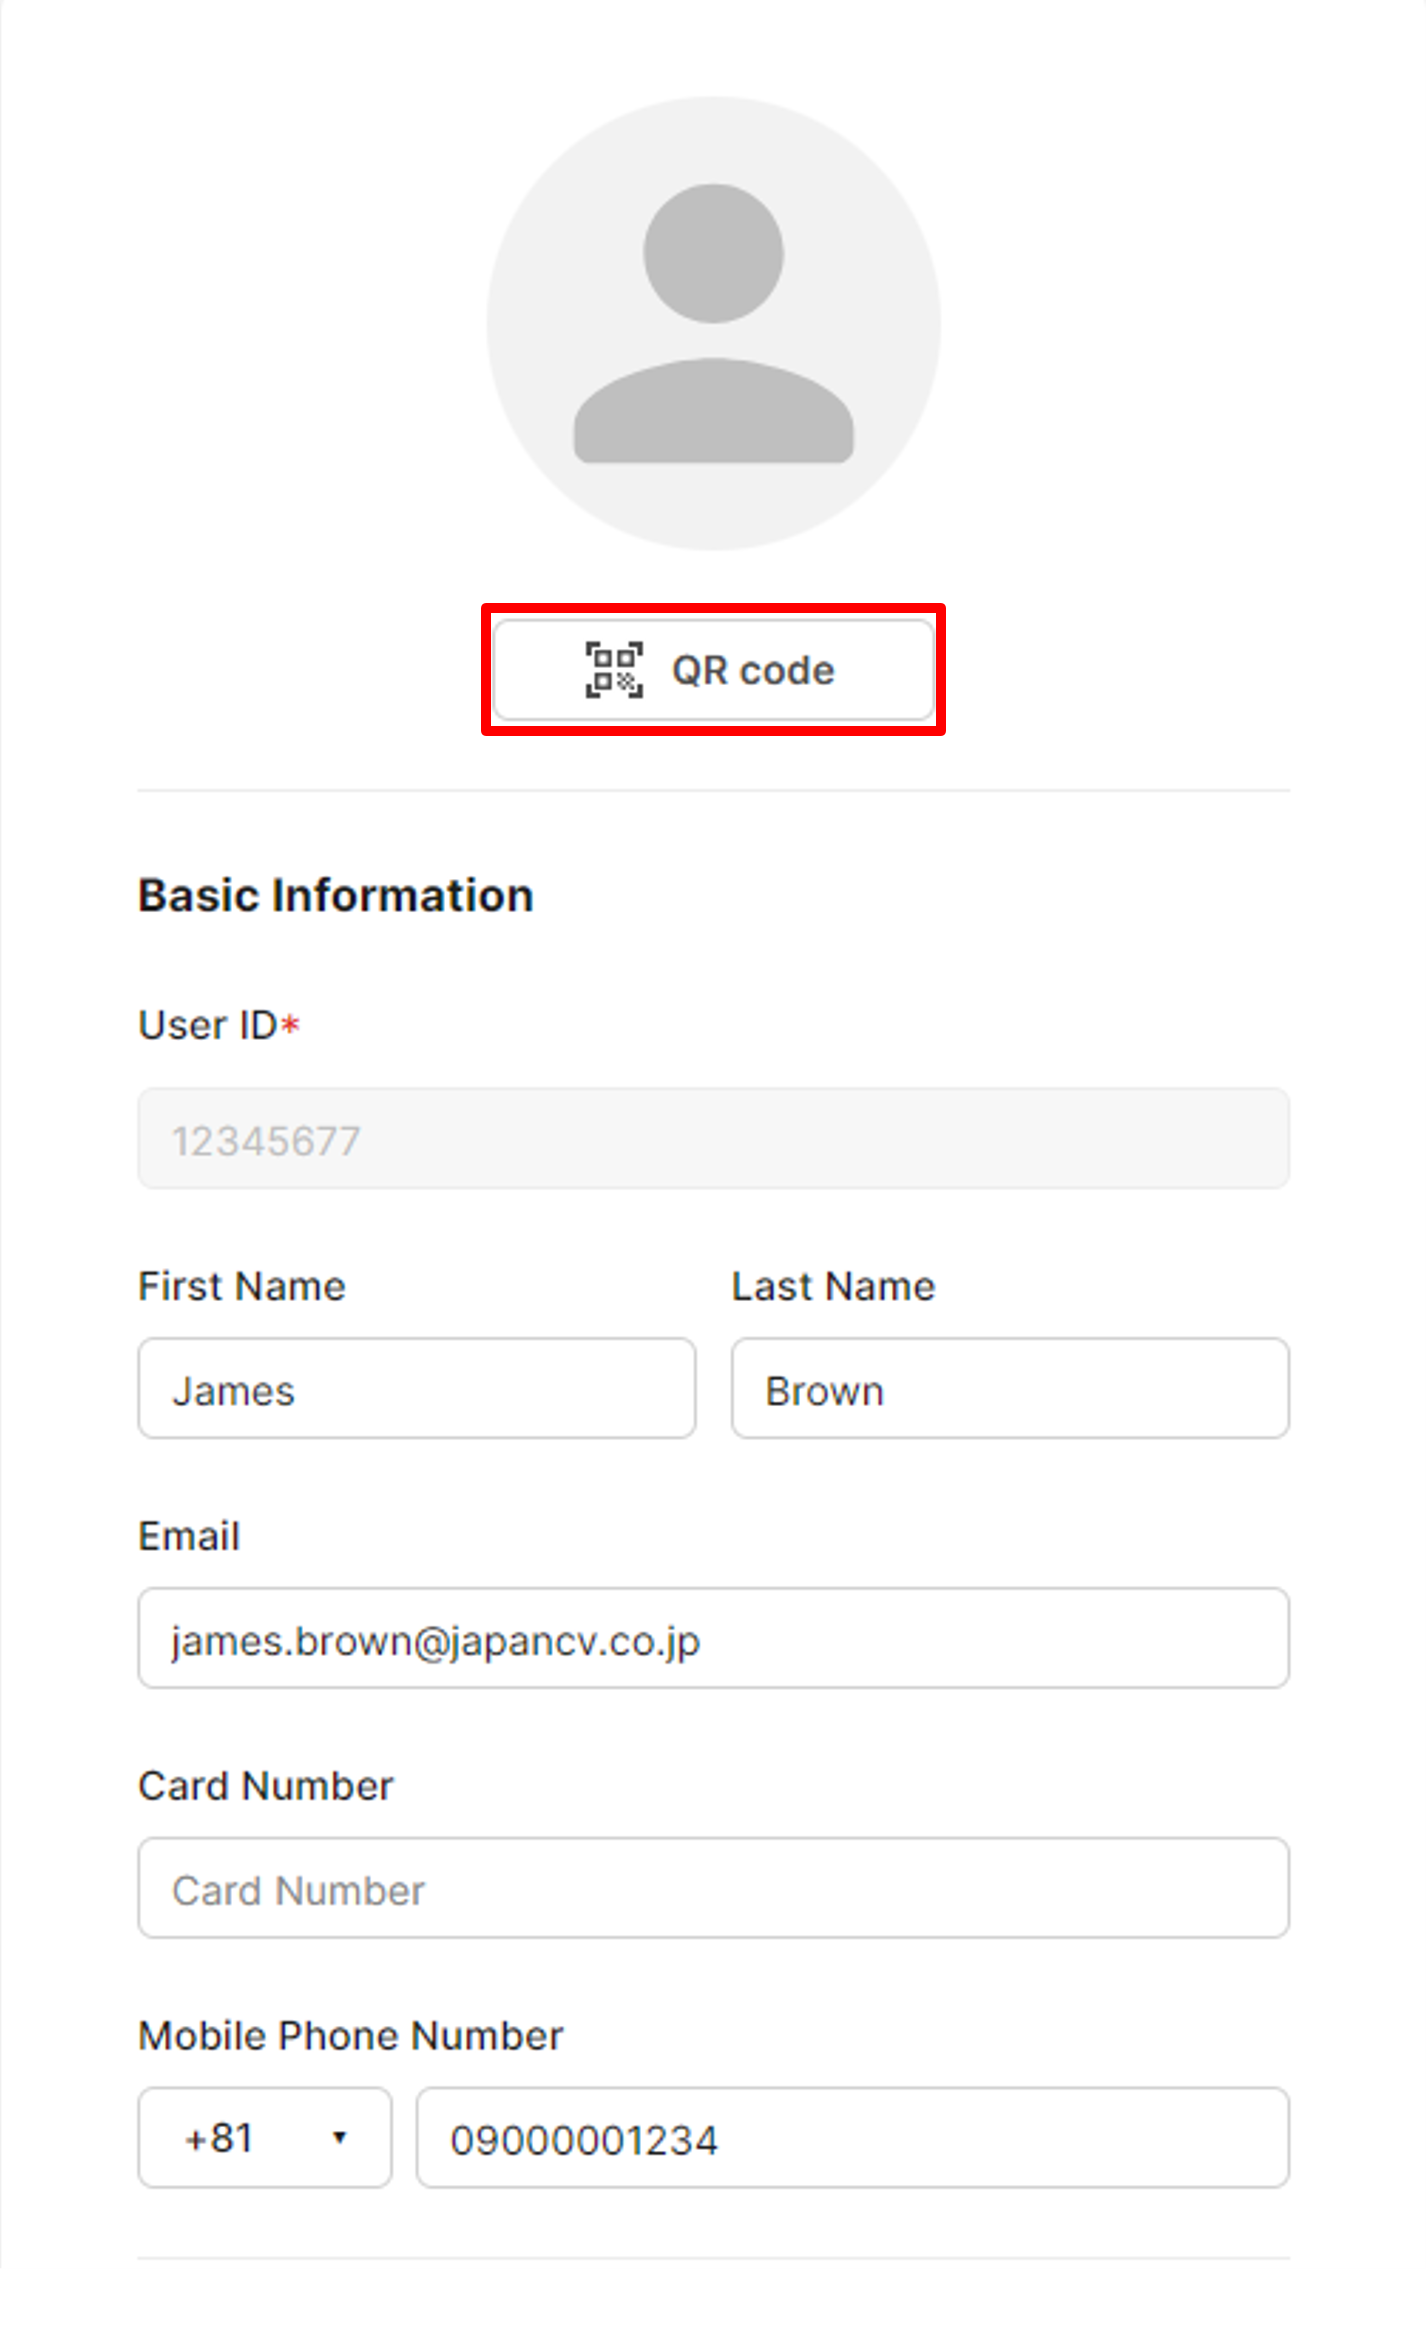
On the identity detail page, there is a QR code link used for Lobby Base APP. Click the QR Code button to get the QR Code image. For more details, refer to the guides for Lobby Base APP. Copy or download the QR Code image for guest registration.
Update the User ID of an identity
The User ID is usually used as the resource indicator of an identity. It can be updated individually by Clicking the Change button next to the User ID.
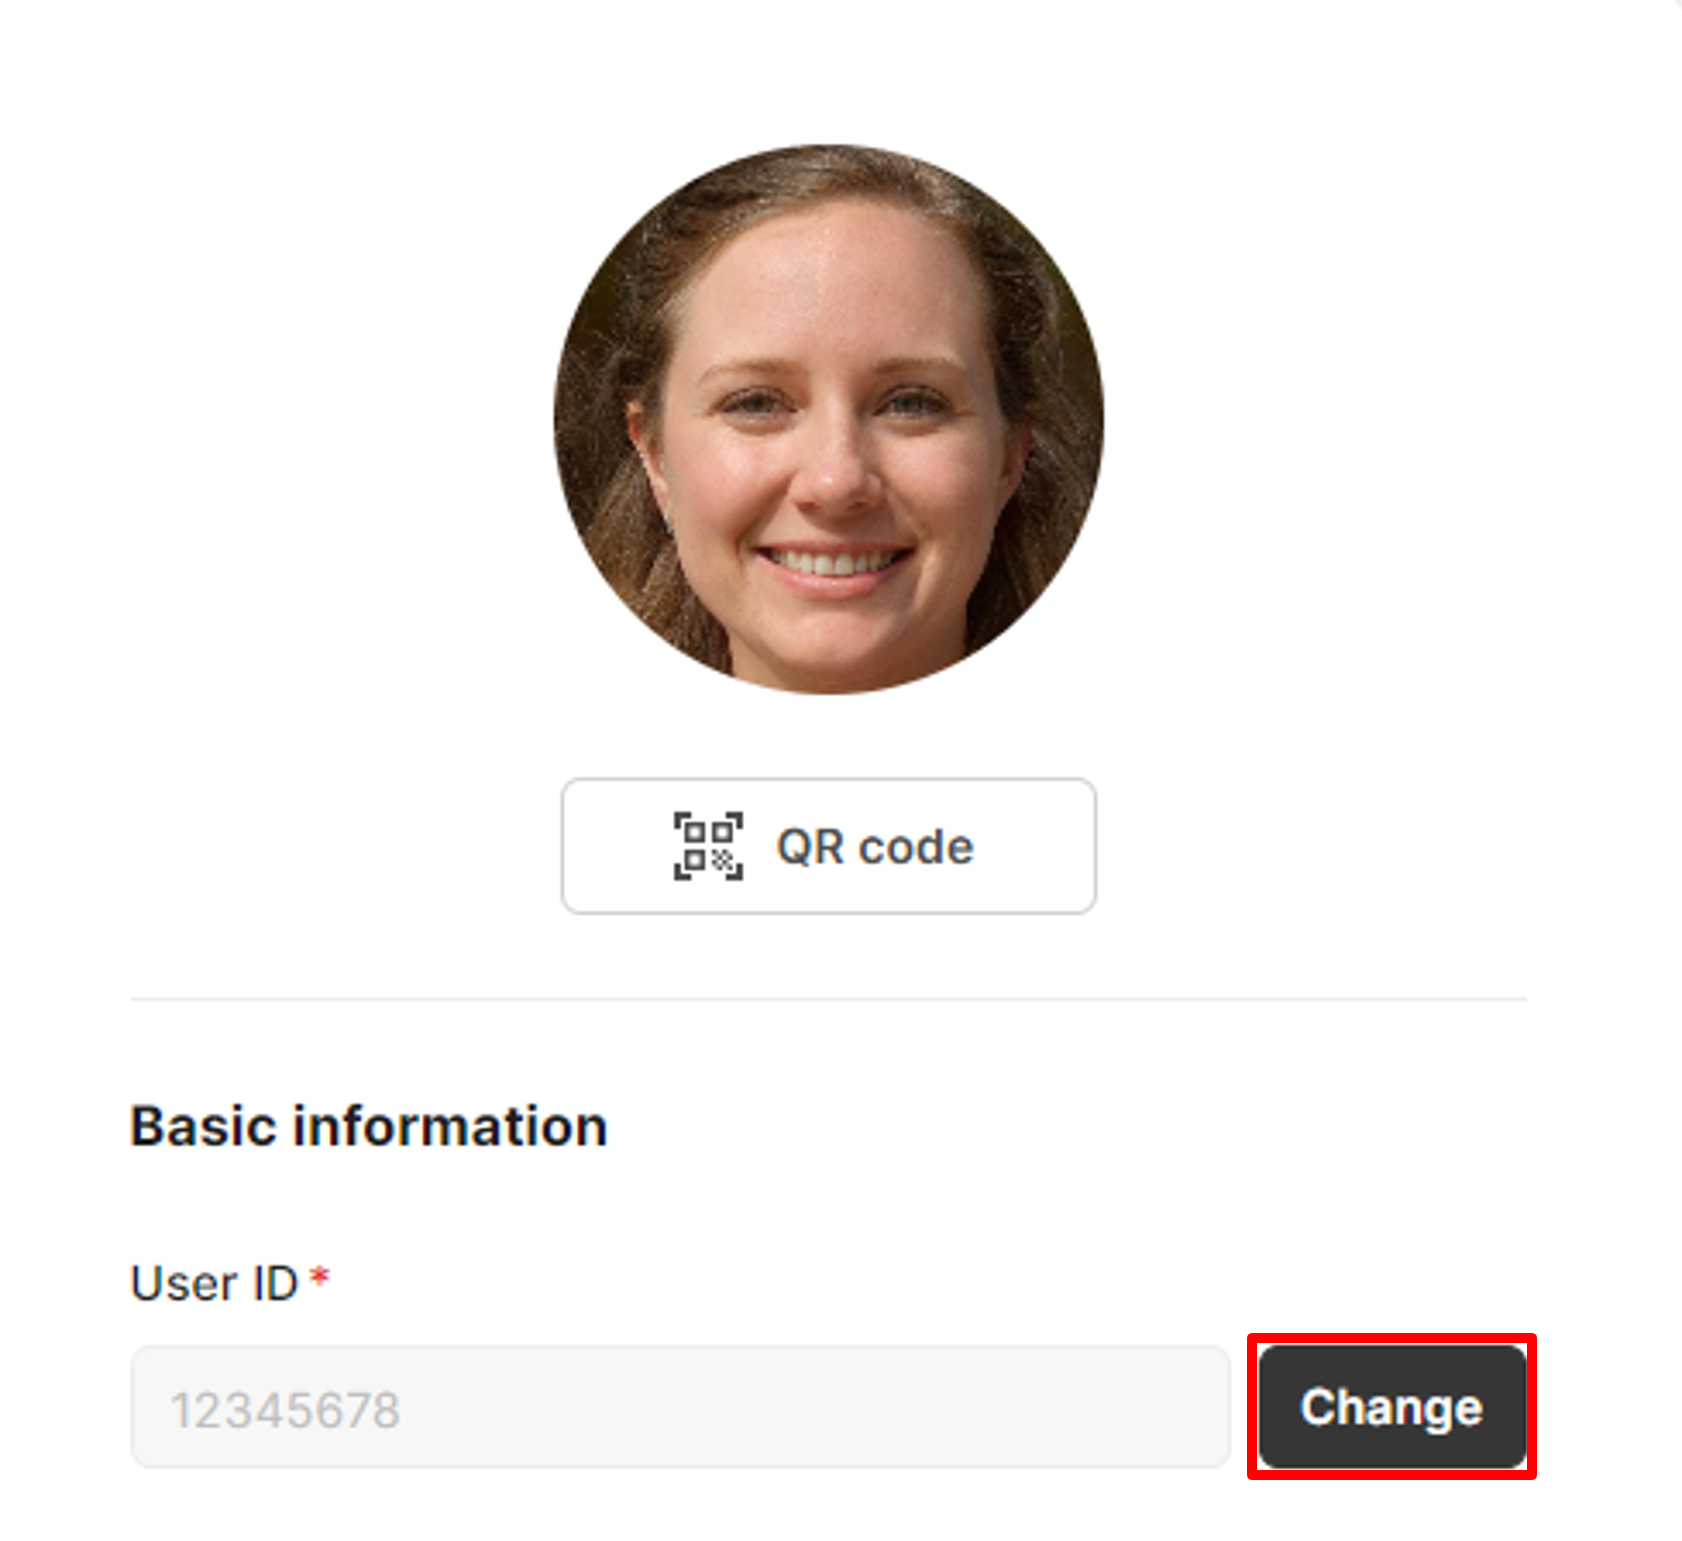
Change User ID
Enter the new User ID, and click Change to finish updating the User ID. Please notice that the new User ID should also follow the regular expression and uniqueness rule of User ID.
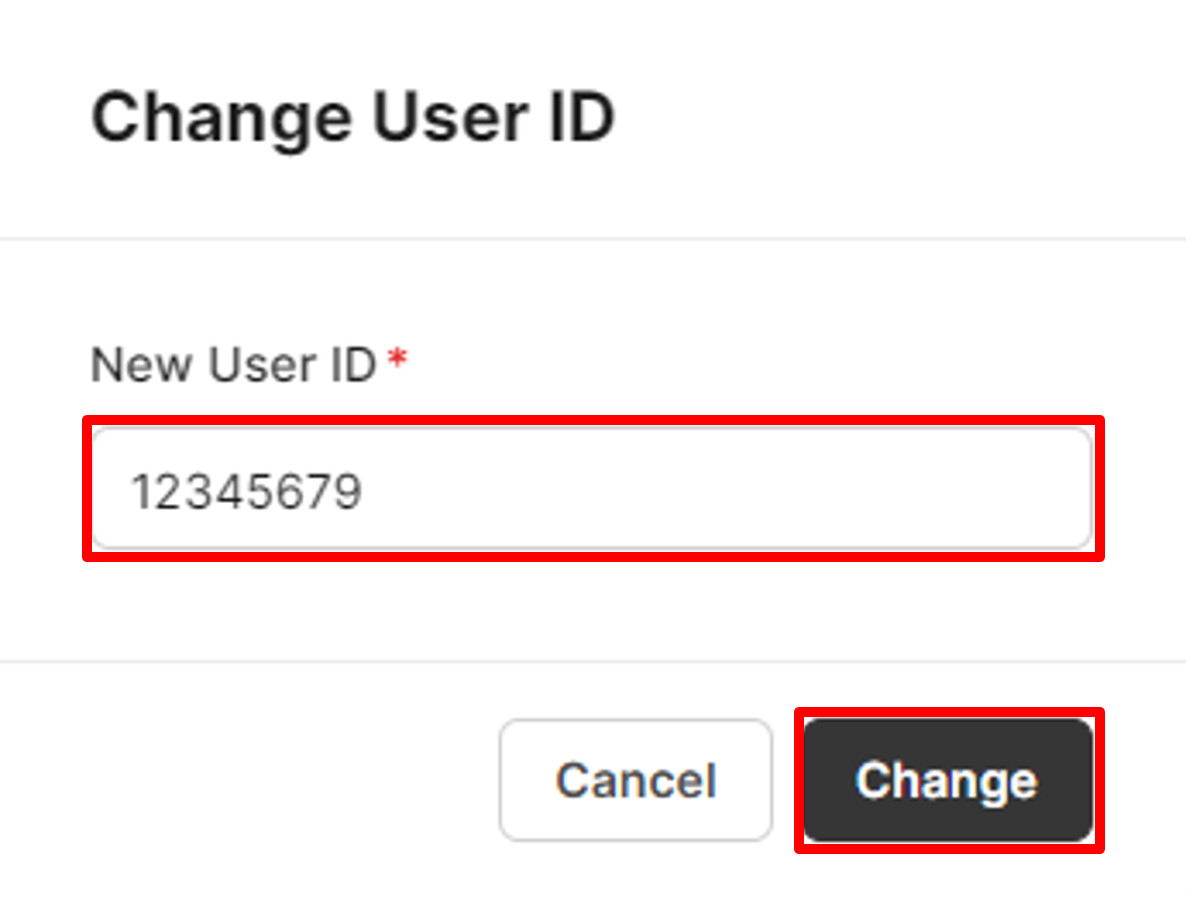
Enter the new User ID
Update an identity
On the identity detail page, you can type in any information you want to update and re-upload a photo to update the portrait.
You can change or remove the portrait by clicking the portrait area.
To delete the portrait, click Delete photo and Agree to delete it.
About photo deletionThe behavior of
photo deletionis different from selectingDo not store the image file after upload.Deleting the photo will disable the facial recognition capability of this identity, while selecting
Do not store the image file after uploadwill dispose the image file but still ensures that facial recognition works for this identity.
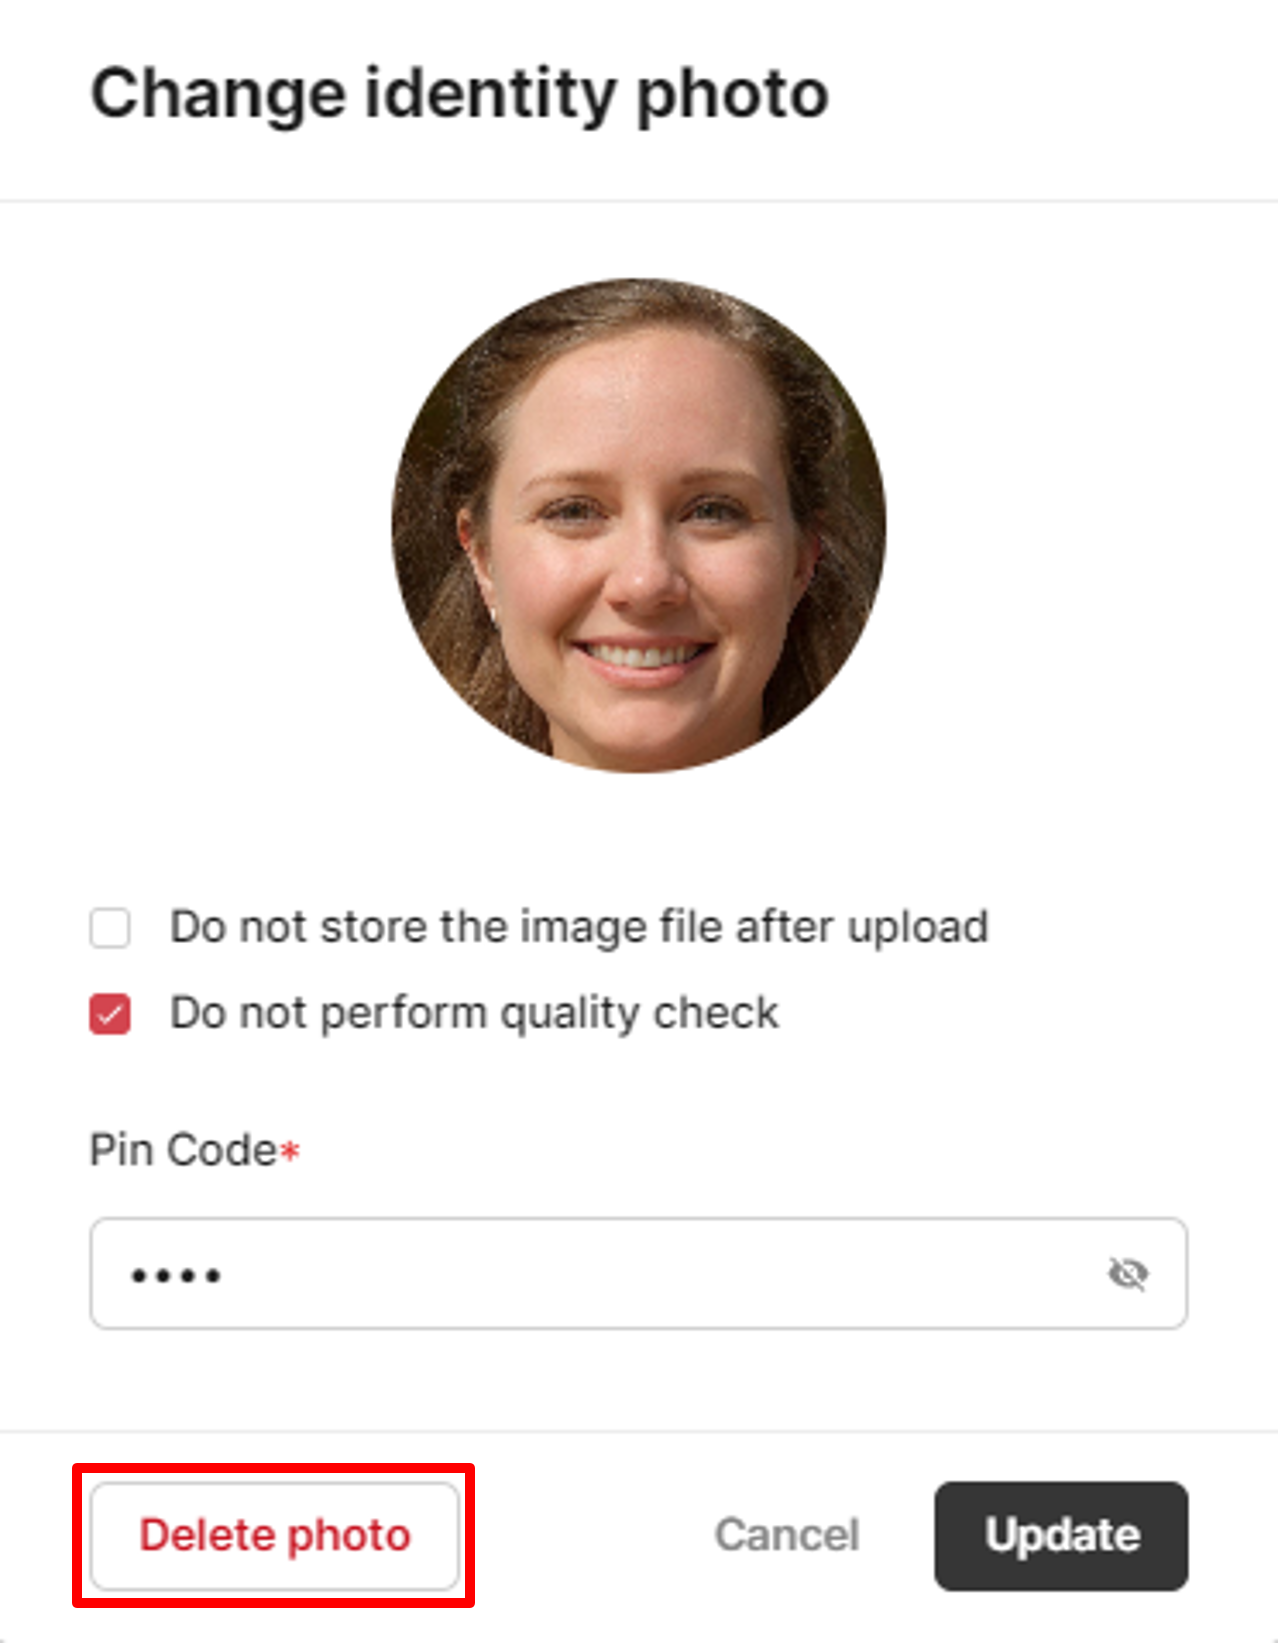
Delete the portrait
Select the corresponding fields to update the portrait, options, and Pin Code, and click Update.
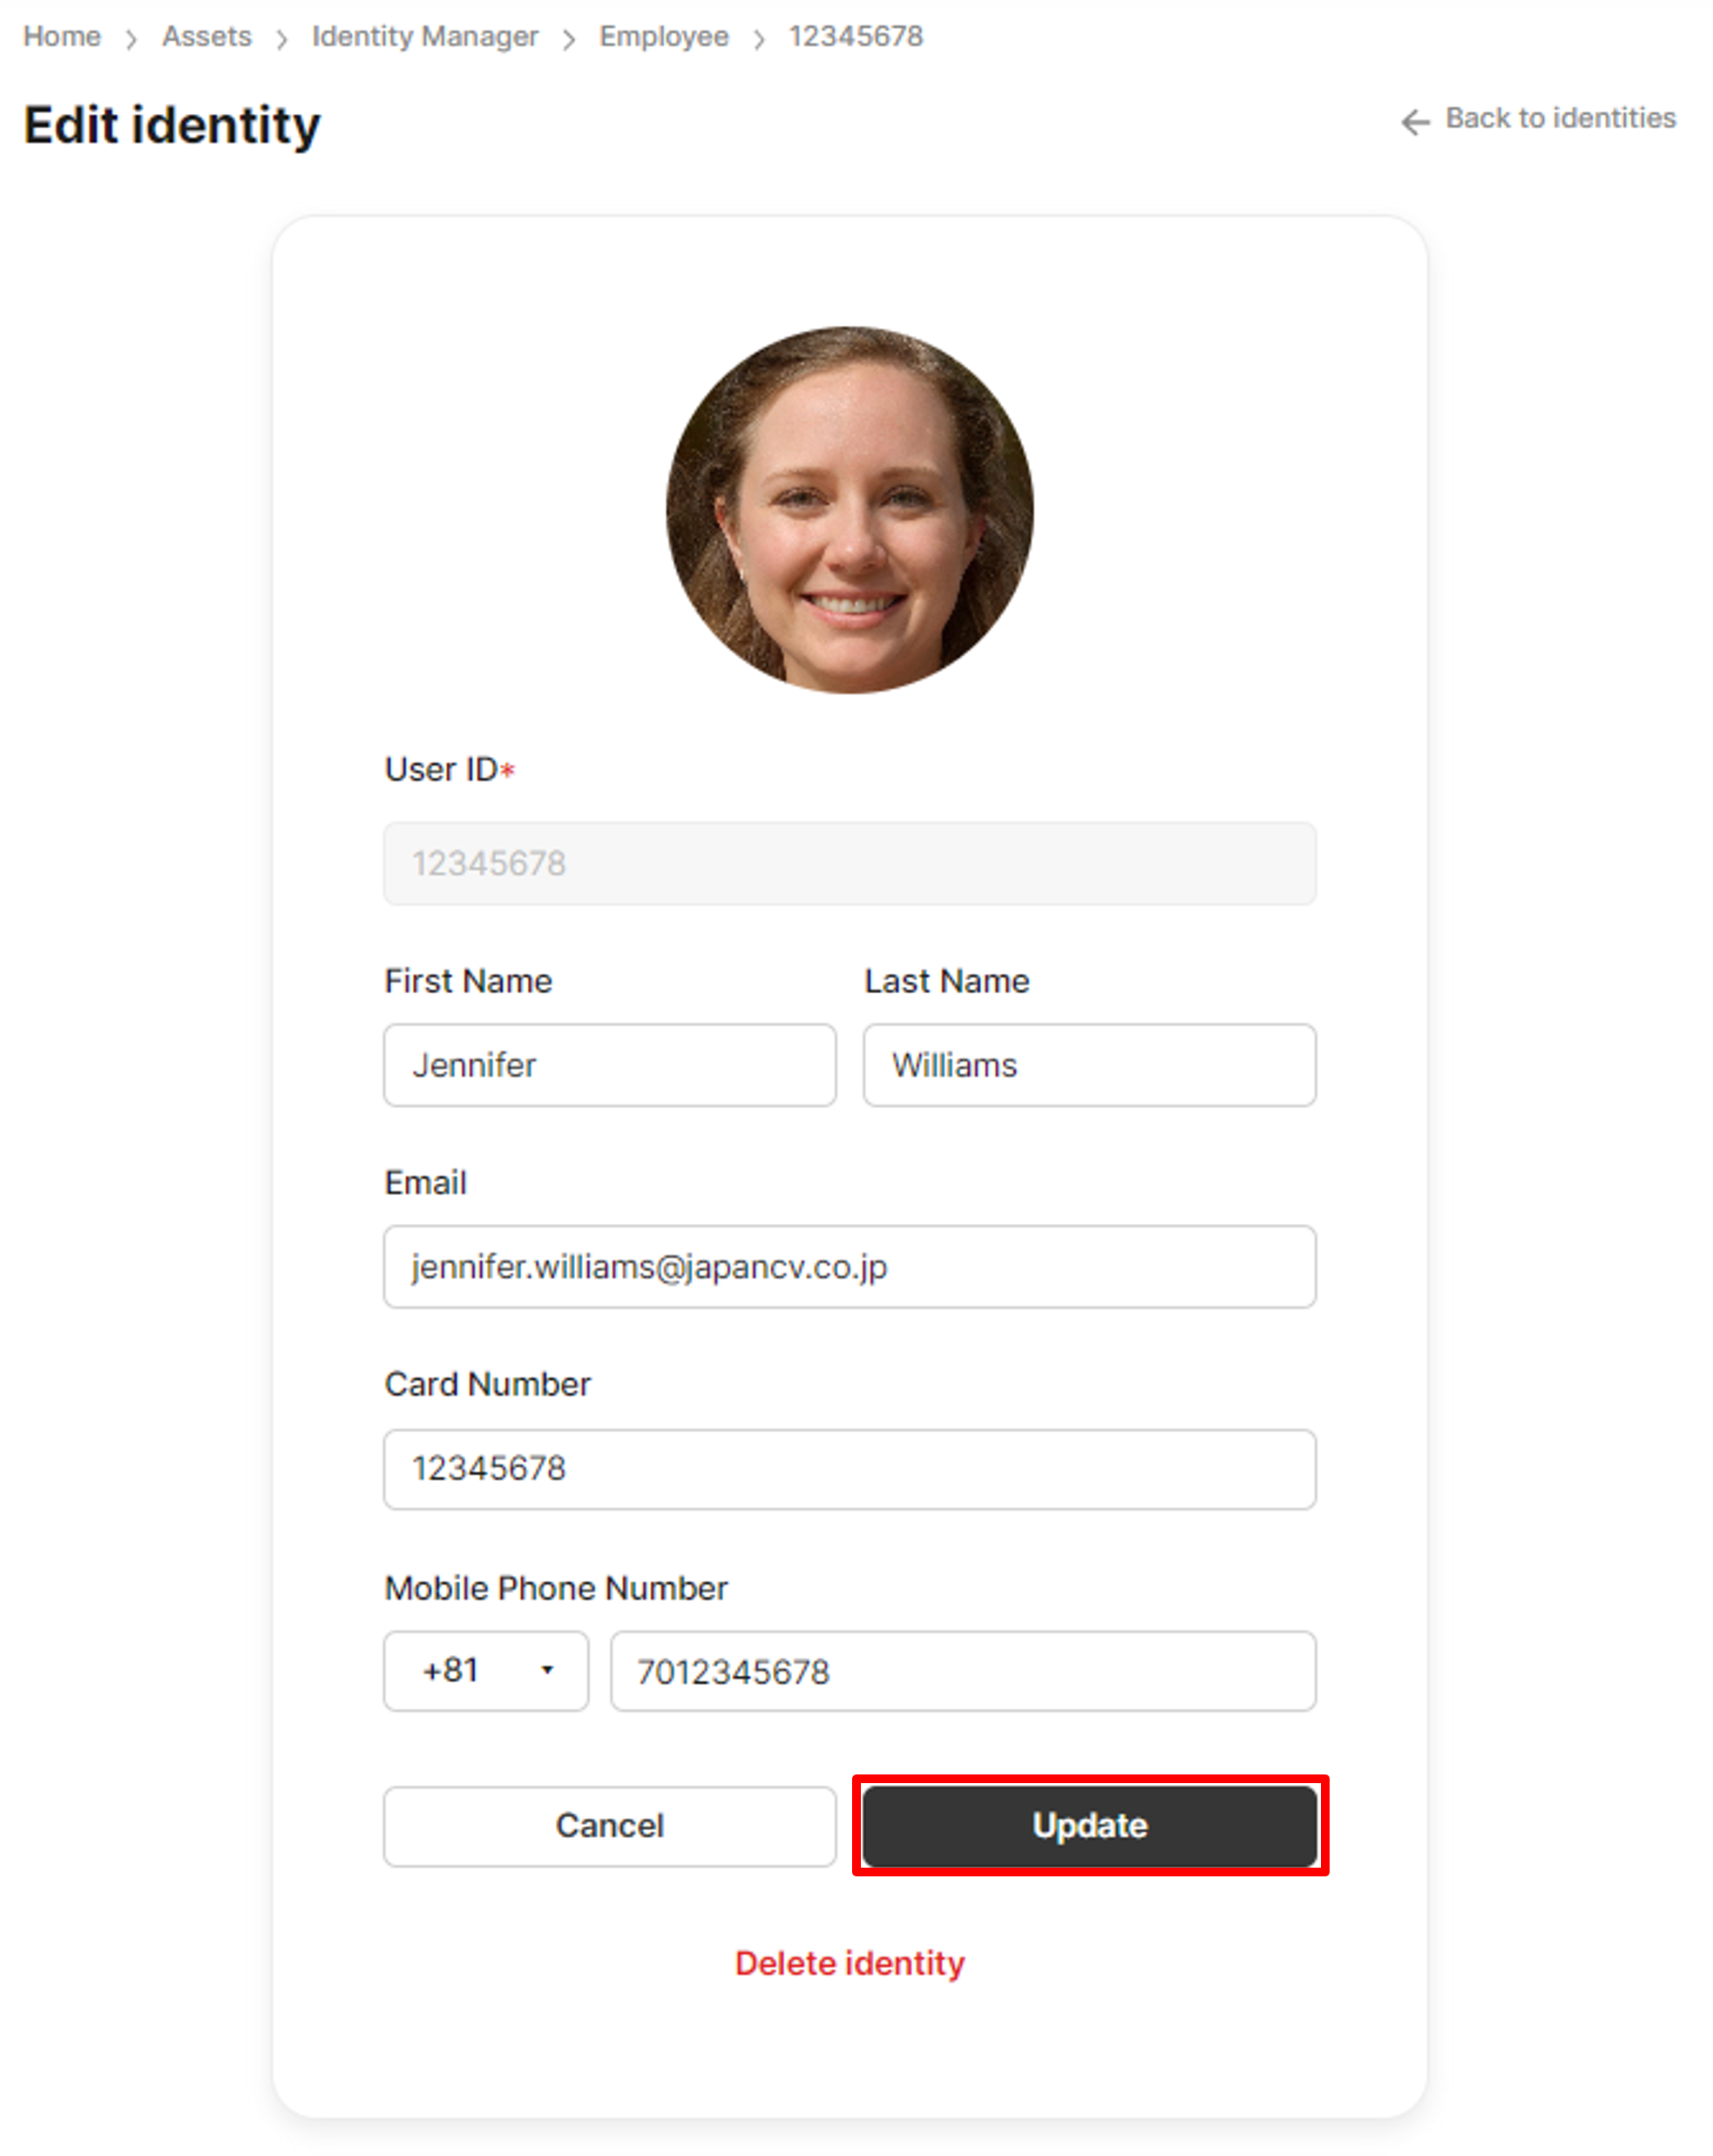
Update an identity
To update fixed filed values, fill in the changed values and click Update to finish the update.
Delete an identity
On the identity detail page, click Delete identity at the bottom to delete the identity.
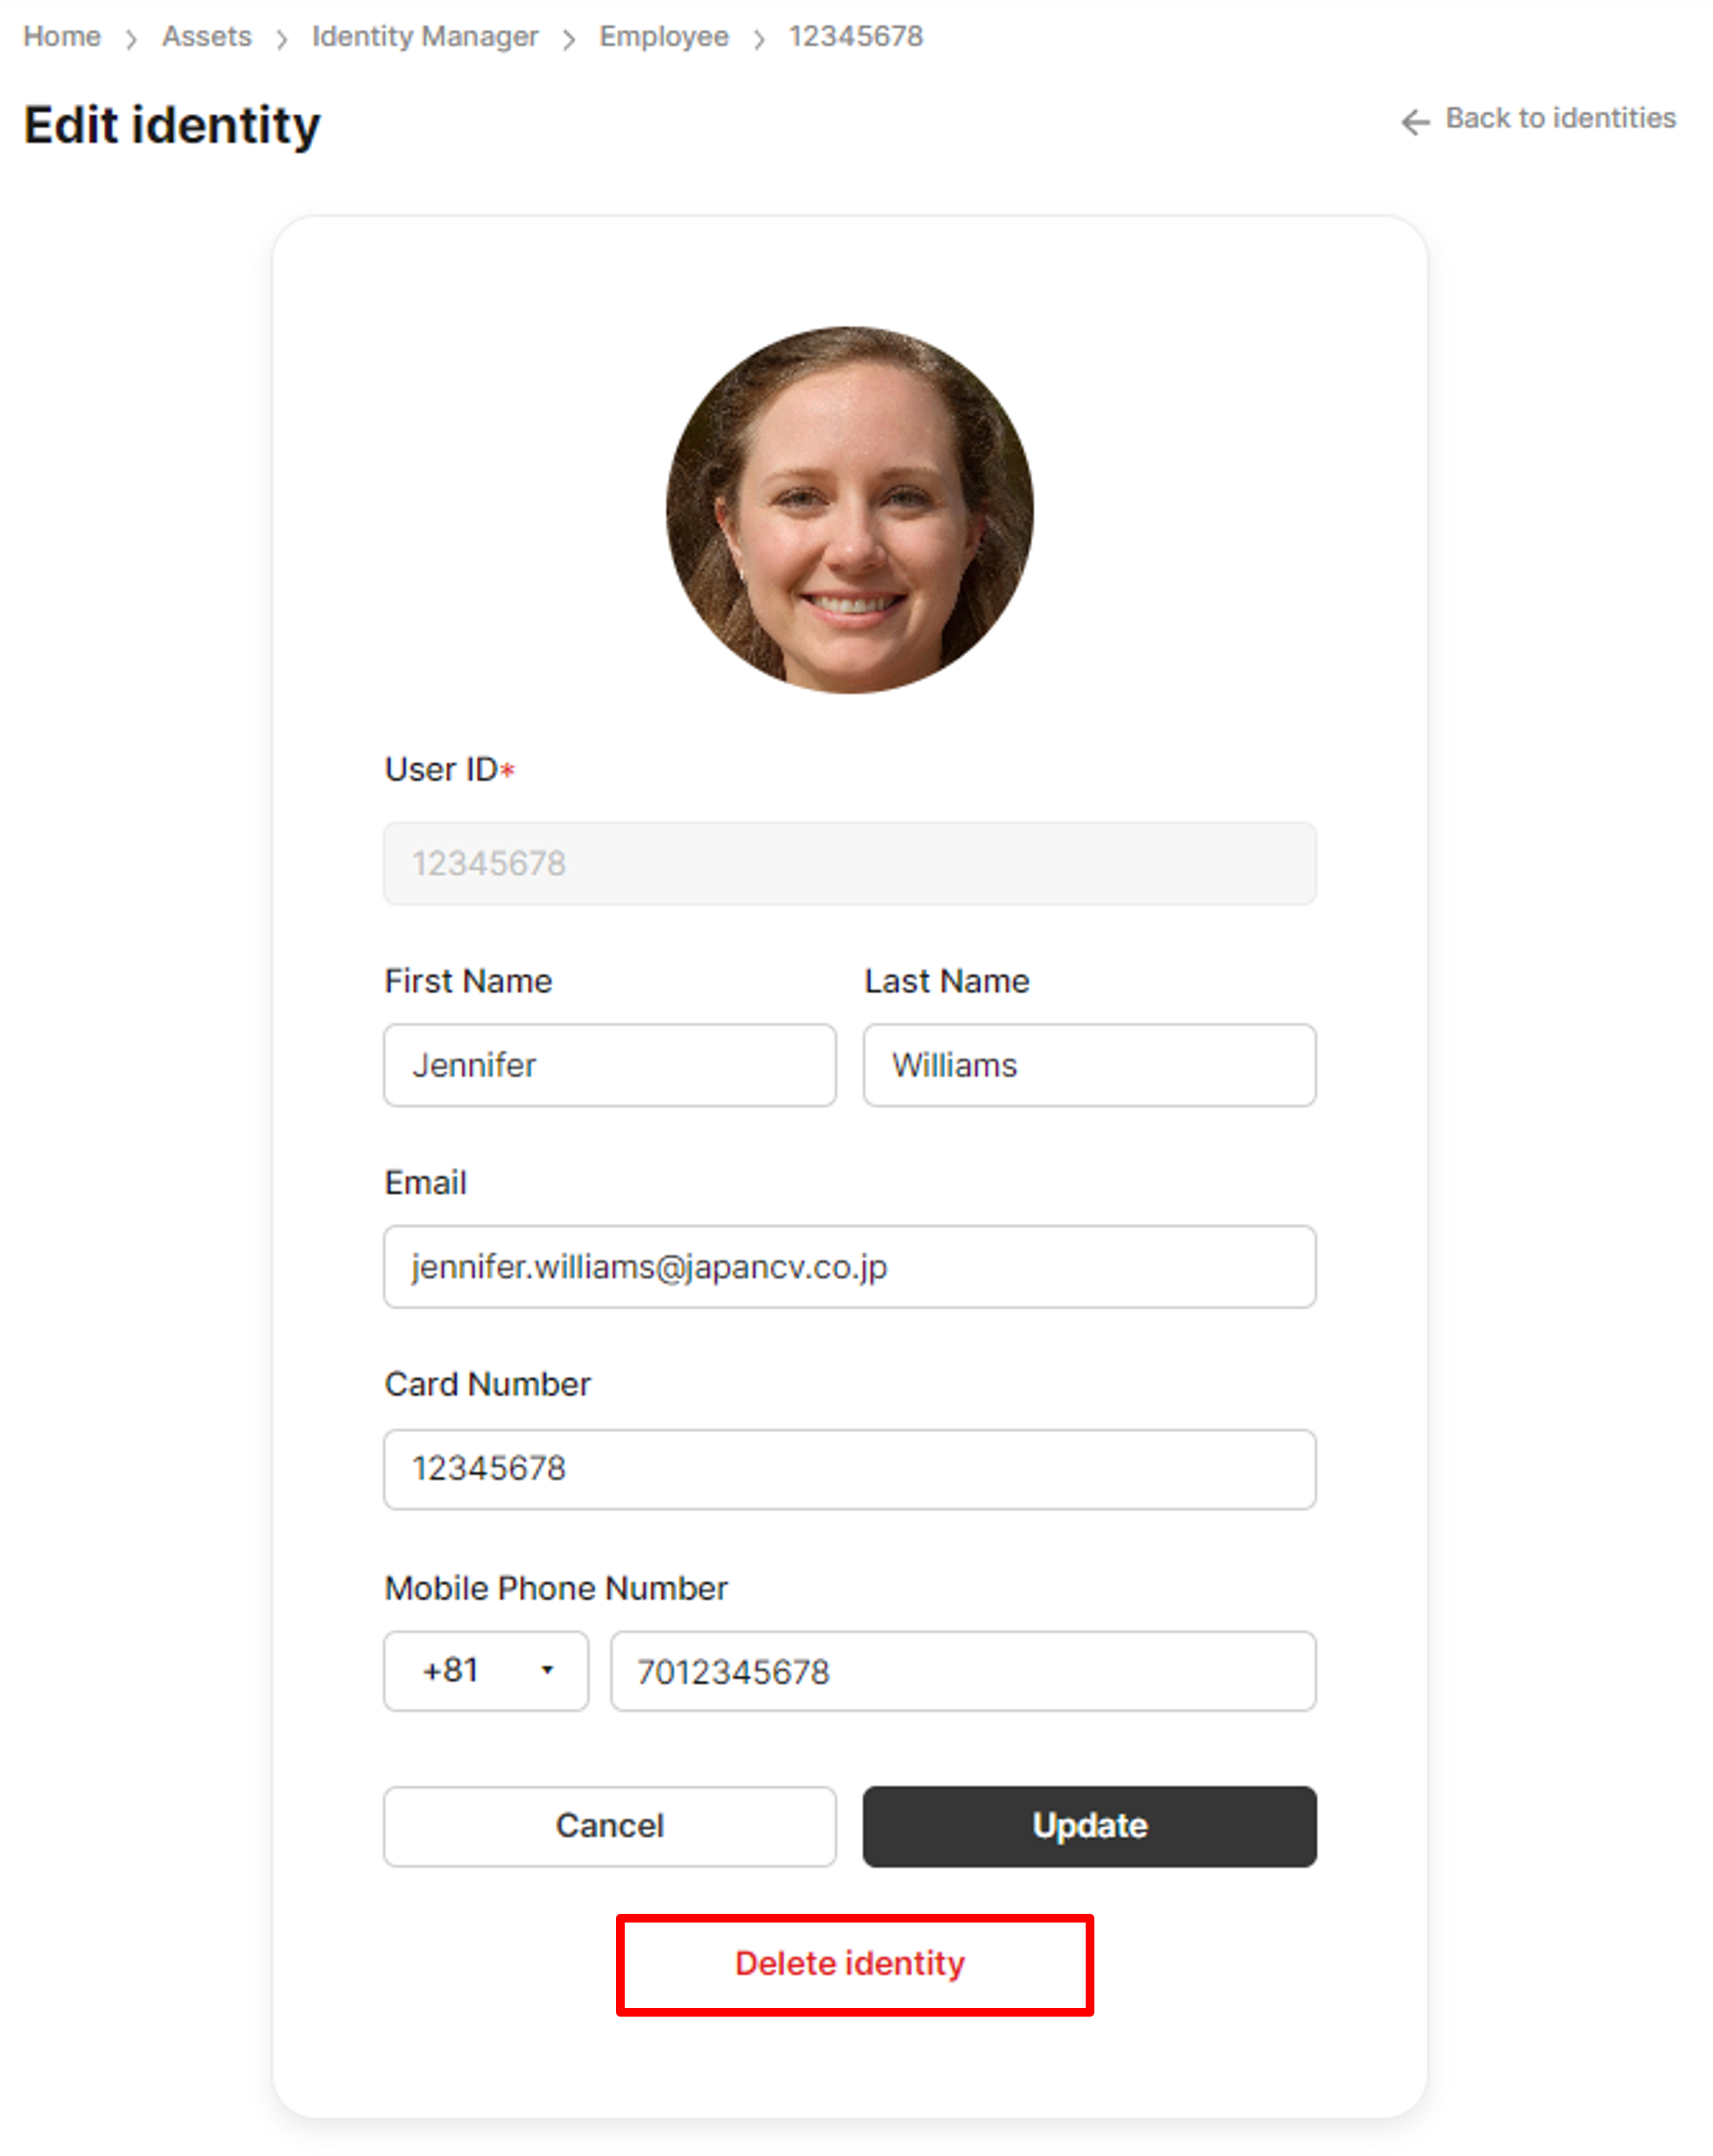
Delete an identity
Once the identity is deleted, it cannot be used in facial recognition or recovered.
Delete multiple identities
On the identity list page, multiple identities can be deleted simultaneously.
Check all the identities you want to delete, click the trash can icon, and click Agree to finish the deletion process.

Delete multiple identities
Updated 9 months ago